
Hooks have been taking the React world by storm. In this tutorial, we’ll take a look at what hooks are and how you use them. I’ll introduce you to some common hooks that ship with React, as well as showing you how to write your own. By the time you’ve finished, you’ll be able to use hooks in your own React projects.
What Are React Hooks?
React Hooks are special functions that allow you to “hook into” React features in function components. For example, the useState Hook allows you to add state, whereas useEffect allows you to perform side effects. Previously, side effects were implemented using lifecycle methods. With Hooks, this is no longer necessary.
This means you no longer need to define a class when constructing a React component. It turns out that the class architecture used in React is the cause of a lot of challenges that React developers face every day. We often find ourselves writing large, complex components that are difficult to break up. Related code is spread over several lifecycle methods, which becomes tricky to read, maintain and test. In addition, we have to deal with the this keyword when accessing state, props and methods. We also have to bind methods to this to ensure they’re accessible within the component. Then we have the excessive prop drilling problem — also known as wrapper hell — when dealing with higher-order components.
In a nutshell, Hooks are a revolutionary feature that will simplify your code, making it easy to read, maintain, test in isolation and re-use in your projects. It will only take you an hour to get familiar with them, but this will make you think differently about the way you write React code.
React Hooks were first announced at a React conference that was held in October 2018, and they were officially made available in React 16.8. The feature is still under development; there are still a number of React class features being migrated into Hooks. The good news is that you can start using them now. You can still use React class components if you want to, but I doubt you’ll want to after reading this introductory guide.
If I’ve piqued your curiosity, let’s dive in and see some practical examples.
Prerequisites
This tutorial is intended for people who have a basic understanding of what React is and how it works. If you’re a React beginner, please check out our getting started with React tutorial before proceeding here.
If you wish to follow along with the examples, you should have a React app already set up. The easiest way to do this is with the Create React App tool. To use this, you’ll have Node and npm installed. If you haven’t, head to the Node.js download page and grab the latest version for your system (npm comes bundled with Node). Alternatively, you can consult our tutorial on installing Node using a version manager.
With Node installed, you can create a new React app like so:
npx create-react-app myapp
This will create a myapp folder. Change into this folder and start the development server like so:
cd myapp
npm start
Your default browser will open and you’ll see your new React app. For the purposes of this tutorial, you can work in the App component, which is located at src/App.js.
You can also find the code for this tutorial on GitHub, as well as a demo of the finished code at the end of this tutorial.
The useState Hook
Now let’s look at some code. The useState Hook is probably the most common Hook that ships with React. As the name suggests, it lets you use state in a function component.
Consider the following React class component:
import React from "react";

export default class ClassDemo extends React.Component {
  constructor(props) {
    super(props);
    this.state = {
      name: "Agata"
    };
    this.handleNameChange = this.handleNameChange.bind(this);
  }

  handleNameChange(e) {
    this.setState({
      name: e.target.value
    });
  }

  render() {
    return (
      <section>
        <form autoComplete="off">
          <section>
            <label htmlFor="name">Name</label>
            <input
              type="text"
              name="name"
              id="name"
              value={this.state.name}
              onChange={this.handleNameChange}
            />
          </section>
        </form>
        <p>Hello {this.state.name}</p>
      </section>
    );
  }
}
If you’re following along with Create React App, just replace the contents of App.js with the above.
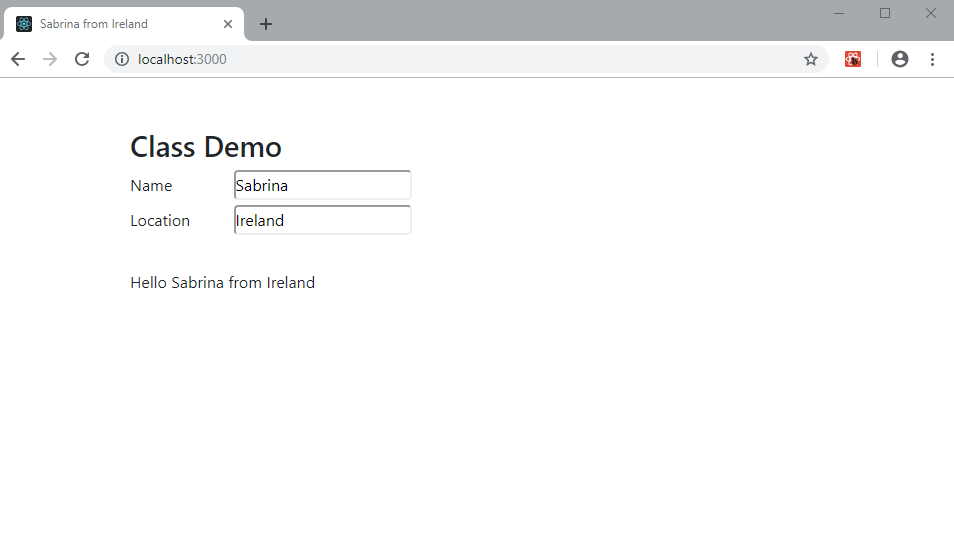
This is how it looks:

Give yourself a minute to understand the code. In the constructor, we’re declaring a name property on our state object, as well as binding a handleNameChange function to the component instance. We then have a form with an input, whose value is set to this.state.name. The value held in this.state.name is also output to the page in the form of a greeting.
When a user types anything into the input field, the handleNameChange function is called, which updates state and consequently the greeting.
Now, we’re going to write a new version of this code using the useState Hook. Its syntax looks like this:
const [state, setState] = useState(initialState);
When you call the useState function, it returns two items:
- state: the name of your state — such as
this.state.nameorthis.state.location. - setState: a function for setting a new value for your state. Similar to
this.setState({name: newValue}).
The initialState is the default value you give to your newly declared state during the state declaration phase. Now that you have an idea of what useState is, let’s put it into action:
import React, { useState } from "react";

export default function HookDemo(props) {
  const [name, setName] = useState("Agata");

  function handleNameChange(e) {
    setName(e.target.value);
  }

  return (
    <section>
      <form autoComplete="off">
        <section>
          <label htmlFor="name">Name</label>
          <input
            type="text"
            name="name"
            id="name"
            value={name}
            onChange={handleNameChange}
          />
        </section>
      </form>
      <p>Hello {name}</p>
    </section>
  );
}
Take note of the differences between this function version and the class version. It’s already much more compact and easier to understand than the class version, yet they both do exactly the same thing. Let’s go over the differences:
- The entire class constructor has been replaced by the
useStateHook, which only consists of a single line. - Because the
useStateHook outputs local variables, you no longer need to use thethiskeyword to reference your function or state variables. Honestly, this is a major pain for most JavaScript developers, as it’s not always clear when you should usethis. - The JSX code is now cleaner as you can reference local state values without using
this.state.
I hope you’re impressed by now! You may be wondering what to do when you need to declare multiple state values. The answer is quite simple: just call another useState Hook. You can declare as many times as you want, provided you’re not overcomplicating your component.
Note: when using React Hooks, make sure to declare them at the top of your component and never inside a conditional.
Multiple useState Hooks
But what if we want to declare more than one property in state? No problem. Just use multiple calls to useState.
Here’s an example of a component with multiple useState Hooks:
import React, { useState } from "react";

export default function HookDemo(props) {
  const [name, setName] = useState("Agata");
  const [location, setLocation] = useState("Nairobi");

  function handleNameChange(e) {
    setName(e.target.value);
  }

  function handleLocationChange(e) {
    setLocation(e.target.value);
  }

  return (
    <section>
      <form autoComplete="off">
        <section>
          <label htmlFor="name">Name</label>
          <input
            type="text"
            name="name"
            id="name"
            value={name}
            onChange={handleNameChange}
          />
        </section>
        <section>
          <label htmlFor="location">Location</label>
          <input
            type="text"
            name="location"
            id="location"
            value={location}
            onChange={handleLocationChange}
          />
        </section>
      </form>
      <p>
        Hello {name} from {location}
      </p>
    </section>
  );
}
Quite simple, isn’t it? Doing the same thing in the class version would require you to use the this keyword even more.
Now, let’s move on to the next basic React Hook.
useEffect Hook
Most React components are required to perform a specific operation such as fetching data, subscribing to a data stream, or manually changing the DOM. These kind of operations are known as side effects.
In class-based components, we would normally put our side effects code into componentDidMount and componentDidUpdate. These are lifecycle methods that allows us to trigger the render method at the right time.
Here is a simple example:
componentDidMount() {
  document.title = this.state.name + " from " + this.state.location;
}
This piece of code will set the document title, based on what is held in state. However, when you try making changes to the state values via the form, nothing happens. To fix this, you need to add another lifecycle method:
componentDidUpdate() {
  document.title = this.state.name + " from " + this.state.location;
}
Updating the form should now update the document title as well.
Let’s see how we can implement the same logic using the useEffect Hook. Update the function component above as follows:
import React, { useState, useEffect } from "react";
//...

useEffect(() => {
  document.title = name + " from " + location;
});
With just those few lines of code, we’ve implemented the work of two lifecycle methods in one simple function.
Adding Clean-up Code
This was a simple example. However, there are cases where you need to write clean-up code, such as unsubscribing from a data stream or unregistering from an event listener. Let’s see an example of how this is normally implemented in a React class component:
import React from "react";

export default class ClassDemo extends React.Component {
  constructor(props) {
    super(props);
    this.state = {
      resolution: {
        width: window.innerWidth,
        height: window.innerHeight
      }
    };

    this.handleResize = this.handleResize.bind(this);
  }

  componentDidMount() {
    window.addEventListener("resize", this.handleResize);
  }

  componentDidUpdate() {
    window.addEventListener("resize", this.handleResize);
  }

  componentWillUnmount() {
    window.removeEventListener('resize', this.handleResize);
  }

  handleResize() {
    this.setState({
      resolution: {
        width: window.innerWidth,
        height: window.innerHeight
      }
    });
  }

  render() {
    return (
      <section>
        <h3>
          {this.state.resolution.width} x {this.state.resolution.height}
        </h3>
      </section>
    )
  }
}
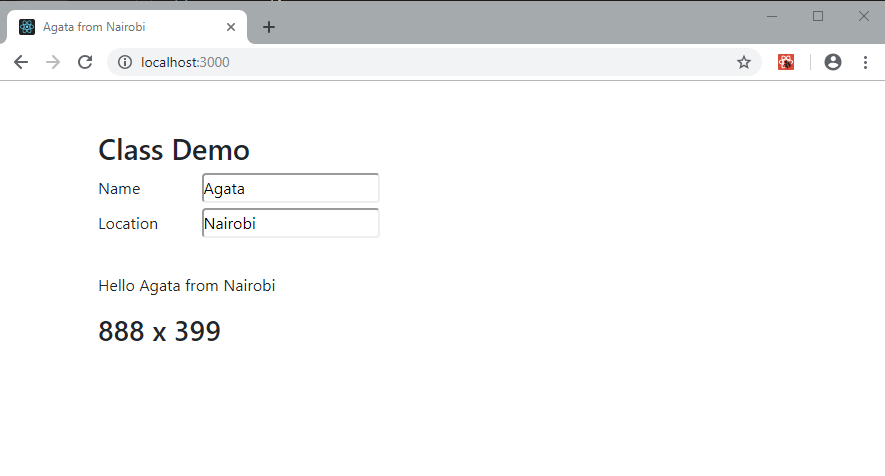
The above code will display the current resolution of your browser window. Resize the window and you should see the numbers update automatically. If you press F11 in Chrome, it should display the full resolution of your monitor. We’ve also used the lifecycle method componentWillUnmount to unregister the resize event.
Let’s replicate the above class-based code in our Hook version. We’ll need to define a third useState Hook and a second useEffect Hook to handle this new feature:
import React, { useState, useEffect } from "react";

export default function HookDemo(props) {
  ...
  const [resolution, setResolution] = useState({
    width: window.innerWidth,
    height: window.innerHeight
  });

  useEffect(() => {
    const handleResize = () => {
      setResolution({
        width: window.innerWidth,
        height: window.innerHeight
      });
    };
    window.addEventListener("resize", handleResize);

    // return clean-up function
    return () => {
      document.title = 'React Hooks Demo';
      window.removeEventListener("resize", handleResize);
    };
  });

  ...

  return (
    <section>
      ...
      <h3>
        {resolution.width} x {resolution.height}
      </h3>
    </section>
  );
}
Amazingly, this Hook version of the code does the same exact thing. It’s cleaner and more compact. The advantage of putting code into its own useEffect declaration is that we can easily test it, since the code is in isolation.
Did you notice that we’re returning a function in this useEffect Hook? This is because any function you return inside a useEffect function will be considered to be the code for clean-up. If you don’t return a function, no clean-up will be carried out. In this case, clean-up is required, as you’ll otherwise encounter an error message logged to your browser console saying “can’t perform a React state update on an unmounted component”.
Custom React Hooks
Now that you’ve learned about the useState and useEffect Hooks, let me show you a really cool way of making your code even more compact, cleaner and reusable than we’ve achieved so far. We’re going to create a custom Hook to simplify our code even further.
We’ll do this by extracting the resize functionality and placing it outside our component.
Create a new function as follows:
function useWindowResolution() {
  const [width, setWidth] = useState(window.innerWidth);
  const [height, setHeight] = useState(window.innerHeight);
  useEffect(() => {
    const handleResize = () => {
      setWidth(window.innerWidth);
      setHeight(window.innerHeight);
    };
    window.addEventListener("resize", handleResize);
    return () => {
      window.removeEventListener("resize ", handleResize);
    };
  }, [width, height]);
  return {
    width,
    height
  };
}
Next, in the component, you’ll need to replace this code:
const [resolution, setResolution] = useState({
  width: window.innerWidth,
  height: window.innerHeight
});
… with this:
const resolution = useWindowResolution();
Delete the second useEffect code. Save your file and test it. Everything should work the same as before.
Now that we’ve created our first custom Hook, let’s do the same for the document title. First, delete the remaining call to useEffect inside the component. Then, outside the component, add the following code:
function useDocumentTitle(title) {
  useEffect(() => {
    document.title = title;
  });
}
Finally, call it from within the component:
useDocumentTitle(name + " from " + location);
Go back to your browser and enter something into the input fields. The document title should change just like before.
Finally, let’s refactor the form fields. We want to create a Hook to keep their value in sync with a corresponding value in state.
Let’s start with the custom Hook. Add the following outside of the component:
function useFormInput(initialValue) {
  const [value, setValue] = useState(initialValue);

  function handleChange(e) {
    setValue(e.target.value);
  }

  return {
    value,
    onChange: handleChange
  };
}
Then update the component to use it:
export default function HookDemo(props) {
  const name = useFormInput("Agata");
  const location = useFormInput("Nairobi");
  const resolution = useWindowResolution();
  useDocumentTitle(name.value + " from " + location.value);

  return (
    <section>
      <form autoComplete="off">
        <section>
          <label htmlFor="name">Name</label>
          <input {...name} />
        </section>
        <section>
          <label htmlFor="location">Location</label>
          <input {...location} />
        </section>
      </form>
      <p>
        Hello {name.value} from {location.value}
      </p>
      <h3>
        {resolution.width} x {resolution.height}
      </h3>
    </section>
  );
}
Go through the code slowly and identify all the changes we’ve made. Pretty neat, right? Our component is much more compact.
For the purposes of this tutorial, we’ve been declaring our Hooks as functions within the same file as the component that uses them. However, in a normal React project, you’d have a hooks folder with each of these Hooks in a separate file, which could then be imported anywhere it was needed.
We could even go as far as to package the useFormInput, useDocumentTitle and useWindowResolution Hooks into an external npm module, since they’re completely independent of the main logic of our code. We can easily reuse these custom Hooks in other parts of the project, or even other projects in the future.
For reference, here’s the complete Hooks component version:
import React, { useState, useEffect } from "react";

function useWindowResolution() {
  const [width, setWidth] = useState(window.innerWidth);
  const [height, setHeight] = useState(window.innerHeight);
  useEffect(() => {
    const handleResize = () => {
      setWidth(window.innerWidth);
      setHeight(window.innerHeight);
    };
    window.addEventListener("resize", handleResize);
    return () => {
      window.removeEventListener("resize ", handleResize);
    };
  }, [width, height]);
  return {
    width,
    height
  };
}

function useDocumentTitle(title){
  useEffect(() => {
    document.title = title;
  });
}

function useFormInput(initialValue) {
  const [value, setValue] = useState(initialValue);

  function handleChange(e) {
    setValue(e.target.value);
  }

  return {
    value,
    onChange: handleChange
  };
}

export default function HookDemo(props) {
  const name = useFormInput("Agata");
  const location = useFormInput("Nairobi");
  const resolution = useWindowResolution();
  useDocumentTitle(name.value + " from " + location.value);

  return (
    <section>
      <form autoComplete="off">
        <section>
          <label htmlFor="name">Name</label>
          <input {...name} />
        </section>
        <section>
          <label htmlFor="location">Location</label>
          <input {...location} />
        </section>
      </form>
      <p>
        Hello {name.value} from {location.value}
      </p>
      <h3>
        {resolution.width} x {resolution.height}
      </h3>
    </section>
  );
}
The Hook’s component should render and behave exactly like the class component version:
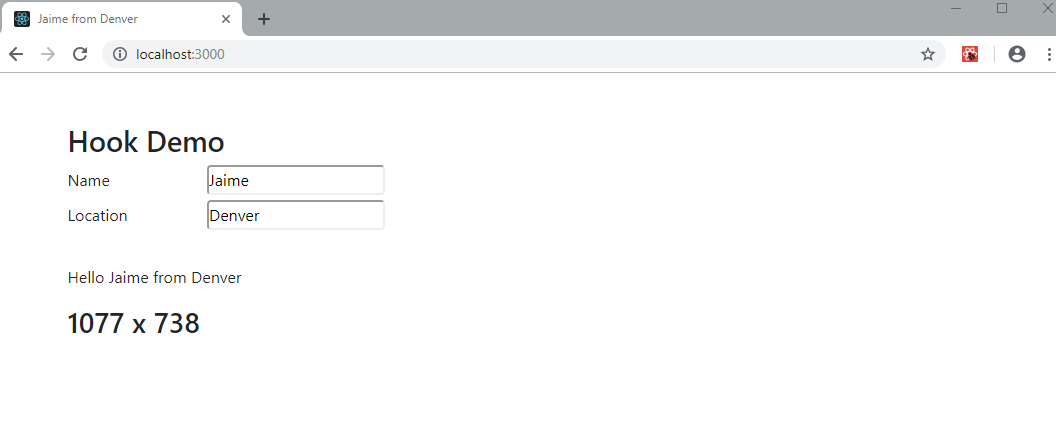
If you compare the Hook version with the class component version, you’ll realize that the Hook feature reduces your component code by at least 30%. You can even reduce your code further by exporting the reusable functions to an npm library.
Next let’s look at how we can use other people’s Hooks in our code.
Fetching Data Using Third-party Hooks
Let’s look at an example of how you can fetch data from a REST JSON API using Axios and React Hooks. If you’re following along at home, you’ll need to install the Axios library:
npm i axios
Change your component to look like this:
import React, { useState, useEffect } from 'react';
import axios from 'axios';

export default function UserList() {
  const [users, setUsers] = useState([]);

  useEffect(() => {
    const fetchData = async () => {
      const result = await axios('https://jsonplaceholder.typicode.com/users');
      setUsers(result.data);
    };
    fetchData();
  }, []);

  const userRows = users.map((user, index) => <li key={index}>{user.name}</li>);

  return (
    <div className="component">
      <h1>List of Users</h1>
      <ul>{userRows}</ul>
    </div>
  );
}
We should expect the following output:

It’s possible to refactor the above code by building your own custom Hook in such as way that we no longer need to use useState and useEffect Hooks. Luckily for us, many developers have already fulfilled this quest and published their work as a package we can install in our project. We’ll use axios-hooks by Simone Busoli, which happens to be the most popular one.
You can install the package using the command:
npm i axios-hooks
Below, I’ve refactored the above code using axios-hooks:
import React from 'react';
import useAxios from 'axios-hooks';

export default function UserListAxiosHooks() {
  const [{ data, loading, error }, refetch] = useAxios(
    'https://jsonplaceholder.typicode.com/users'
  );

  if (loading) return <p>Loading...</p>;
  if (error) return <p>Error!</p>;

  const userRows = data.map((user, index) => <li key={index}>{user.name}</li>);

  return (
    <div className="component">
      <h1>List of Users</h1>
      <ul>{userRows}</ul>
      <button onClick={refetch}>Reload</button>
    </div>
  );
}
Not only have we gotten rid of the useState and useEffect Hooks from our code, but we’ve also gained three new abilities with no extra brain-power on our part:
- to display loading status
- to display error messages
- to refetch data from a click of a button
The lesson here is to avoid reinventing the wheel. Google is your friend. In the JavaScript world, there’s a high chance that someone has already solved the problem you’re trying to tackle.
Demo
Below is a live demo of what we’ve accomplished so far:
Official React Hooks
These are the basic React Hooks that you’ll come across in your day-to-day React projects:
useState: for managing local stateuseEffect: replaces lifecycle functionsuseContext: allows you to easily work with the React Context API (solving the prop drilling issue)
We also have additional official React Hooks that you may need to use, depending on your project requirements:
useReducer: an advanced version ofuseStatefor managing complex state logic. It’s quite similar to Redux.useCallback: returns a function that returns a cacheable value. Useful for performance optimization if you want to prevent unnecessary re-renders when the input hasn’t changed.useMemo: returns a value from a memoized function. Similar tocomputedif you’re familiar with Vue.useRef: returns a mutable ref object that persists for the lifetime of the component.useImperativeHandle: customizes the instance value that’s exposed to parent components when usingref.useLayoutEffect: similar touseEffect, but fires synchronously after all DOM mutations.useDebugValue: displays a label for custom Hooks in React Developer Tools.
You can read all about these Hooks in the official React documentation.
Summary
The React community has responded positively to the new React Hooks feature. There’s already an open-source repository called awesome-react-hooks, and hundreds of custom React Hooks have been submitted to this repository. Here’s a quick example of one of those Hooks for storing values in local storage:
import useLocalStorage from "@rehooks/local-storage";

function MyComponent() {
  let name = useLocalStorage("name"); // send the key to be tracked.
  return (
    <div>
      <h1>{name}</h1>
    </div>
  );
}
You’ll need to install the local-storage Hook with npm or yarn like this to use it:
npm i @rehooks/local-storage
Pretty neat, right?
The introduction of React Hooks has made a big splash. Its waves have moved beyond the React community into the JavaScript world. This is because Hooks are a new concept that can benefit the entire JavaScript ecosystem. In fact, the Vue.js team has recently released something similar called the Composition API.
There’s also talk of React Hooks and the Context API overthrowing Redux from its state management throne. Clearly, Hooks have made coding much simpler and have changed the way we’ll write new code. If you’re like me, you probably have a strong urge to rewrite all your React component classes and replace them with functional component Hooks.
Do note that this isn’t really necessary: the React team doesn’t plan to deprecate React class components. You should also be aware that not all React class lifecycle methods are possible with Hooks yet. You may have to stick with React component classes a bit longer.
If you feel confident enough with your new knowledge of basic React Hooks, I’d like to leave you with a challenge. Refactor this Countdown timer class using React Hooks to make it as clean and compact as possible.
Happy coding, and let me know how you get on!
FAQs on React Hooks
React Hooks are functions that allow you to “hook into” React state and lifecycle features in functional components. They were introduced in React 16.8 to enable state and other React features without writing class components.
React Hooks were introduced to simplify the reuse of stateful logic in functional components, making it easier to manage component state and side-effects.
You can use the useState hook to add state to functional components. It returns an array with the current state value and a function to update it.
useEffect hook used for? The useEffect hook allows you to perform side-effects in your functional components, such as data fetching, DOM manipulation, and more, and ensures these effects are handled correctly.
useState and useEffect hooks in a single component? Yes, you can use multiple instances of useState and useEffect hooks within a single functional component to manage different states and effects.
useContext hook for? The useContext hook is used for accessing context in functional components. It allows you to consume context values without rendering a context consumer component.
useReducer hook used for, and when should I use it? The useReducer hook is an alternative to useState for more complex state management. It is useful when you need to manage state transitions in a predictable manner.
You can create custom hooks by defining functions that use built-in hooks or other custom hooks. These custom hooks can encapsulate and share stateful logic across components.
The key rules for using hooks include only using them in functional components, using hooks at the top level (not inside loops or conditionals), and ensuring their order in the component remains consistent on re-renders.
When used correctly, React Hooks can improve performance by reducing unnecessary re-renders. However, it’s essential to use the useMemo and useCallback hooks to optimize performance when needed.
 Michael Wanyoike
I write clean, readable and modular code. I love learning new technologies that bring efficiencies and increased productivity to my workflow.