
More often than not, when building your JavaScript application, you’ll want to fetch data from a remote source or consume an API. There’s lots of cool stuff that can be done with data from a range of publicly available APIs.
With Vue.js, you can literally build an app around one of these services and start serving content to users in minutes.
I’ll demonstrate how to build a simple news app that will show the top news articles of the day, and that will allow users to filter by their category of interest, fetching data from the New York Times API. You can find the complete code for this tutorial here, and a live demo of the finished app here.
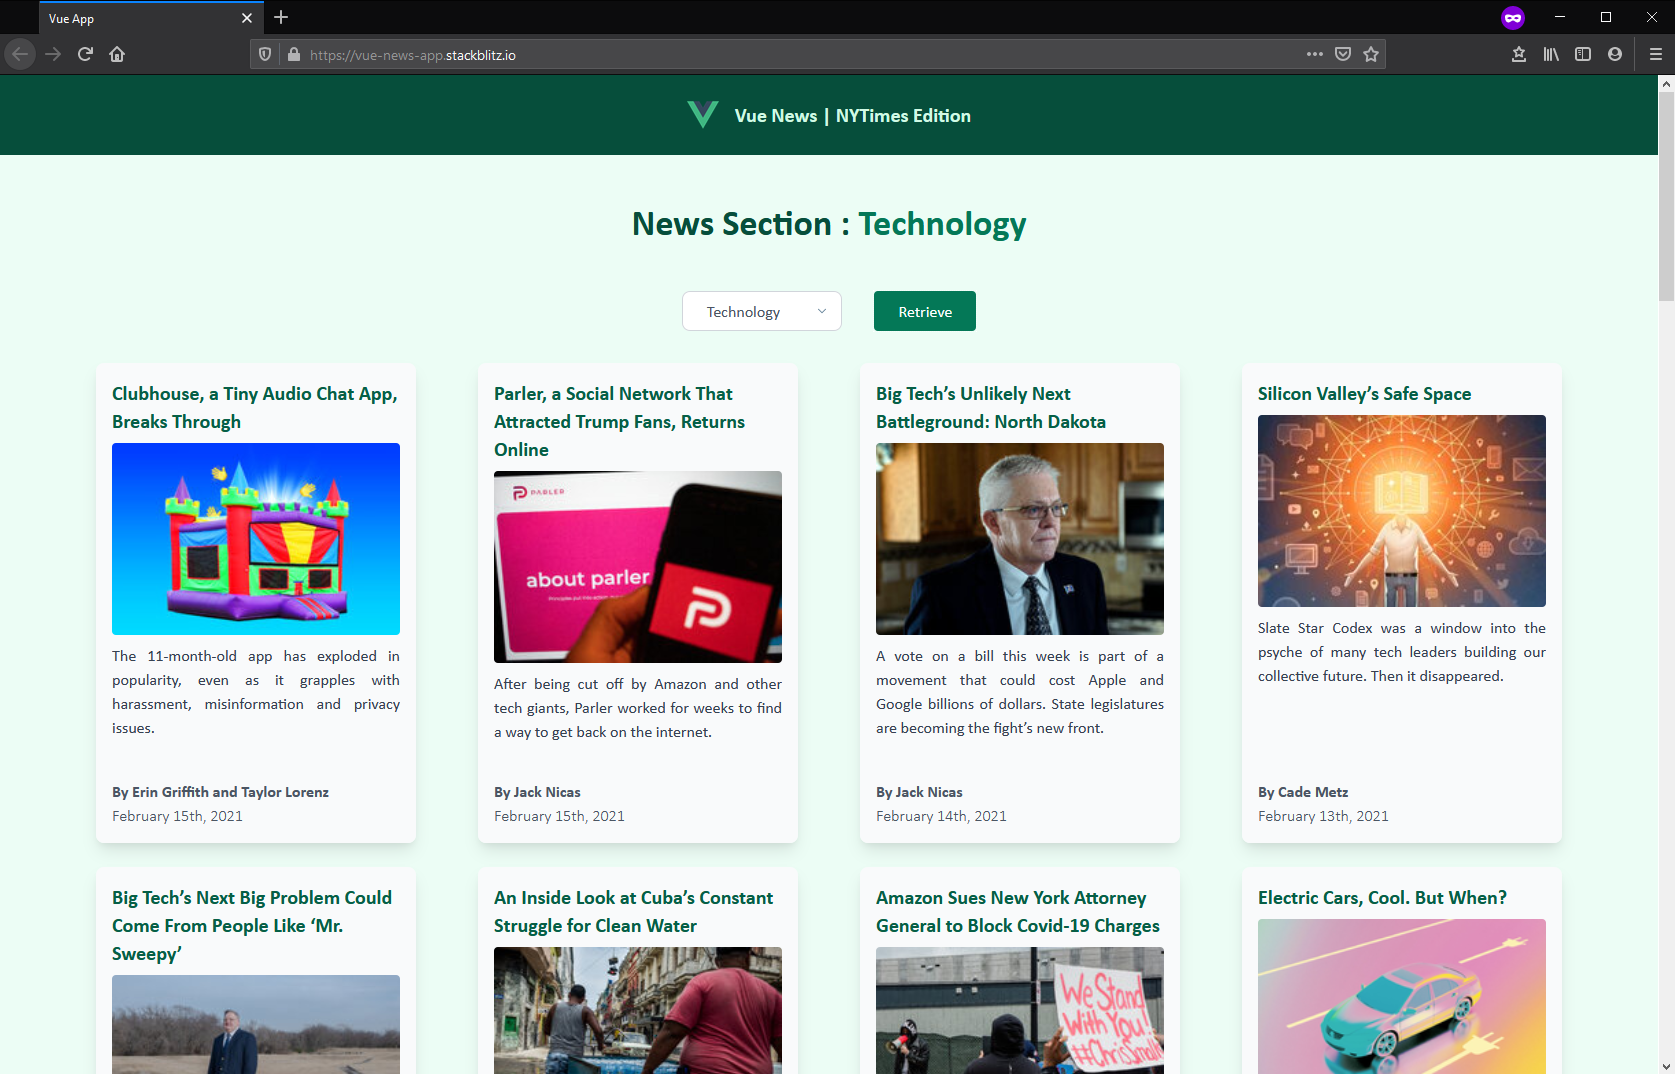
Here’s what the final app will look like:
To follow along with this tutorial, you’ll need Node.js and (optionally) Yarn installed on your machine. To install Node, you can either head to the official download page and grab the Node binaries for your system, or use a version manager instead.
Once Node is installed, to pull in Yarn, run:
npm i -g yarn
You’ll also require a basic knowledge of Vue.js. You can find a great getting started guide for that here.
Acquire an API Key
To make use of the NYTimes API, you’ll need to get an API key. So if you don’t already have one, head over to their signup page and register to get an API key for the Top Stories API.
We’ll be using the top stories API endpoint to fetch data from. Take note that there are multiple sections such as “home”, “travel”, “arts” and “science” that this API provides. We’ll need to build a filter that can allow users to select a section and load the stories within it.
Below are example calls:
https://api.nytimes.com/svc/topstories/v2/arts.json?api-key=yourkey
https://api.nytimes.com/svc/topstories/v2/home.json?api-key=yourkey
https://api.nytimes.com/svc/topstories/v2/science.json?api-key=yourkey
https://api.nytimes.com/svc/topstories/v2/us.json?api-key=yourkey
https://api.nytimes.com/svc/topstories/v2/world.json?api-key=yourkey
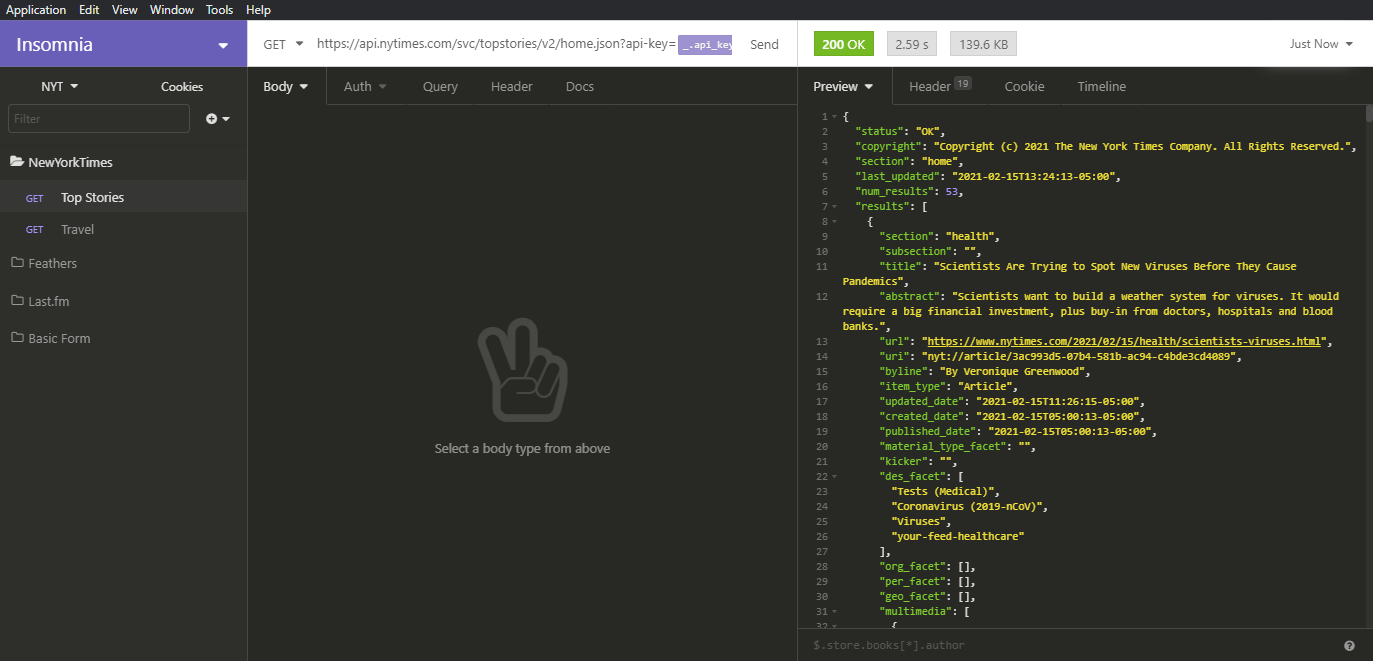
Feel free to use your favorite REST client (such as Hoppscotch or Insomnia) to test your API calls.
Project Structure
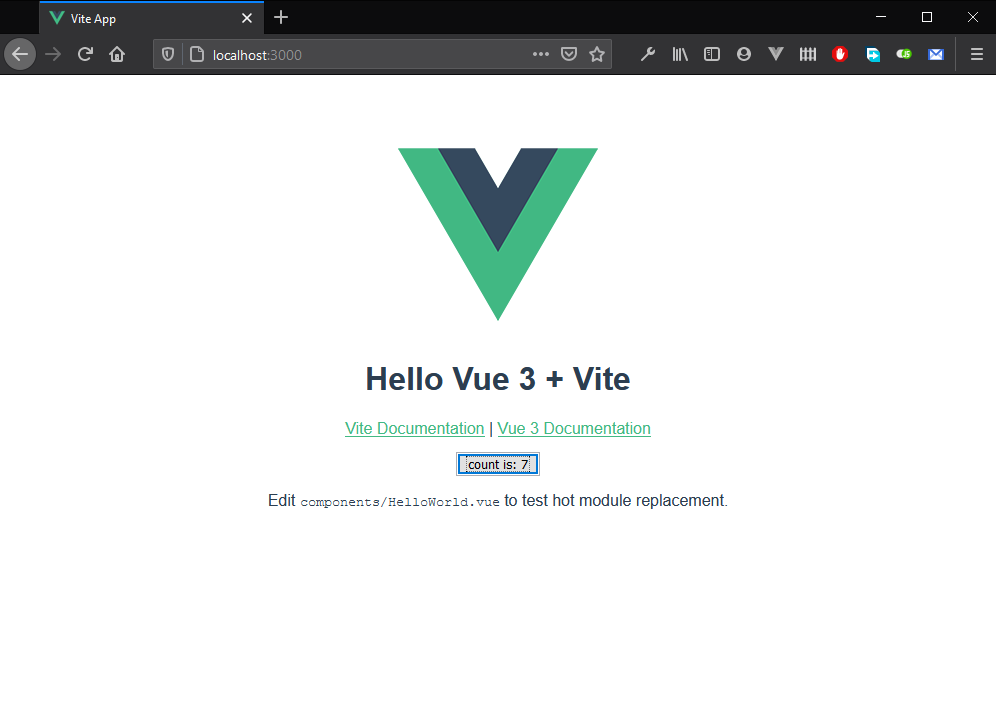
Let’s quickly spin up a Vue 3 project using Vite, a dev server that runs faster than Vue CLI:
yarn create @vitejs/app vue-news-app --template vue

# Install package dependencies
cd vue-news-app
yarn install

# Confirm app can run
yarn dev
Open localhost:3000 in your browser. You should have the following view:
Next, let’s install the TailwindCSS framework to provide some basic styling. You’ll need to stop the server in order to perform this action:
yarn add -D tailwindcss@latest postcss@latest autoprefixer@latest

# Generate tailwind.config.js and postcss.config.js files
npx tailwindcss init -p
We’ll need some additional package utilities to help us format dates (date-fns) and clamp the number of lines (tailwind’s line-clamp) for the abstract field:
yarn add @tailwindcss/line-clamp date-fns
@tailwindcss/line-clamp is a plugin that needs to be included in tailwind.config.js. Below is the full configuration:
module.exports = {
  purge: ["./index.html", "./src/**/*.{vue,js,ts,jsx,tsx}"],
  darkMode: false, // or 'media' or 'class'
  theme: {
    extend: {},
  },
  variants: {
    extend: {},
  },
  plugins: [require("@tailwindcss/line-clamp")],
}
Next, create an index.css file in the src folder and add this code:
@tailwind base;
@tailwind components;
@tailwind utilities;

body {
  @apply antialiased text-green-900 bg-green-50;
  font-family: "Gill Sans", "Gill Sans MT", Calibri, "Trebuchet MS", sans-serif;
}

#app {
  @apply flex flex-col min-h-screen overflow-x-hidden;
}
In addition to importing the required Tailwind CSS classes, we’ve included a few CSS settings to help us define the default theme of our application. We’ve also implemented a flex layout system to help us create a sticky header and footer for our application.
We’ll need to import index.css in src/main.js:
import { createApp } from "vue"
import App from "./App.vue"
import "./index.css"

createApp(App).mount("#app")
Let’s now go ahead and define our application layout. First, clear out any existing components in src/components. Next, within the same folder, create these three files:
Layout.vueHeader.vueFooter.vue
Copy the following code for each file:
src/components/Footer.vue:
<template>
  <footer
    class="px-4 py-8 text-sm font-bold text-center text-green-100 bg-green-900">
    <p class="text-sm tracking-wide">Copyright (c) 2021 SitePoint</p>
  </footer>
</template>
src/components/Header.vue:
<template>
  <header class="flex justify-center py-6 bg-green-900 place-items-center">
    <img alt="Vue logo" src="../assets/logo.png" width="32" />
    <span class="ml-4 text-lg font-bold text-green-100 md:text-xl">
      Vue News | NYTimes Edition
    </span>
  </header>
</template>
src/components/Layout.vue:
<template>
  <Header />
  <main class="container flex-grow px-4 mx-auto my-12">
    <slot />
  </main>
  <Footer />
</template>

<script>
import Header from "./Header.vue"
import Footer from "./Footer.vue"

export default {
  components: {
    Header,
    Footer,
  },
}
</script>
Finally, update src/App.vue:
<template>
  <Layout>
    <p>Main content goes here</p>
  </Layout>
</template>

<script>
import Layout from "./components/Layout.vue"

export default {
  components: {
    Layout,
  },
}
</script>
Execute yarn dev. The browser should refresh automatically.
With the application layout completed, we can now start building the core logic of our news app.
Building News App Components
Our application structure will be made up of three News components and one container, src/App.vue. The container will be responsible for fetching post data and populating the components.
First, we need to design the layout and look for these components. Hence we need some mock data to begin with. Create the file src/posts.json and populate it with the following data:
{
  "posts": [
    {
      "title": "Stay Healthy When Exercising Outdoors",
      "abstract": "Cold weather workouts do bring unique risks, but a little planning and preparation can help whether you’re going for a winter walk, trekking in snowshoes or sledding with the kids.",
      "url": "https://www.nytimes.com/2021/02/06/at-home/exercise-outdoors-cold-weather.html",
      "byline": "By Kelly DiNardo",
      "published_date": "2021-02-06T23:40:05-05:00",
      "thumbnail": "https://static01.nyt.com/images/2021/02/07/multimedia/07ah-OUTDOOREXERCISE/07ah-OUTDOOREXERCISE-mediumThreeByTwo210.jpg",
      "caption": ""
    },
    {
      "title": "4 Skiers Killed in Avalanche in Utah, Officials Say",
      "abstract": "It was the third such deadly episode in days and the deadliest avalanche in the United States since May 2014, according to the authorities.",
      "url": "https://www.nytimes.com/2021/02/06/us/avalanche-salt-lake-city.html",
      "byline": "By Michael Levenson",
      "published_date": "2021-02-06T20:22:39-05:00",
      "thumbnail": "https://static01.nyt.com/images/2021/02/06/lens/06xp-avalanche-photo2/06xp-avalanche-photo2-mediumThreeByTwo210.jpg",
      "caption": "A helicopter returning to Millcreek Canyon after rescuing one of the four avalanche survivors on Saturday."
    }
  ]
}
I’d encourage you to duplicate the records in order to better test our component design layouts, but I won’t do that here due to space constraints.
Let’s now start building our News components. In the src/components folder, create the following files:
NewsCard.vueNewsList.vueNewsFilter.vue
Just to visualize how all these components come together, import them in src/App.vue and set them out as follows:
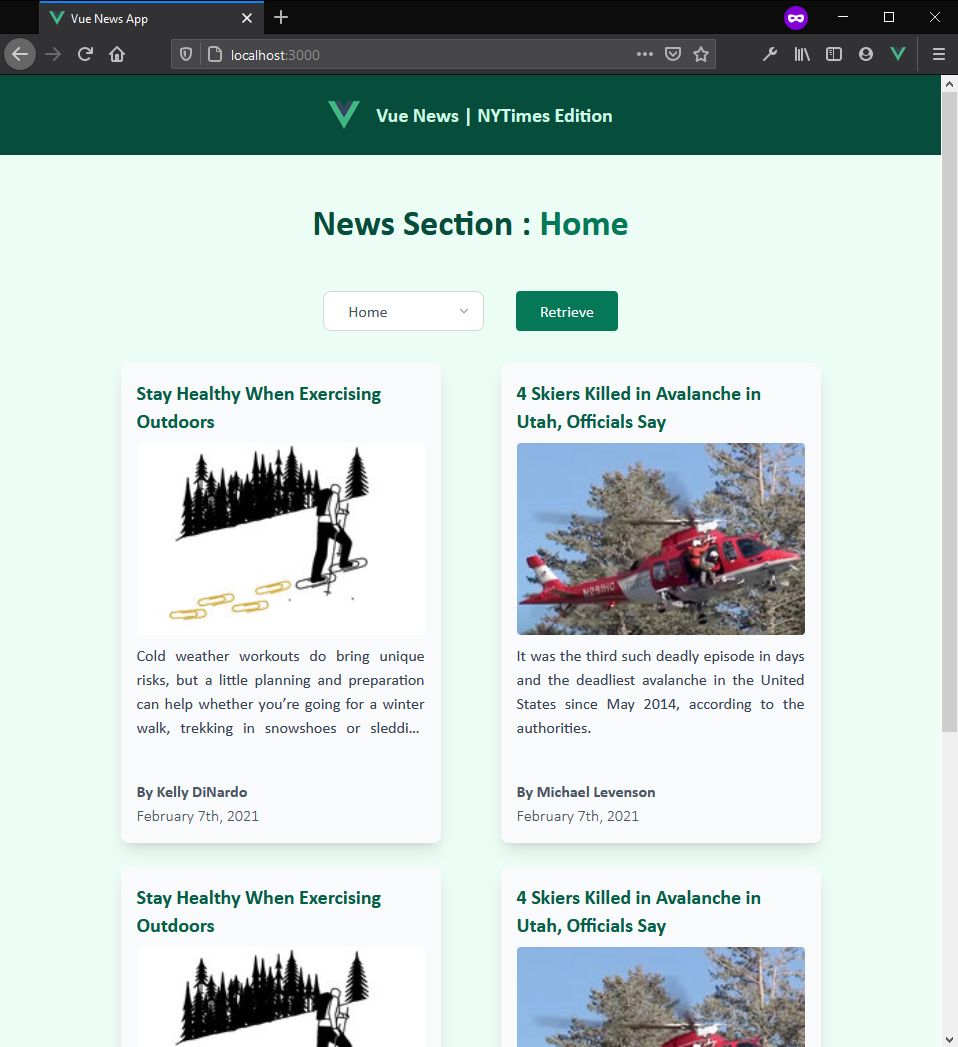
<template>
  <Layout>
    <h2 class="mb-8 text-4xl font-bold text-center capitalize">
      News Section : <span class="text-green-700">{{ section }}</span>
    </h2>
    <NewsFilter v-model="section" />
    <NewsList :posts="posts" />
  </Layout>
</template>

<script>
import Layout from "./components/Layout.vue"
import NewsFilter from "./components/NewsFilter.vue"
import NewsList from "./components/NewsList.vue"

import data from "./posts.json"

export default {
  components: {
    Layout,
    NewsFilter,
    NewsList,
  },
  data() {
    return {
      section: "home",
      posts: data.posts,
    }
  },
}
</script>
Let’s break down the code above:
- The
headertag is where we display the current state value ofsection. - The
NewsFiltercomponent will contain a dropdown input for users to select a different section. There will be a button they’ll have to click in order to perform the fetch. We’ve bound the component to the statesectionto allow state synchronization. - The
NewsListcomponent will display posts using theNewsCardcomponent across a responsive grid.
Let’s now start working with each individual News component. The NewsCard.vue component will present data for a single post. It requires one prop, post:
<template>
  <section class="p-4 rounded-lg shadow-lg bg-gray-50 w-80">
    <div class="h-96">
      <a
        class="text-xl font-bold text-center text-green-800 hover:text-green-600 hover:underline"
        :href="post.url"
        target="_blank"
        rel="noreferrer"
      >
        {{ post.title }}
      </a>
      <img
        class="w-full mt-2 rounded"
        :src="post.thumbnail"
        :alt="post.caption"
        height="140"
        width="210"
      />
      <p class="mt-2 text-justify text-gray-700 line-clamp-4">
        {{ post.abstract }}
      </p>
    </div>
    <div>
      <p class="mt-4 font-bold text-gray-600">{{ post.byline }}</p>
      <p class="font-light text-gray-600">
        {{ formatDate(post.published_date) }}
      </p>
    </div>
  </section>
</template>

<script>
import { format } from "date-fns"

export default {
  props: {
    post: {
      type: Object,
      required: true,
    },
  },
  methods: {
    formatDate(strDate) {
      return format(new Date(strDate), "MMMM do, yyyy")
    },
  },
}
</script>
The NewsList.vue will loop through a posts array and populate NewsCards across a responsive grid:
<template>
  <div
    class="grid grid-cols-1 gap-6 mt-4 md:grid-cols-2 lg:grid-cols-3 2xl:grid-cols-4 justify-items-center"
  >
    <NewsCard v-for="(post, index) in posts" :key="index" :post="post" />
  </div>
</template>

<script>
import NewsCard from "./NewsCard.vue"
export default {
  props: {
    posts: {
      type: Array,
      required: true,
    },
  },
  components: {
    NewsCard,
  },
}
</script>
Next, we have the NewsFilter component, which will allow users to load posts from different sections. First, we need a content file to store all the sections supported by the Top Stories API endpoint. Create the file src/components/sections.js:
const sections = [
  "home",
  "arts",
  "automobiles",
  "books",
  "business",
  "fashion",
  "food",
  "health",
  "insider",
  "magazine",
  "movies",
  "nyregion",
  "obituaries",
  "opinion",
  "politics",
  "realestate",
  "science",
  "sports",
  "sundayreview",
  "technology",
  "theater",
  "magazine",
  "travel",
  "upshot",
  "us",
  "world",
]

export default sections
Let’s now create our NewsFilter.vue, which contains a dropdown select input and a button. We’ll need to use v-model to bind the state section in a way that syncs up with the state in App.vue:
<template>
  <div class="flex justify-center p-4 rounded">
    <!-- Start of select dropdown -->
    <div class="relative inline-flex">
      <svg
        class="absolute top-0 right-0 w-2 h-2 m-4 pointer-events-none"
        xmlns="http://www.w3.org/2000/svg"
        viewBox="0 0 412 232"
      >
        <path
          d="M206 171.144L42.678 7.822c-9.763-9.763-25.592-9.763-35.355 0-9.763 9.764-9.763 25.592 0 35.355l181 181c4.88 4.882 11.279 7.323 17.677 7.323s12.796-2.441 17.678-7.322l181-181c9.763-9.764 9.763-25.592 0-35.355-9.763-9.763-25.592-9.763-35.355 0L206 171.144z"
          fill="#648299"
          fill-rule="nonzero"
        />
      </svg>
      <select
        class="h-10 pl-5 pr-10 text-gray-600 bg-white border border-gray-300 rounded-lg appearance-none hover:border-gray-400 focus:outline-none"
        v-model="section"
      >
        <option
          v-for="(section, index) in sections"
          :key="index"
          :value="section"
        >
          {{ capitalize(section) }}
        </option>
      </select>
    </div>
    <!-- End of select dropdown -->
    <div class="self-center ml-8">
      <button
        class="px-6 py-2 text-white bg-green-700 rounded hover:bg-green-900"
      >
        Retrieve
      </button>
    </div>
  </div>
</template>

<script>
import { computed } from "vue"
import sectionsData from "./sections"

export default {
  props: {
    modelValue: String,
  },
  setup(props, { emit }) {
    const section = computed({
      get: () => props.modelValue,
      set: value => emit("update:modelValue", value),
    })

    return {
      section,
    }
  },
  data() {
    return {
      sections: sectionsData,
    }
  },
  methods: {
    capitalize(value) {
      if (!value) return ""
      value = value.toString()
      return value.charAt(0).toUpperCase() + value.slice(1)
    },
  },
}
</script>
The article “Vue 3: Data down, Events up” best explains the strategy we are using to bind section state to the NewsFilter component. Basically, this allows child components to update props and sync with the parent component.
Below is a screenshot of the current state of the application:
Using Axios to Fetch Remote Data
Axios is a promise-based HTTP client for making Ajax requests, and will work great for our purposes. It provides a simple and rich API. It’s quite similar to the fetch API, but without the need to add a polyfill for older browsers, and some other subtleties.
To install axios, run:
yarn add axios
The UI development of our application is complete. We now only need to implement remote fetching logic. Below is an example of the full URL format that NYTimes API service expects:
https://api.nytimes.com/svc/topstories/v2/home.json?api-key=your_api_key
First, let’s store our API key in a .env file at the root of our project. Save in the following format:
VITE_NYT_API_KEY=####
Replace the hashes with your actual API key.
Since we’re using Vite, we need to comply with Vite’s manual on loading environment variables. Vue/CLI has its own instructions for doing the same.
Let’s now implement the logic that will fetch actual posts from the NYTimes REST API endpoint. Simply update src/App.vue accordingly:
<template>
  <Layout>
    <h2 class="mb-8 text-4xl font-bold text-center capitalize">
      News Section : <span class="text-green-700">{{ section }}</span>
    </h2>
    <NewsFilter v-model="section" :fetch="fetchNews" />
    <NewsList :posts="posts" />
  </Layout>
</template>

<script>
import Layout from "./components/Layout.vue"
import NewsFilter from "./components/NewsFilter.vue"
import NewsList from "./components/NewsList.vue"

import axios from "axios"
const api = import.meta.env.VITE_NYT_API_KEY

export default {
  components: {
    Layout,
    NewsFilter,
    NewsList,
  },
  data() {
    return {
      section: "home",
      posts: [],
    }
  },
  methods: {
    // Helper function for extracting a nested image object
    extractImage(post) {
      const defaultImg = {
        url: "http://placehold.it/210x140?text=N/A",
        caption: post.title,
      }
      if (!post.multimedia) {
        return defaultImg
      }
      let imgObj = post.multimedia.find(
        media => media.format === "mediumThreeByTwo210"
      )
      return imgObj ? imgObj : defaultImg
    },
    async fetchNews() {
      try {
        const url = `https://api.nytimes.com/svc/topstories/v2/${this.section}.json?api-key=${api}`
        const response = await axios.get(url)
        const results = response.data.results
        this.posts = results.map(post => ({
          title: post.title,
          abstract: post.abstract,
          url: post.url,
          thumbnail: this.extractImage(post).url,
          caption: this.extractImage(post).caption,
          byline: post.byline,
          published_date: post.published_date,
        }))
      } catch (err) {
        if (err.response) {
          // client received an error response (5xx, 4xx)
          console.log("Server Error:", err)
        } else if (err.request) {
          // client never received a response, or request never left
          console.log("Network Error:", err)
        } else {
          console.log("Client Error:", err)
        }
      }
    },
  },
  mounted() {
    this.fetchNews()
  },
}
</script>
Here we’ve created a function called fetchNews that contains logic for performing the fetch logic. This function will be called from two places:
- The
mounted()lifecycle event - The
NewsFiltercomponent
Let’s break the function down to make sure we understand what is going on:
- We’re using async syntax, since it’s cleaner than using regular
Promisecallback syntax. - Since we’re about to perform a network call, many things can go wrong. We’ve wrapped the function’s code within a
try...catchblock. Otherwise, users will be met with a non-descriptive Promise error if one occurs. - Using ES6 template literals, we’re able to build a URL string that automatically gets updated whenever the user changes the news
sectionvia theNewsFiltercomponent. Note that the API key has been included in the URL string as well. - After fetching results using the
axios.get()function, we need to parse the results and format them in a way that’s compatible with our UI, specifically theNewsCardcomponent. We do this using JavaScript’sArray.mapfunction to create a new array with our formatted data. - Extracting image data is a little tricky. Some posts lack the
multimediafield, and even if they do have it, there’s no guarantee that the media format we need is present. In such a case, we return a default image URL —http://placehold.it/210x140?text=N/A— and use the post’s title as the caption. - In the error block, we’re checking the presence of specific error properties to determine what kind of error has occurred. You can use this information to construct a helpful error message.
Now, take a look at the template section and observe that we’ve included a new prop called fetch, which links to the fetchNews function. We need to update src/components/NewsFilter.vue to accept this prop. Below, I’ve highlighted only the code sections you should change:
<template>
  ...
  <button
    class="px-6 py-2 text-white bg-green-700 rounded hover:bg-green-900"
    @click="fetch"
  >
    Retrieve
  </button>
  ...
</template>

<script>
export default {
  props: {
    modelValue: String,
    fetch: Function,
  },
}
</script>
You’ll probably need to restart the dev server in order to properly load the axios library and the API key. Once you’ve done that, you should have a view of actual posts. Below is the current state of the application.
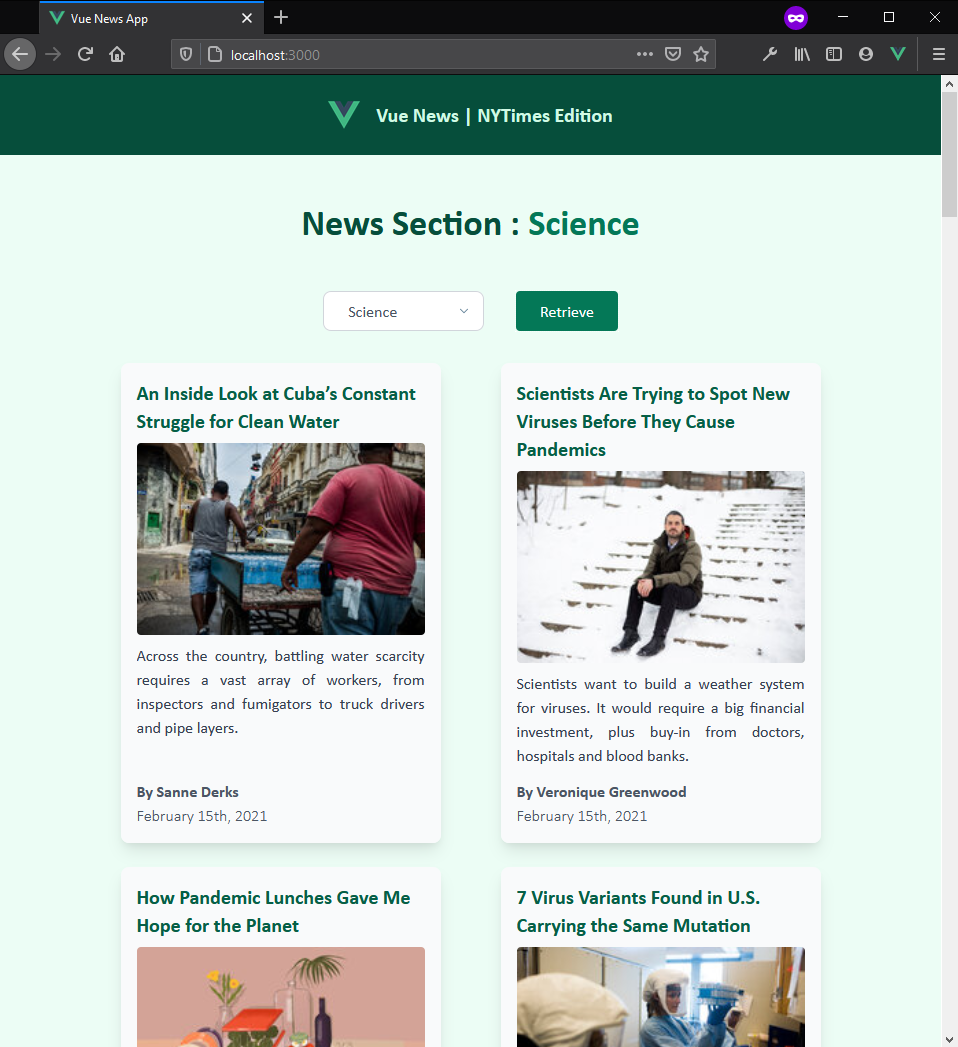
You should be able to switch and load different news sections.
Final Touches and Demos
I decided to add some minor (optional) touches to make the app experience a little bit better, like introducing a loading image.
You can see a demo in the StackBlitz below (limited functionality):
Alternatively, you can view a live version here.
Conclusion
In this tutorial, we’ve learned how to start a Vue.js project from scratch, how to fetch data from an API using axios, and how to handle responses and manipulate data using components and computed properties.
Now we have a functional Vue.js 3.0 app, built around an API service. There are loads of improvements that could be made by plugging in some other APIs. For example, we could:
- Automatically queue social media posts from a category using the Buffer API
- Mark posts to be read later, using the Pocket API
… and so on.
The entire code for this project is also hosted on GitHub, so you can clone, run, and make any improvements you fancy.
FAQs About Fetching Data from a Third-Party API with Vue.js
What Is Vue.js?
Vue.js, commonly referred to as Vue, is an open-source JavaScript framework used for building user interfaces and single-page applications. It is often described as a progressive framework because it can be incrementally adopted in your projects. Vue is designed to be flexible, efficient, and user-friendly, making it an excellent choice for developers of all skill levels.
How to fetch data from an API in Vue?
To fetch data from an API in a Vue.js application, you can use the Axios library, a popular HTTP client for making network requests. Start by installing Axios if you haven’t already using npm or yarn. Import Axios in the Vue component where you intend to fetch data. In the component’s data section, create a property to store the API response data. This property should be initially set to an empty array or object, depending on the API response structure.
You can use the component’s lifecycle hooks, such as created, to initiate the API request when the component is created. Inside the component’s methods, employ Axios to make a GET request to the API. Upon receiving the response, update the apiData property with the data from the API. In your component’s template section, you can utilize Vue directives like v-for to iterate through the data and display it as needed.
Furthermore, it’s crucial to include error handling to manage potential API request failures, such as network issues or incorrect API endpoints. In the example provided, there’s a .catch() block to capture and log errors to the console, but you can customize error handling based on your application’s requirements. Simply replace the API URL in the Axios request with the actual endpoint from which you wish to retrieve data. This approach allows Vue.js applications to seamlessly integrate data from external sources, making it a powerful tool for creating dynamic and interactive web applications.
How to fetch data from JSON in Vue?
To fetch data from a JSON file in a Vue.js application, you can use JavaScript’s fetch API or a library like Axios for making HTTP requests. The process involves creating a JSON file containing the data you wish to retrieve and then integrating it into your Vue component.
Start by creating a JSON file, such as data.json, which should be placed in your project directory. Ensure that the JSON data is structured appropriately to match your application’s needs.
In your Vue component, you can import Axios if you haven’t already, create a data property to store the fetched JSON data, and initiate the API request in a lifecycle hook like created. Use Axios or the fetch API to make an HTTP request to the JSON file and update the data property with the response. In the template section of your component, you can use Vue directives like v-for to iterate through the JSON data and display it as required.
This approach allows you to seamlessly integrate JSON data into your Vue.js application, making it dynamic and flexible for displaying a wide range of content or information, such as lists of items, configurations, or user-generated data.
When to call an API in Vue?
The choice of when to call an API in Vue depends on the context and requirements of your application. Vue’s flexible lifecycle hooks, methods, and data-binding capabilities allow you to integrate API calls at the most appropriate moments to achieve the desired behavior and user experience.
How to make an API call with Vue.js?
Making an API call in a Vue.js application can be achieved using various methods, but one of the most common and straightforward approaches is to use the axios library, which simplifies HTTP requests.
 Olayinka Omole
Olayinka is a self-taught full stack developer from Lagos. He spends his time tweeting, doing academic research, taking photographs, designing and writing code... You know, the usual fun things.
 Michael Wanyoike
I write clean, readable and modular code. I love learning new technologies that bring efficiencies and increased productivity to my workflow.