
Custom auth for Hasura with Netlify
In the last couple of months, I published several blog posts on authentication with different providers such as Auth0 or AWS Cognito. I also summarized different authentication options with these providers in Hasura Authentication Explained blog post
One of the auth solutions that I've been missing is the one provided by Netlify. In this tutorial, we will create an auth solution for hasura.io using Netlify in a bit different way than we did it previously. The main difference is that Netlify Identity - Netlify auth solution, even though supports JWT, it still does not support custom claims, which are crucial to make Hasura work with JWT tokens. We will talk about the different approach here - using custom Auth webhook to verify JWT token provided by Netlify Identity, extract data from it and send this data in the format Hasura can parse and use in permission system.
Getting started
Setting up our Hasura
First of all, we will set up our Hasura on Heroku. If you are new to Hasura you can read more about it in the following blog post
We will create two tables: posts and users. User table will have Text type id, because we will get that from Netlify identity.
Getting users into Hasura
In this section we will make sure when signing up, the user will be written into users table.
Create netlify site
We will start simple by the creation of our netlify site:
mkdir hasura-netlify-identity-auth
npm init
netlify init
For this custom auth solution we will need two things:
- Netlify function, which will run on signup and will add users to Hasura
- Netlify function which we will use as auth webhook to validate our token, extract data and send this data to Hasura
Frontend
I won't be creating frontend in this blog post, but will use react-netlify-identity-widget sample. You can check frontend code here
Creating signup hook
We will use netlify cli to create signup hook.
netlify functions:createchoose identity signup. This will create functions folder and auto-generate identity-signup.js file with boilerplate code. Netlify identity will call identity-signup.js automatically whenever user confirmed his email.
We will install node-fetch cause we will need it to execute our insertUser mutation
npm install node-fetch
on signup function hook we will execute insertUser mutation to insert a new user into Hasura
Let's also add hasura secret in environment variables in Netlify to set admin secret for Hasura.
If you want to watch this part, which we streamed together with swyx on https://twitch.tv/hasurahq
It's available here:
Creating custom auth webhook
In this section, we will create a custom auth web hook by creating a new function to validate auto-generated jwt token whenever we sign up.
What we will do first is to create a new function using
netlify fuctions:create we will call it validate-user
Inside the function we will get identity and user object from context.clientContext
Netlify automatically decodes JWT token and if a token is supplied properly, then we will be able to get a user object. If not, then we will set a role as anonymous
You can notice that we return x-hasura-role and x-hasura-user-id, so we will be able to use them in the permission system inside Hasura.
Now the last thing left to do is to add HASURA_GRAPHQL_AUTH_HOOKenvironment variable to heroku or any other environment you run hasura at. Whenever you do so, the token will be validated with netlify identity and correct values will be sent to the permission system.
Watch the part2 of our Twitch stream with swyx here:
Signing in with Google
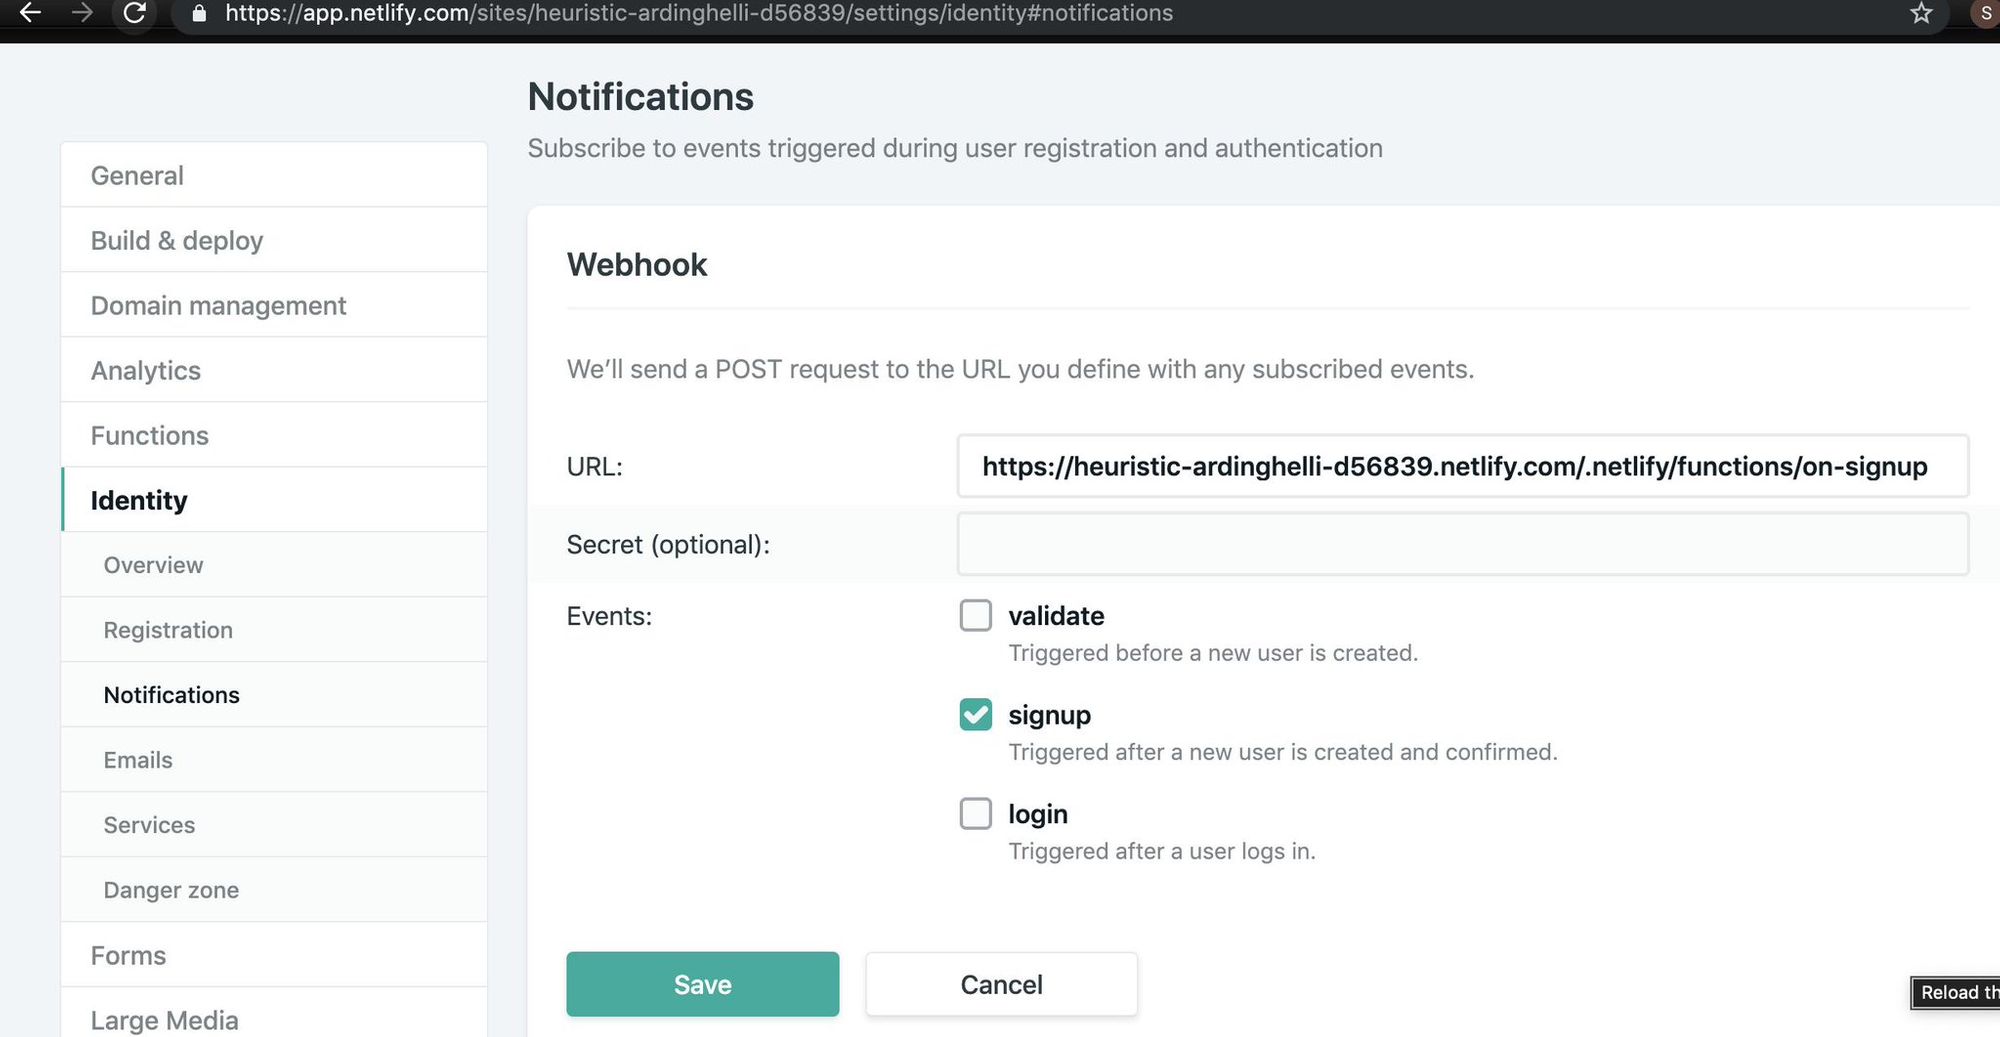
Something that we haven't covered in the stream, but you might want to do is to sign with Google or any other providers. For that, you cannot rely on identity-signup name convention, but you need to create a hook manually. So the process will be to rename identity-signup function to something else and then in Notification settings for identity, add our signup hook url triggered on signup event.
Summary
This blog post is a rough explanation of what we did during our twitch stream, so if you haven't subscribed to our Twitch streams or to Youtube channel I strongly suggest doing so, cause we stream this type of content on a weekly basis, having guests from different companies guiding me through live coding solutions for real-world problems. All of this is done in a fun, friendly environment.
If you want to show me some really cool technique, product or solution involving Hasura, I would be happy to find the time to stream with you, so let me know on Twitter


