
Telescope Nova is the perfect platform to use if you want to build your own social web app fast and easy. This is a free and open-source project created by Sacha Greif. The front-end development part of the app is built with the React library , while the back-end is taken care of by the Meteor framework. Both are written in JavaScript, one of the most popular programming languages today.
Since at work we are using Meteor.js for back-end development, it was next to impossible for us not to try to customize Telescope Nova, which is one of the most popular among Meteor apps.
In this quick tip, you will learn how to create your own custom theme for Telescope Nova. But first, a few words on how to get your development environment set up.
Installing Node.js , NPM and Meteor.js
Before you can install Nova, you need to have Node.js, NPM and Meteor.js already installed. If you haven’t, proceed with the following installation steps:
- Install Node.js and NPM . If you are using Windows and struggle with installation, How to Install Node.js and NPM on Windows by Dave McFarland should be helpful
- Install Meteor.js.
Installing Telescope Nova
Now let’s install Nova on your localhost. On the command line, type:
git clone https://github.com/TelescopeJS/Telescope.git

cd Telescope

npm install

meteor
Then you should be able to see the app running on http://localhost:3000/ .
For more info about installing Nova, go to their GitHub instructions.
Creating Your Theme Package
Once your app is up and running, you can start to customize its default look by following the steps outlined below:
- Go inside your
Telescope>packagesfolder. There you will find the foldermy-custom-package - Copy/Paste the
my-custom-packagefolder and rename the copy, for example,custom-theme. Now you have created your own package - Inside your
custom-themepackage, find the filepackage.jsand open it in your editor. Replace this piece of code –name: “my-custom-package”— to match your package name. So in this case it will bename: “custom-theme” - In the terminal, navigate to your
Telescopefolder and type:meteor add custom-themeto apply your new package to the app - Then start the app using the command:
meteor - Finally, go to
http://localhost:3000where you should see this new look with star-shaped emojis around the logo.

Customizing Components
Before going ahead with customizing components, here are a few reminders:
- You will find most of the components you want to change in the
packages>nova-base-componentsfolder - Never edit original files! You should only change your custom files!
- Don’t forget to use
classNameinstead of regularclass - Always write the closing html tags, for example
<img src="/" alt=""></img>.
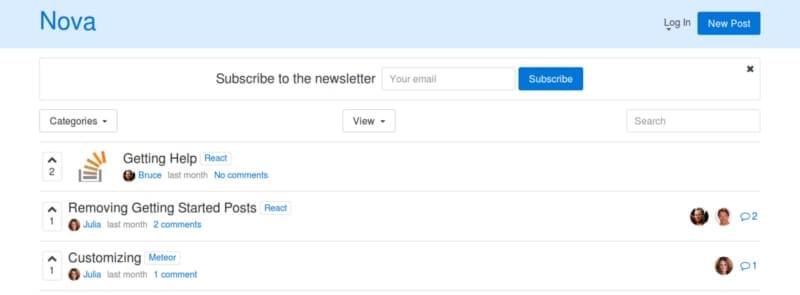
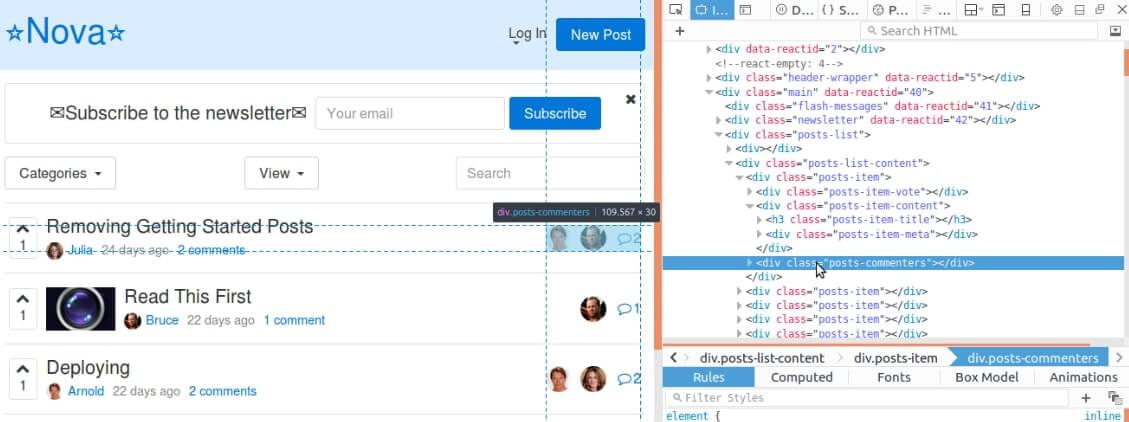
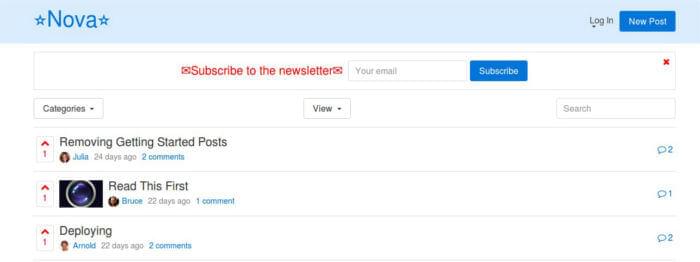
Now, let’s say you want to remove these avatars on the right side. You should see the relevant class using your browser’s developer tools’ inspect element functionality, which will help you locate the markup you are looking for.
Next, follow the steps below:
- Find the PostsCommenters component by accessing
nova-base-components>lib>posts>PostsCommenters.jsx, and copy its entire content - Inside your package, create a new file called
CustomPostsCommenters.jsx. The path will becustom-theme>lib>components>CustomPostsCommenters.jsx - Paste the content of
PostsCommenters.jsx, which you copied before, inside it.
The original code looks like this:
import Telescope from 'meteor/nova:lib';
import React from 'react';
import { Link } from 'react-router';
import Posts from "meteor/nova:posts";

const PostsCommenters = ({post}) => {
  return (
    <div className="posts-commenters">
      <div className="posts-commenters-avatars">
        {_.take(post.commentersArray, 4).map(user =>
          <Telescope.components.UsersAvatar key={user._id} user= {user}/>)}
      </div>
      <div className="posts-commenters-discuss">
        <Link to={Posts.getPageUrl(post)}>
          <Telescope.components.Icon name="comment" />
          <span className="posts-commenters-comments-count">{post.commentCount}</span>
          <span className="sr-only">Comments</span>
        </Link>
      </div>
    </div>
  )
}

PostsCommenters.displayName = "PostsCommenters";

module.exports = PostsCommenters;
export default PostsCommenters;
To remove the avatars, you will delete the part of the code inside your custom file, not the original, that reads as follows:
<div className="posts-commenters-avatars">
  {_.take(post.commentersArray, 4).map(user =>
  <Telescope.components.UsersAvatar key={user._id} user={user}/>)}
</div>
And to make this custom file actually override the original one, you need to make the following further changes:
Locate the portion of the code that looks like this:
const PostsCommenters = ({post}) => {
  return (
    <div className="posts-commenters">
    // more code here
    </div>
  )
}

PostsCommenters.displayName = "PostsCommenters";

module.exports = PostsCommenters;
export default PostsCommenters;
Edit it to look like the snippet below:
const CustomPostsCommenters = ({post}) => {
  return (
    <div className="posts-commenters">
    // more code here
    </div>
  )
}

export default CustomPostsCommenters;
It is important that you always name your custom files and components by adding the word Custom at the beginning of the name! The rest of the file name remains the same as the original file.
The last thing to do is to write a few more lines of code inside the components.js file, which you can find here: custom-theme>lib>components.js:
import CustomPostsCommenters from "./components/CustomPostsCommenters.jsx";

Telescope.components.PostsCommenters = CustomPostsCommenters;
You will need to repeat the steps above for each new component you want to change. Your components.js file will look something like this:

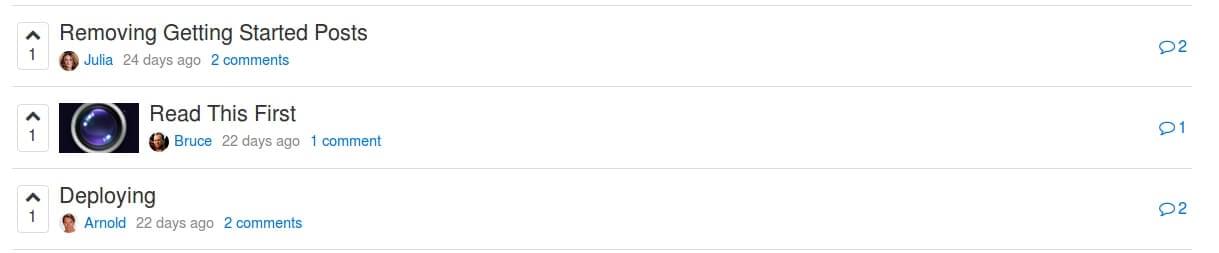
At this point, the desired changes should be applied and you should no longer see any avatars displayed on the screen. Here’s what your theme should look like:
Customizing CSS
You are not limited to customizing the structure of your Telescope Nova theme. You can just as painlessly customize its appearance by modifying the style sheet.
Here’s how.
Inside your package, you should find a file called custom.scss , where you are going to write your custom styles. The path should be: custom-theme>lib>stylesheets>custom.scss
If you are more comfortable with pure CSS rather than Sass, just make a new file and call it, for example, custom.css .
Now make a simple change inside it, just for testing. For instance:
a {
  color:red;
}
Save custom.css and then open the package.js file located at custom-theme>lib>package.js .
Find the part of the code that reads:
api.addFiles([
  'lib/stylesheets/custom.scss'
], ['client']);
Add the path to your new file, like this:
api.addFiles([
  'lib/stylesheets/custom.scss',
  'lib/stylesheets/custom.css'
], ['client']);
Save your work and wait for the app to reload. Now the color of your links should have changed into red.
Check out the live version of one of our customized Telescope Nova theme in action!
Resources
For more information about making a custom Telescope theme, take a look at these useful resources:
- Telescope official documentation
- Telescope Github repo
- Telescope official youtube tutorial part 1 and part 2
Now it’s your turn, add your own customizations and share the result in the comments!
Frequently Asked Questions (FAQs) about Building a Custom Theme for Telescope Nova
How can I install Telescope Nova for Neovim?
To install Telescope Nova for Neovim, you need to use a plugin manager like vim-plug. Add the following line to your init.vim or .vimrc file: Plug ‘nvim-telescope/telescope.nvim’. After adding this line, run :PlugInstall in Neovim to install the plugin.
How can I customize the Telescope Nova theme?
Customizing the Telescope Nova theme involves modifying the CSS files. You can change the colors, fonts, and layout according to your preference. Remember to save your changes and refresh your browser to see the changes take effect.
What are the key features of Telescope Nova?
Telescope Nova is a powerful search tool for Neovim. It allows you to search files, buffers, git commits, and more. It also supports fuzzy finding and previewing of search results.
How can I use Telescope with the Ivy theme?
To use Telescope with the Ivy theme, you need to install the Ivy theme first. Then, in your Telescope configuration file, set the theme to ‘ivy’.
Why is my Telescope Nova not working after installation?
If Telescope Nova is not working after installation, it could be due to a number of reasons. Check if you have the latest version of Neovim and that your plugin manager is working correctly. Also, ensure that you have added the correct line to your init.vim or .vimrc file.
How can I contribute to the Telescope Nova project?
Telescope Nova is an open-source project, and contributions are welcome. You can contribute by reporting bugs, suggesting new features, or writing code. Check out the project’s GitHub page for more information.
Can I use Telescope Nova with other Neovim plugins?
Yes, Telescope Nova can be used with other Neovim plugins. However, make sure that there are no conflicts between the plugins.
How can I uninstall Telescope Nova?
To uninstall Telescope Nova, remove the line that you added to your init.vim or .vimrc file. Then, run :PlugClean in Neovim.
Can I use Telescope Nova on other text editors?
Telescope Nova is specifically designed for Neovim. While it may work on other text editors that are compatible with Neovim plugins, it is not guaranteed.
How can I get help if I encounter problems with Telescope Nova?
If you encounter problems with Telescope Nova, you can ask for help on the project’s GitHub page. You can also ask questions on forums like Reddit or Stack Overflow.
 Jelena Jovanovic
Jelena is a co-founder and web developer at Vanila.io. You can follow her work on Twitter and Instagram.