Writing code and managing a good workflow is a challenge. Things can easily get messy, and bugs can appear from seemingly nowhere. This is where Git comes in. No matter who you are, or how much code you write on a daily basis, using Git will change your workflow and coding behaviour for the better and make collaboration in teams possible.
Do you have problems such as obscure file names (eg final, final2, final3)? Do you struggle to tell what’s changed between versions of designs, files or code? Do you ever make changes to a file and then struggle to return to a previous point in the workflow? Version control can help you solve all of these problems.
Git is a version control system. It allows for every change in your projects to get tracked, every line of code added or removed. So when you work on the new feature/redesign-navigation and make it worse, you can roll back to a point when it was working — or easily hand it off to someone who knows how to fix the problem. It can even be used for image files, you don’t necessarily get a pretty overview of what’s changed on most Git platforms, but you’re still able to commit changes to your designs.
Git takes snapshots of your work that live in a project called a repository, also known as a repo. The snapshots make up a history of every change you save. You make these snapshots by committing changes. The commit is the most important part of Git, as it’s the way to save changed or new files to the history. Each commit you make gets a message, and it’s important to always write a message so you know what’s changed. The committing mindset is powerful, because it lets you think about your code (or design) in a modular way, helping you to organise your work in a pragmatic manner.
You might have heard of something called GitHub. GitHub isn’t Git, it’s just a platform for the Git repository. Normally you’d have to install Git on a server and then manage it, but tools were invented to prevent you from having to do this. GitHub is one of them, others are BitBucket and GitLab.
Getting started
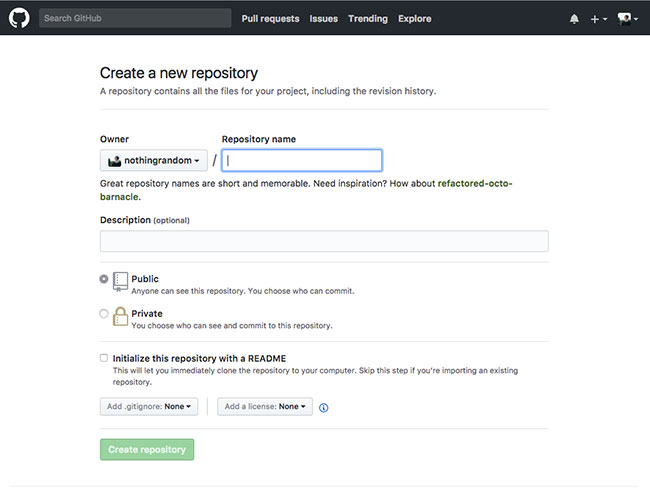
The best way to learn about Git is to do it yourself, so start by creating a GitHub account. Then create a new repository, you can name it whatever you like.
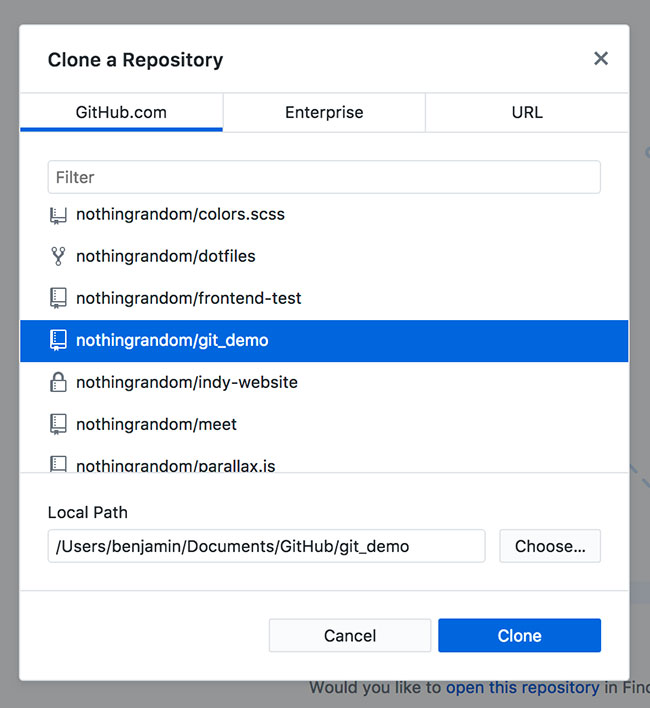
You might have seen someone use Git from the terminal or command line. This is quite easy to do, but for our example, let’s use a UI — the GitHub Desktop App for Windows and macOS.
You now need to clone the repository you just created. Go to ‘File > Clone Repository…’ and select your repository. You’ll be asked to select a folder, this is where the project will be stored on your computer.
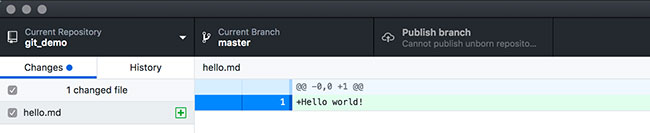
You can now save some changes to your repo. Add any file, and you’ll see the changes in the GitHub App.
So now we’ll add a message, and commit it. The best practice for commit messages is to use present participle tense — or like you’d read in a cookbook:. “Add 250g of flour” (or “add styling for about page”).

When you’re ready to share your code, it’s important to push your changes using the ‘publish’ button, so other people can see them (and so your code is backed up somewhere). And then to get other people’s changes, you should pull their changes by using the ‘fetch origin’ button.
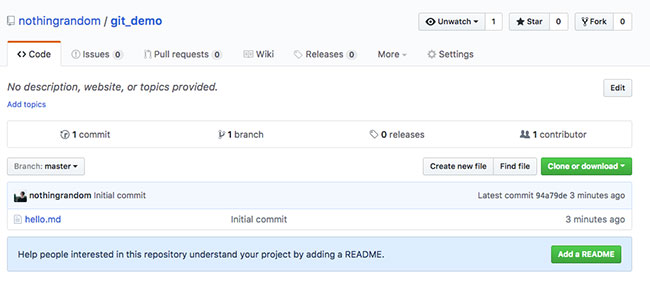
You’ll now have a snapshot of your code history saved, and you’ll be able to see this in the history tab of the GitHub app. Your repo is now also shareable. If you go to your GitHub profile, you’ll be able to see the repository and the file(s) you just added.
Congratulations! You’re now able to use Git to improve your workflow. That wasn’t so hard, was it?
Better collaboration
When you’re collaborating with a friend or a colleague on a project, things can get messy if you don’t keep things organised. If you use the project, and then someone else pushes, you won’t be able to push your changes until you’ve pulled and ‘rebased’ or ‘merged’ the changes. This isn’t the ideal way to use Git.
Git works in a tree like structure. The main element of the project is the ‘master’ or the trunk of a tree. You can create a branch of the tree, work on a specific feature or bug fix on that branch, and then merge it back into master. Let’s try this now.
To create a new branch, go to the branch menu item, between repository and window. Click ‘new branch’ and name it along the lines of what you’re about to do. If it’s a feature, prefix it with feature/. If it’s a bug fix, prefix it with fix/.

As before, create a new file with some text and commit and publish your changes.
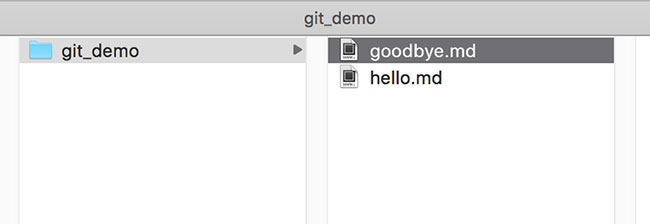
If you now look at your project in Finder / Windows Viewer, you’ll see your two files.
Going back to the GitHub app, click the tab that says ‘current branch’ and then your branch name, and then select ‘master’. This is called a ‘checkout’.
If you look at your file viewer again, you won’t see the new file you just added to the feature/add-new-file branch. This is how branches help to solve issues with collaboration and file management.
When you’ve finished your work, you’re going to want to have them in the master of the project. We need to do this in the GitHub web interface.
Open your project at github.com, and then click the branches tab.
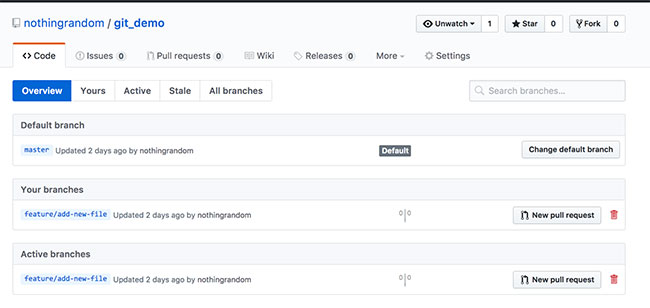
Next to your new branch, there’s a ‘new pull request’ button. Let’s click this. This new view includes all the information you need to see the changes you made between your new branch and master. You can add a pull request message, and set an assignee to approve the pull request which is a good idea if you’re working on a project with other people. When you’ve filled in all the information you feel is necessary for people to properly review your pull request, click the ‘create pull request’ button.
You’ll be taken to a new view, and have the option to merge the pull request. Let’s do this. You should now also delete the branch.

If you go back into the GitHub app, change your branch to master and then fetch origin. You’ll see the merge request in the history tab.
Issue tracking
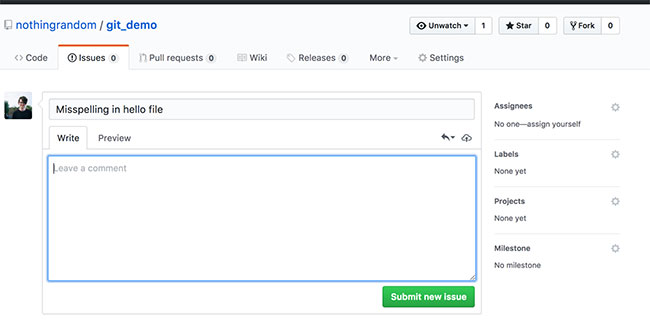
Git platforms come with some great tools for tracking issues, bugs, and feature requests. In the GitHub web interface, go to the issues tab, and click the button that says ‘new issue’.
If you ever use someone else’s GitHub repository and find a bug or need help, this is where you should go to report it so that someone can fix it — but check that someone else hasn’t already submitted one for the same issue!
We’re now going to create a new issue.
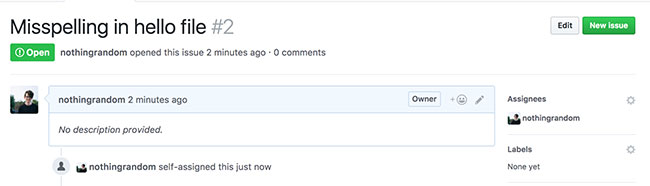
Fairly basic, something that we could fix ourselves. It’s good practice to check for an issue or submit a ticket yourself first to ensure that you don’t work on something whilst someone else is doing the same.
Because we plan on fixing the issue, you should assign it to yourself.
Let’s go fix that issue, and create a commit message for it. Whilst creating the commit message, we can reference the issue. The issue is given a number, in this case it’s #2. To reference it, we use the same syntax.
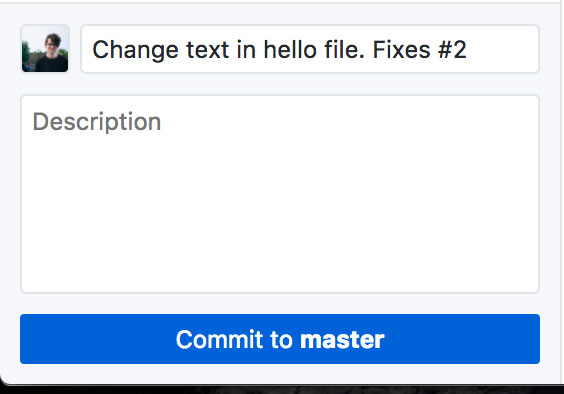
Using the keyword “fixes” automatically closes the issue on GitHub.
More advanced features
.gitignore
When working with Git, you might see ghost files appear such as .DS_Store or Thumbs.db. You can make Git permanently ignore these sorts of files by adding a .gitignore file to your project. I recommend using .gitignore.io to generate a file for you based on your criteria. In the input field, add Git, Windows, macOS, and Linux.
Depending on which tools you’re using, search for them too. If you use Photoshop, add Adobe to your list. If you use the npm package manager, add Node.
When you create the file, you’ll see it in plain text in your browser. You then need to copy all the text, and copy it into a file called .gitignore inside of your project. The . is very important in getting Git to read the file as a settings file.
Releases
When you’re happy with your project, you can create a release. This is a lesser used feature, but quite a nice one to use on larger projects or client projects. Go to the releases tab in the GitHub web interface. Then click ‘create a new release’.
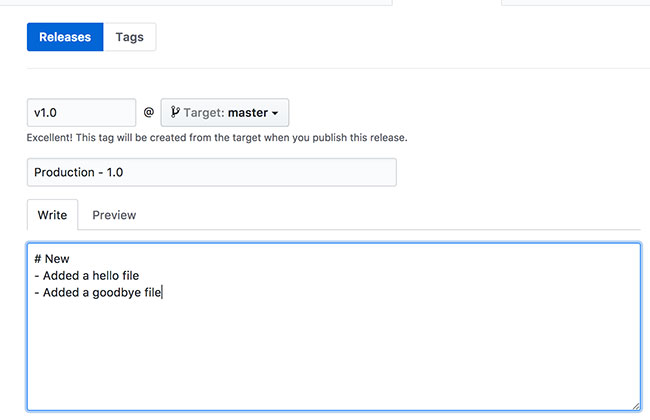
In this section, I’d recommend using the tagging suggestions that GitHub gives you on the right side of the input fields.
In the text area that asks you to describe your release, you should note down your major changes. In a future release of this project, I might be able to list changes and fixes. Think of it similarly to an update to an app you have on your phone.
Forks
GitHub is filled with millions of public repositories. It also has some great ways of searching for new ones such as Explore. You might find a project that would work well for your team, but needs a little bit of tweaking. You can change someone’s code without annoying them, you just need to fork their code.
Open a repository, and then along the very top there are three primary action buttons.
‘Watch’ allows you to get notifications to your email about changes. ‘Star’ allows you to show your support of a project. It’s similar to the ‘Like’ button on Facebook or the heart on Twitter. And finally, there’s the ‘fork’ button. If you click it, you’ll be taken to a new view that will look quite similar to the previous one. However, if you look across the top of the page, you’ll see that the project’s name is now proceeded by your username and there will be some text that says “forked from username/project”.
You’re now able to clone this project to your machine and work from it locally and make as many changes as you like.
You may even end up adding a new cool feature or fixing a bug. Then you have the ability to create a pull request to the original project and contribute to the open source ecosystem. You’re also now able to use Git in a work environment, you know the basics and that’s all you need to know to get started and to get your colleagues involved too. One of the great things about Git is that you can make it fit to your needs and requirements. There aren’t really too many right or wrongs.
Resources
In this article we used the tools GitHub and the GitHub Desktop app. Here are some other great tools:
UIs
- Tower: This is one of the most advanced Git apps, but it comes with a higher price tag.
- SourceTree: A fantastic and free Git app made by Atlassian, creators of Jira and Bitbucket.
- Abstract: This one is specifically for design files!
Git platforms
- Gitlab: GitLab has free private repositories (unlike GitHub) but lacks the same community behind open source projects. You can also get a corporate plan and host it yourself.
- BitBucket: BitBucket is designed for teams and self hosting, so it’s great to use in a business environment. It also integrates well with Jira.
Further reading
- GitHub Help: It has a lot of content, and I don’t recommend you read every word, but there’s a search function to find the information you need.
Comments
Please remember that all comments are moderated and any links you paste in your comment will remain as plain text. If your comment looks like spam it will be deleted. We're looking forward to answering your questions and hearing your comments and opinions!