


Last week we created a textured paper canvas and got a healthy dose of the P5 API and JavaScript’s Math.random() function. This week, we’re going to look at a specific element of watercolor to see if we can emulate it on our canvas: the edge color.
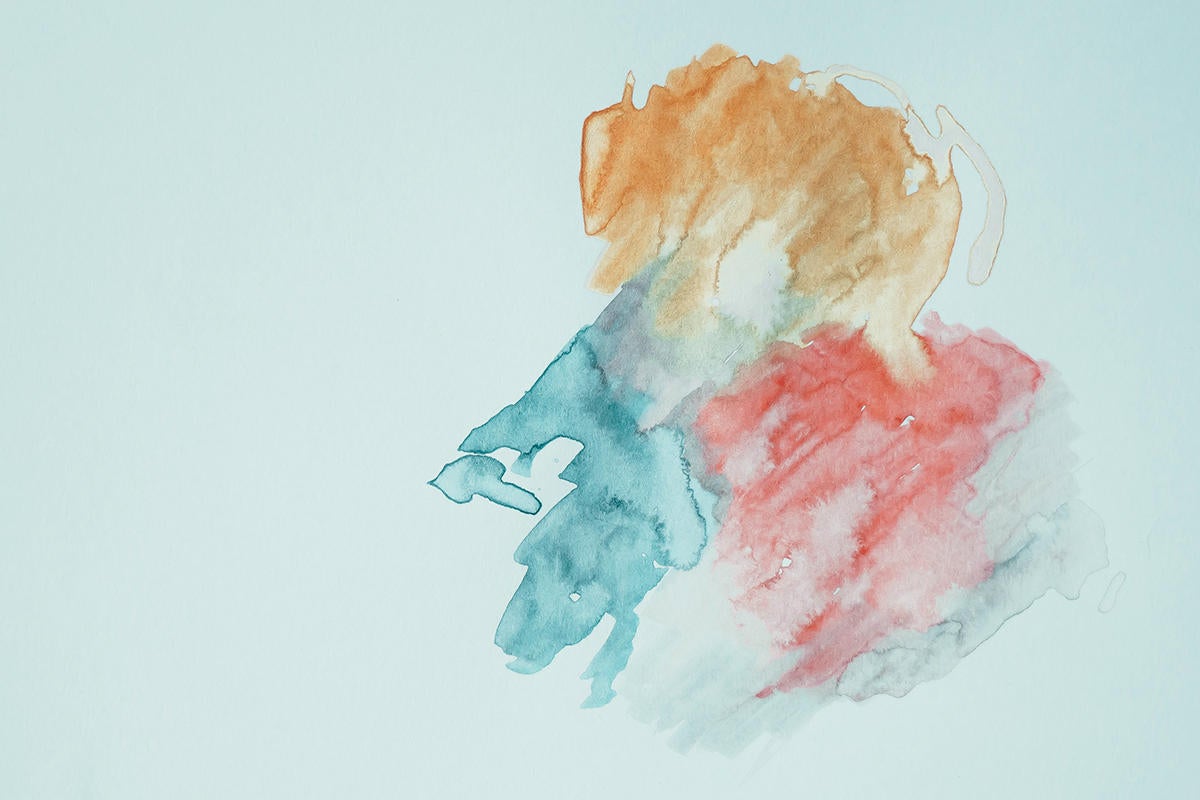 Annie Spratt (CC0)
If you take a look at the various paint blots in the watercolor above, you may notice that in many cases the saturation of color increases dramatically at the edges. This dramatic increase in saturation is going to be the goal of this week’s exercise. You’ll also notice that the shapes are very irregular, which is a complicating detail I’m going to leave off for now by just drawing perfect circles.
We left off with the foundation of P5 code that draws a textured paper canvas for us to draw on:
 IDG
IDGFor starters, let’s create a function that draws a watercolor spot with a given position, radius, and hue. P5.js gives us a function to draw an ellipse that we already used last week. By pairing that with some functions to define the fill color and stroke, we should be able to draw a spot. First I’ll define our drawSpot function to draw a circle with at the position and hue that we pass in:
const drawSpot = (p5, x, y, radius, hue) => {
  p5.fill(
    hue,
    100,
    100
  );
  p5.ellipse(x, y, radius, radius);
};
Next, we’ll call this function from our draw method, arbitrarily choosing to draw the circle in the middle of the canvas with a radius of 200 and a bluish hue:
drawSpot(p5, CANVAS_WIDTH/2, CANVAS_HEIGHT/2, 200, 70);
 IDG
IDG
Very blue. Not very watercolory.
That’s a start, but it doesn’t capture any of the essence of watercolor. The ink in watercolor isn’t so dense that you can’t see the paper behind it; in fact in some places the ink fades away completely. If we add a fourth argument to our call to p5.fill(), we can specify a transparency value between 0 and 100, where 0 is invisible and 100 is completely opaque. I zeroed in on 10 as a decent starting point:
 IDG
IDGNow in order to get the edge of the circle darker, we can simply redraw the edge by specifying p5.noFill() and defining a stroke color using p5.stroke() before making the same call to p5.ellipse(). For now, I’ve just arbitrarily decided to use the same hue, saturation, brightness, and alpha as we used for the first fill. The result is that the overlaid outline will be somewhat more opaque than the circle by itself.
const drawSpot = (p5, x, y, radius, hue) => {
  p5.fill(
    hue,
    100,
    100,
    10
  );
  p5.ellipse(x, y, radius, radius);
  p5.noFill();
  p5.stroke(
    hue,
    100,
    100,
    50
  );
  p5.ellipse(x, y, radius, radius);
};
IDG
IDG
Edge definition.
We can see some edge definition now, but we’re still missing the effect where the ink opacity increases at the edge. This got me thinking about how opacity blends, and that if you keep drawing a 10 percent opaque line on itself it will become more and more opaque. With this in mind, I also thought about the effect of increasing the stroke width to start, then slowly decreasing it while drawing over with a light opacity. To give you an example of what I mean, the image below is our circle with three edge strokes, one with a width of 15 pixels, one with a width of 5 pixels, and one with a width of a single pixel. Each stroke has the same opacity: 20.
 IDG
IDGSee how drawing over the same place with the same opacity darkens the color? Now instead of choosing three stroke widths, let’s try the strokes at 1-pixel increments using a simple for loop. In the code below, note that I have subtracted the stroke width from the radius of the ellipse we’re drawing. This is because the stroke is an outline of the shape and extends beyond the radius. Because we want the stroke to be contained within the shape, we have to subtract the stroke width from the radius. I have also taken the opacity down to 3 because we’re adding many more layers than before.
const drawSpot = (p5, x, y, radius, hue) => {
  p5.fill(
    hue,
    100,
    100,
    10
  );
  p5.ellipse(x, y, radius, radius);
  p5.noFill();
  for(let i = 6; i > 0; i--) {
    p5.stroke(
      hue,
      100,
      100,
      3
    );
    p5.strokeWeight(i);
    p5.ellipse(x, y, radius - i, radius - i);
  }
};The increase in ink density is starting to go in the right direction. Because I wanted a harder edge, I added one last 1-pixel stroke after the loop with 20 percent opacity. Now we can add a bit of randomness and draw a bunch of these spots across the canvas in our draw function:
    for (let i = 0; i < 10; i++) {
      let hue = Math.random() * 100;
      let radius = Math.random() * 250 + 50;
      let x = Math.random() * CANVAS_WIDTH;
      let y = Math.random() * CANVAS_HEIGHT;
      drawSpot(p5, x, y, radius, hue);
    }
IDG
IDG
It looks more like a Lisa Frank design than a watercolor, but it’s getting there.
We’re not quite there yet, and adding irregularity to the circles will involve more math than most people want to read about, but next week we’ll discuss some final tips and tricks that might help you on your own generative art journey. The code we built up today is available on GitHub, so feel free to pull it down and play around with it.
Have thoughts or suggestions on how to improve the watercolor effect? Want to share your own work? Continue the conversation in the comments below or on Twitter @freethejazz.