
In recent years, we’ve seen a proliferation of JavaScript tools and frameworks, such as Angular and React. I remember when I bought a book about Grunt.js: it was already being dropped by developers, who had started using other tools like Gulp, “the streaming build system”. But anyone who jumped on that train was likely to switch again really fast, because webpack came along and replaced them all.
But among JavaScript frameworks, one has seen particularly rapid growth in recent years: Vue.js. It’s been so popular that its rate of growth has become explosive compared to others in this space.
Vue has become one of the primary contenders due its soft learning curve. It lends itself nicely to gradual implementation. It has a modular, component-based architecture. And it has wide usage and a developed ecosystem of tools. If you’re interested in getting started with Vue, you can check out our book Jump Start Vue.js to start getting on your way to using Vue in your projects.
Vue Tools, Terminology and Landscape
As with most technologies one ventures to master, getting to grips with Vue includes getting to know the terms and concepts, and getting comfortable with its ecosystem of tools and building blocks.
Vue Router is an indispensable part of all Vue single-page applications. It provides navigation control, nested routing, route-view mapping, and many other features.
Vuex is a “state management pattern + library” for Vue apps. It’s like a centralized data store helping us to manage state in our applications, across all components. Handling stage across multiple parts of front-end applications can quickly get out of hand, and thus the need for a comprehensive solution. We talk more about Vuex in our Vuex Beginners Guide.
Vue devtools can make life easier for developers. It helps you keep track of the components, state, and events in our applications. You can find more about this tool in Chapter 2 of our book dedicated to Vue tools.
Vue Cli provides a command-line toolset for building Vue applications — prototyping, fast scaffolding of JavaScript applications with included CSS pre-processors, ESLint, Babel, Typescript support, PWA support, and so on. Vue CLI — especially in its latest incarnation — is a game changer, and presents a little ecosystem of its own. The Vue CLI 3 plugin for building Electron applications is one very good example. We also devoted a whole book to it, the Beginner’s Guide to Vue CLI, so you can dive right in.
Vue Component System is another one of Vue’s strengths. It enables us to modularize our applications, to encapsulate pieces of markup, logic and styling and reuse them.
Vue Cli Plugin Component, by David Desmaisons, helps with development of components to be published on npm.
If you’re looking for a deep dive into these and other Vue.js tools, I recommend you take a look through Vue.js: Tools & Skills.
Awesome Vue is also an excellent resource. It’s an in-depth, categorized, up-to-date collection/repo of all the pieces of the Vue ecosystem and Vue.js resources.
Quasar, the Vue framework we’re covering here, also has Awesome Quasar, an excellent repo page with many useful resources.
Quasar
Vue is a JavaScript framework for building user interfaces. On its own, however, it doesn’t provide actual UI elements, or components, or consistent designs we can use. That’s why, on top of Vue, many UI frameworks have been built, to provide users with reusable, styled components. We can think of it like different takes on Twitter’s Bootstrap — only for Vue.
If you’re interested in finding out more, I recommend taking a look at “Five Vue UI Libraries for Your Next Project”, which is Chapter 3 of Vue.js: Tools & Skills. One serious contender in this space, which we didn’t cover, is Vuetify, a material design component framework with quite a big following. Another one is Quasar.
Quasar is a high performance, Material Design 2, full front-end stack for Vue.js.
It’s an MIT-licensed, simple-to-use but powerful UI kit that supplements Vue.js to provide a full-featured toolset for building responsive front-end apps without having to delve too deep into the scaffolding and configuration.
As we can see in the Quasar docs, it comes with a lot of UI components, and layout elements and helpers.
It gives us three ways to bootstrap our app:
- UMD / Standalone makes it possible to start small, by including scripts and styles we need from a CDN. This method doesn’t rely on VUE CLI or the building of assets.
- Quasar CLI claims to be “the pride of the Quasar framework”, and is the recommended way of building Quasar applications. It can be used to build:
- SPAs (single-page apps/websites)
- SSRs (server-side rendered apps/websites)
- PWAs (progressive web apps)
- mobile apps (through Cordova)
- Electron apps
- Vue CLI 3 plugin
We’ll follow Quasar team’s recommendation and use Quasar CLI.
Bootstrapping a Quasar App with Quasar CLI
Before we install Quasar CLI, we need to make sure we have the right versions of node (>= 8 at the time of writing) and npm (>= 5). If not, we need to either install or update it. Then we can install Quasar CLI:
sudo npm install -g @quasar/cli
Now we can use it to bootstrap our projects. Quasar has a thorough documentation on Quasar CLI. We’ll skim through it and discuss most relevant parts.
The command we use is quasar + subcommand. Just quasar will list the commands for us, and quasar <command> --help will get us the help for the given subcommand.
We use quasar create to scaffold a quasar project.
We’re then presented with a list of choices about the project we want to bootstrap.
After the project is scaffolded, we can cd into the directory and start a development server with quasar dev. The project is built and the browser will open the provisional index page on localhost.
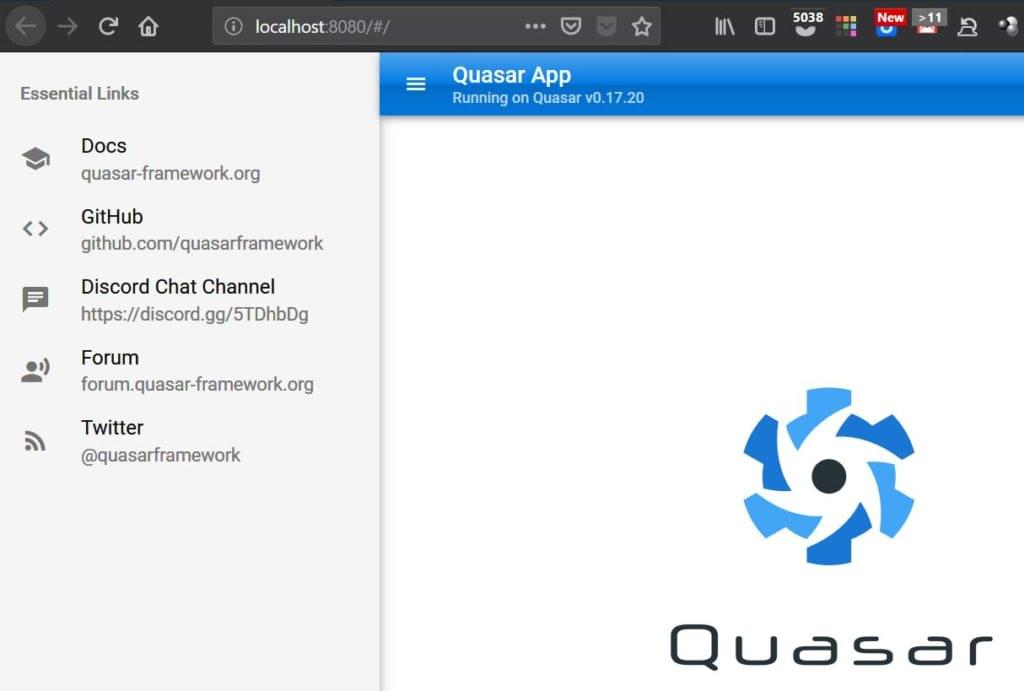
Note: for production, once our project is done, we’d be using quasar build to compile our resources.
The dev server provides us with Hot Reload, which preserves the state in the browser through reloads.
Hot Reload is much more than just refreshing your browser when the code changes. It skips the refresh and updates your code on the fly, while maintaining your app’s state (like your Vue’s model data).
As we write code and save our files/Vue components, along with a page reload in the browser, the terminal shell in which we started the dev server will output many errors in the code. This section in Vue.js: Tools & Skills gives a pretty good explanation of why.
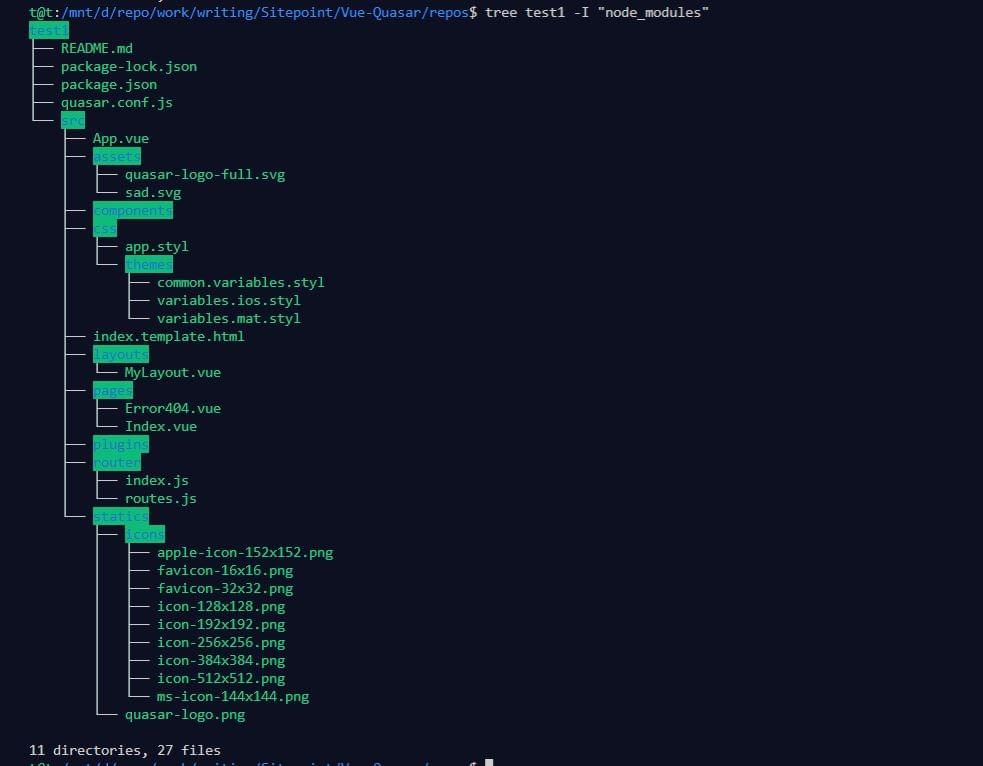
Once we’ve bootstrapped our project, we get this directory structure (with the exclusion of node_modules):
Quasar Components
Quasar components are just Vue components, and there’s a pretty good explanation of these in Jump Start Vue.js in Chapter 3 on “Components”, and also in A Beginner’s Guide to Working With Components in Vue. When we bootstrapped our project, quasar created a file quasar.conf.js in the root folder, which holds all of our configuration settings.
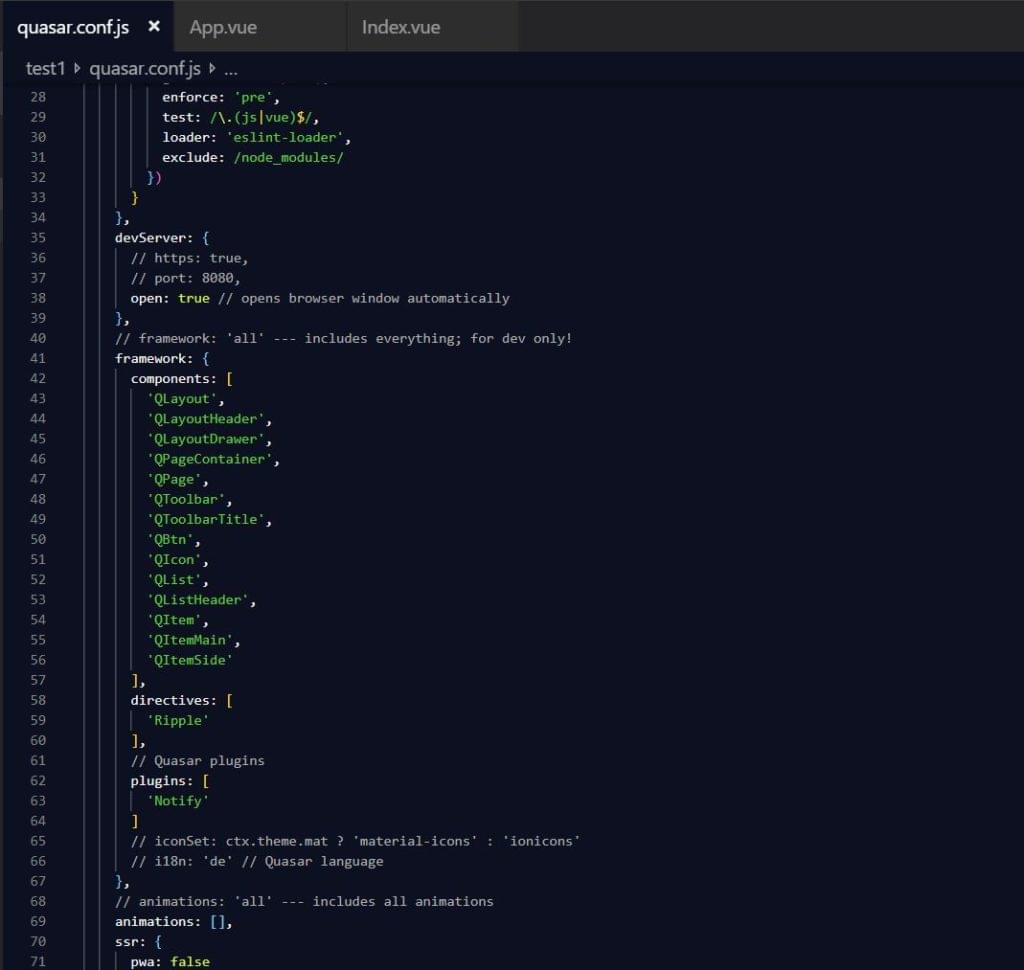
Here, we can change our project configuration, you can add or remove dependencies, quasar components, and so on. We can see that, by default, quasar includes components like QLayout, QPage, and QPageContainer, which pertain to CSS layout. You can find out more about it here. One caveat, though: when using these components, you should not use the margin css property on them, as it will break the layout. Quasar also provides a layout builder — a small web app that can help us build through the web UI, and then export and use our layout.
Quasar has created router/routes.js file with an index route, specifying layout and page for the root path:
const routes = [
  {
    path: '/',
    component: () => import('layouts/MyLayout.vue'),
    children: [
      { path: '', component: () => import('pages/Index.vue') }
    ]
  }
]

// Always leave this as last one
if (process.env.MODE !== 'ssr') {
  routes.push({
    path: '*',
    component: () => import('pages/Error404.vue')
  })
}

export default routes
So, in order to add components or change the index page, we’ll change the MyLayout.vue or Index.vue files referenced in the root (/) route.
Now, the quasar create generator by default creates a Quasar 0.17 version project, and not the latest major version, which is still in beta. Apparently the new version uses different nomenclature for components — such as QLayout instead of QLayoutHeader — so this is something to be aware of.
If we want to use the new beta version, we’ll need to scaffold our project like this:
quasar create <folder_name> -b dev. Bear in mind that the generator we just mentioned is also for the new beta version.
The generator will then produce markup that we can export, like so:
<template>
  <q-layout view="hHh lpR fFf">

    <q-header reveal class="bg-primary text-white">
      <q-toolbar>
        <q-toolbar-title>
          <q-avatar>
            <img src="https://cdn.quasar-framework.org/logo/svg/quasar-logo.svg">
          </q-avatar>
          Title
        </q-toolbar-title>

        <q-btn dense flat round icon="menu" @click="right = !right" />
      </q-toolbar>
    </q-header>

    <q-drawer v-model="right" side="right" bordered>
      <!-- drawer content -->
    </q-drawer>

    <q-page-container>
      <router-view />
    </q-page-container>

  </q-layout>
</template>

<script>
export default {
  data () {
    return {
      right: true
    }
  }
}
</script>
Now we’ll replace the content of src/layouts/MyLayout.vue with the above content, and add the QAvatar component to the quasar.conf.js file.
![]()
Once we save those changes, we should see the result in our browser.
Now we’ll add a quasar table component to the central area by adding code to src/pages/Index.vue. We’ll simply replace the Quasar logo img tag:
<img alt="Quasar logo" src="~assets/quasar-logo-full.svg">
… with table code:
<div class="q-pa-md">
  <q-table
    title="Treats"
    :data="data"
    :columns="columns"
    row-key="name"
  />
</div>
We’ll also add the following to the export default object in the <script> tag in the same file:
data () {
    return {
      columns: [
        {
          name: 'name',
          required: true,
          label: 'Dessert (100g serving)',
          align: 'left',
          field: row => row.name,
          format: val => `${val}`,
          sortable: true
        },
        { name: 'calories', align: 'center', label: 'Calories', field: 'calories', sortable: true },
        { name: 'fat', label: 'Fat (g)', field: 'fat', sortable: true },
        { name: 'carbs', label: 'Carbs (g)', field: 'carbs' },
        { name: 'protein', label: 'Protein (g)', field: 'protein' },
        { name: 'sodium', label: 'Sodium (mg)', field: 'sodium' },
        { name: 'calcium', label: 'Calcium (%)', field: 'calcium', sortable: true, sort: (a, b) => parseInt(a, 10) - parseInt(b, 10) },
        { name: 'iron', label: 'Iron (%)', field: 'iron', sortable: true, sort: (a, b) => parseInt(a, 10) - parseInt(b, 10) }
      ],
      data: [
        {
          name: 'Frozen Yogurt',
          calories: 159,
          fat: 6.0,
          carbs: 24,
          protein: 4.0,
          sodium: 87,
          calcium: '14%',
          iron: '1%'
        },
        {
          name: 'Ice cream sandwich',
          calories: 237,
          fat: 9.0,
          carbs: 37,
          protein: 4.3,
          sodium: 129,
          calcium: '8%',
          iron: '1%'
        },
        {
          name: 'Eclair',
          calories: 262,
          fat: 16.0,
          carbs: 23,
          protein: 6.0,
          sodium: 337,
          calcium: '6%',
          iron: '7%'
        },
        {
          name: 'Cupcake',
          calories: 305,
          fat: 3.7,
          carbs: 67,
          protein: 4.3,
          sodium: 413,
          calcium: '3%',
          iron: '8%'
        },
        {
          name: 'Gingerbread',
          calories: 356,
          fat: 16.0,
          carbs: 49,
          protein: 3.9,
          sodium: 327,
          calcium: '7%',
          iron: '16%'
        },
        {
          name: 'Jelly bean',
          calories: 375,
          fat: 0.0,
          carbs: 94,
          protein: 0.0,
          sodium: 50,
          calcium: '0%',
          iron: '0%'
        },
        {
          name: 'Lollipop',
          calories: 392,
          fat: 0.2,
          carbs: 98,
          protein: 0,
          sodium: 38,
          calcium: '0%',
          iron: '2%'
        },
        {
          name: 'Honeycomb',
          calories: 408,
          fat: 3.2,
          carbs: 87,
          protein: 6.5,
          sodium: 562,
          calcium: '0%',
          iron: '45%'
        },
        {
          name: 'Donut',
          calories: 452,
          fat: 25.0,
          carbs: 51,
          protein: 4.9,
          sodium: 326,
          calcium: '2%',
          iron: '22%'
        },
        {
          name: 'KitKat',
          calories: 518,
          fat: 26.0,
          carbs: 65,
          protein: 7,
          sodium: 54,
          calcium: '12%',
          iron: '6%'
        }
      ]
    }
  }
}
(It’s an object that we grabbed from Quasar docs.)
We also need to add the QTable component to quasar.conf.js like with QAvatar, and now we should see a table in the middle of our layout:
Reference for the table component can be found here.
A new addition to Quasar v1 is QMarkupTable, a component that can be used to wrap a regular HTML table to give it material design styling.
In order to test another component, we’ll add an /editor route to router/routes.js:
const routes = [
  {
    path: '/',
    component: () => import('layouts/MyLayout.vue'),
    children: [
      { path: '', component: () => import('pages/Index.vue') }
    ]
  },
  {
    path: '/editor',
    component: () => import('layouts/MyLayout.vue'),
    children: [
      { path: '', component: () => import('pages/Editor.vue') }
    ]
  }
]

// Always leave this as last one
if (process.env.MODE !== 'ssr') {
  routes.push({
    path: '*',
    component: () => import('pages/Error404.vue')
  })
}

export default routes
We’re now adding an editor component. We’ll add QEditor to quasar.conf.js, and we’ll copy src/pages/Index.vue to src/pages/Editor.vue.
Then we add this code to the copy where we originally replaced the img tag in Index.vue file:
 <div class="q-pa-md q-gutter-sm">
    <q-editor
      v-model="editor"
      :definitions="{
        save: {
          tip: 'Save!',
          icon: 'save',
          label: 'Save',
          handler: saveWork
        },
        upload: {
          tip: 'Upload!',
          icon: 'cloud_upload',
          label: 'Upload',
          handler: uploadIt
        }
      }"
      :toolbar="[
        ['bold', 'italic', 'strike', 'underline'],
        ['upload', 'save']
      ]"
    />
  </div>
Note: we also remove flex classes from q-page tag in Editor.vue.
We also need to make sure that the script tag in the Editor.vue file looks like this:
<script>
  export default {
    name: 'PageEditor',
    data () {
      return {
          editor: 'this is a test'
      }
    },
    methods: {
      saveWork () {
        this.$q.notify({
          message: 'Saved your text in the browser storage',
          color: 'green-4',
          textColor: 'white',
          icon: 'fas fa-check-circle'
        })
      },
      uploadIt () {
        this.$q.notify({
          message: 'Error! Check your connection',
          color: 'red-5',
          textColor: 'white',
          icon: 'fas fa-exclamation-triangle'
        })
      }
    }
  }
</script>
Note: when we compile this, we may get indentation errors, which should not be too hard to solve.
When we navigate to http://localhost:8080/#/editor, we should see the editor:
This is a WYSIWYG editor – and it has more items available for its toolbar.
In reality, we would be adding axios to our app — a recommended library for Ajax requests — and Vuex for the handling of data among other Quasar utilities.
Conclusion
Quasar provides lots more components, features, styles, and utilities than we were able to cover in this tutorial. It’s a well-rounded framework for creating single-page applications, but is not restricted to that.
This is a mere introduction to it, and by no means a comprehensive one. But we covered the part that is most often the biggest obstacle to adoption: understanding the setup and scaffolding process. With the rest of the literature on Vue.js in our library, and excellent documentation on the Quasar website, this tutorial should make it possible for you to jump right into making real life Quasar applications.
Frequently Asked Questions (FAQs) about Vue.js and Quasar Framework
What are the key differences between Vue.js and Quasar Framework?
Vue.js is a progressive JavaScript framework used for building user interfaces. It is flexible and can be integrated into projects where other JavaScript libraries are being used. On the other hand, Quasar Framework is a high-performance, Material Design 2, full-front-end stack for Vue.js. It provides a variety of pre-developed components and features that can help speed up development time. Quasar is built on Vue.js, meaning you can use all the features of Vue.js within Quasar.
How does Quasar Framework enhance the capabilities of Vue.js?
Quasar enhances Vue.js by providing a complete suite of pre-developed components, utilities, and features. This includes layout and grid system, form components, typography, and much more. It also provides support for building mobile apps with Cordova or Electron, which is not natively available in Vue.js. This means you can use the same codebase to build for different platforms, which can significantly reduce development time and cost.
Is Quasar Framework compatible with Vue 3?
Yes, Quasar Framework is compatible with Vue 3. The Quasar team has been actively working on ensuring compatibility with Vue 3 since its release. This means you can take advantage of the improvements and features in Vue 3 when building applications with Quasar.
How does Quasar compare to Vuetify?
Both Quasar and Vuetify are Vue.js frameworks that provide Material Design components. However, Quasar offers more features out of the box, such as support for building mobile apps and desktop apps. It also provides a more comprehensive suite of components and utilities. On the other hand, Vuetify may be a better choice if you are looking for a more minimalistic approach and prefer to add additional features as needed.
Can I use Quasar with other JavaScript frameworks?
Quasar is specifically designed to work with Vue.js. This means it may not work correctly with other JavaScript frameworks. However, since it’s built on Vue.js, you can use it alongside any libraries or tools that are compatible with Vue.js.
What are the benefits of using Quasar for my Vue.js projects?
Quasar can significantly speed up your Vue.js development process by providing a wide range of pre-developed components and features. It also allows you to write code once and deploy it on multiple platforms, including web, mobile, and desktop. This can save a lot of time and resources in development.
Is Quasar suitable for large-scale projects?
Yes, Quasar is suitable for both small and large-scale projects. It provides a scalable and maintainable structure that can handle complex applications. It also includes features for optimizing performance, such as lazy loading and code splitting, which can be crucial for large-scale projects.
How steep is the learning curve for Quasar?
If you are already familiar with Vue.js, learning Quasar should be relatively straightforward. The Quasar documentation is comprehensive and provides a lot of examples and guides to help you get started.
What kind of support is available for Quasar?
Quasar has a vibrant and active community where you can get help and support. There are also numerous tutorials, guides, and resources available online. The Quasar team also provides regular updates and improvements to the framework.
How does Quasar handle responsiveness and cross-platform compatibility?
Quasar has built-in support for responsiveness and cross-platform compatibility. It provides a flexible grid system and components that automatically adapt to different screen sizes. It also allows you to build apps for different platforms, including web, iOS, Android, and Electron, from the same codebase.
 Tonino Jankov
Tonino is a web developer and IT consultant who's dived through open-source code for over a decade. He's also a crypto enthusiast, Linux fan, and moderate libertarian.