

What is A-Frame?
Well as I mentioned Mozilla is a big driving force in WebVR at the moment and they helped create A-Frame, a web framework for building Virtual Reality experiences. It has since blossomed into one of the largest and most exciting open source projects and is growing and evolving quickly. A-Frame is one of the simplest frameworks I’ve had the pleasure of working with, yet the things you can create with it are amazing. It’s simple to get going, easy to understand, and yet extremely powerful. In A-Frame’s own words:A-Frame is based on top of HTML, making it simple to get started. But A-Frame is not just a 3D scene graph or a markup language; the core is a powerful entity-component framework that provides a declarative, extensible, and composable structure to three.js.
Why Should I Make WebVR Content?
Let’s get one thing straight: WebVR and A-Frame are still not useable everywhere. This technology is moving fast, but is still pretty experimental. Also WebVR is not going to replace the way we build websites at the moment (at least not for a while). I predict 2D views with normal monitors and screens will still be the dominant way we consume content for a long time. So I think the main reason to make WebVR content is for fun. It’s a new and exciting technology and we can make really, really cool things with it. Some of those projects could become client projects, a museum could hire you to create a virtual tour for them, or a game could take off and you could get money for it. But in the main we should be having fun, and creating exciting things with WebVR and A-Frame.Let’s Make Something
In my opinion the best way to get excited about a framework like A-Frame is to crack on and build something. We’re going to build a fairly simple Virtual Reality Art Gallery whilst introducing you to some of the core functionality of A-Frame.Getting Started
First things first, we’ll need a local server. If you’ve already got a way you do this, great. If not I recommend setting up a node server with http-server. Ok, when you’ve got a local server running let’s dive into A-Frame. We’ll begin with a basic HTML document called index.html and load the A-Frame library into the head of the document. A-Frame should be loaded in the head so that it’s ready before the custom elements we’re going to be adding are loaded.<html> <head> <script src="https://aframe.io/releases/0.7.0/aframe.min.js"></script> </head> <body> </body> </html>Now we have A-Frame loaded, let’s prepare the HTML document for a A-Frame scene. A-Frame is based on top of HTML and uses Custom Elements to abstract away much of the complexity. Let’s place an <a-scene> into the document. All of our A-Frame components will be added within this a-scene tag so this is becomes our parent component.
<html>
 <head>
 <script src="https://aframe.io/releases/0.7.0/aframe.min.js"></script>
 </head>
 <body>
 <a-scene>
 </a-scene>
 </body>
</html>
This is all of the structural work done. I know right? Super simple. We don’t have any objects in the scene yet so it’s just going to be a blank screen but we can add the example objects from the A-Frame tutorial quickly.
<a-box position="-1 0.5 -3" rotation="0 45 0" color="#4CC3D9"></a-box>
<a-sphere position="0 1.25 -5" radius="1.25" color="#EF2D5E"></a-sphere>
<a-cylinder position="1 0.75 -3" radius="0.5" height="1.5" color="#FFC65D"></a-cylinder>
<a-plane position="0 0 -4" rotation="-90 0 0" width="4" height="4" color="#7BC8A4"></a-plane>
<a-sky color="#ECECEC"></a-sky>
Wow. Ok, maybe not totally awesome as it’s just some shapes, but hey, in a few lines we have some 3D objects being loaded in WebVR. Next we’ll start making our Virtual Reality Art Gallery.
Downloading Our Assets
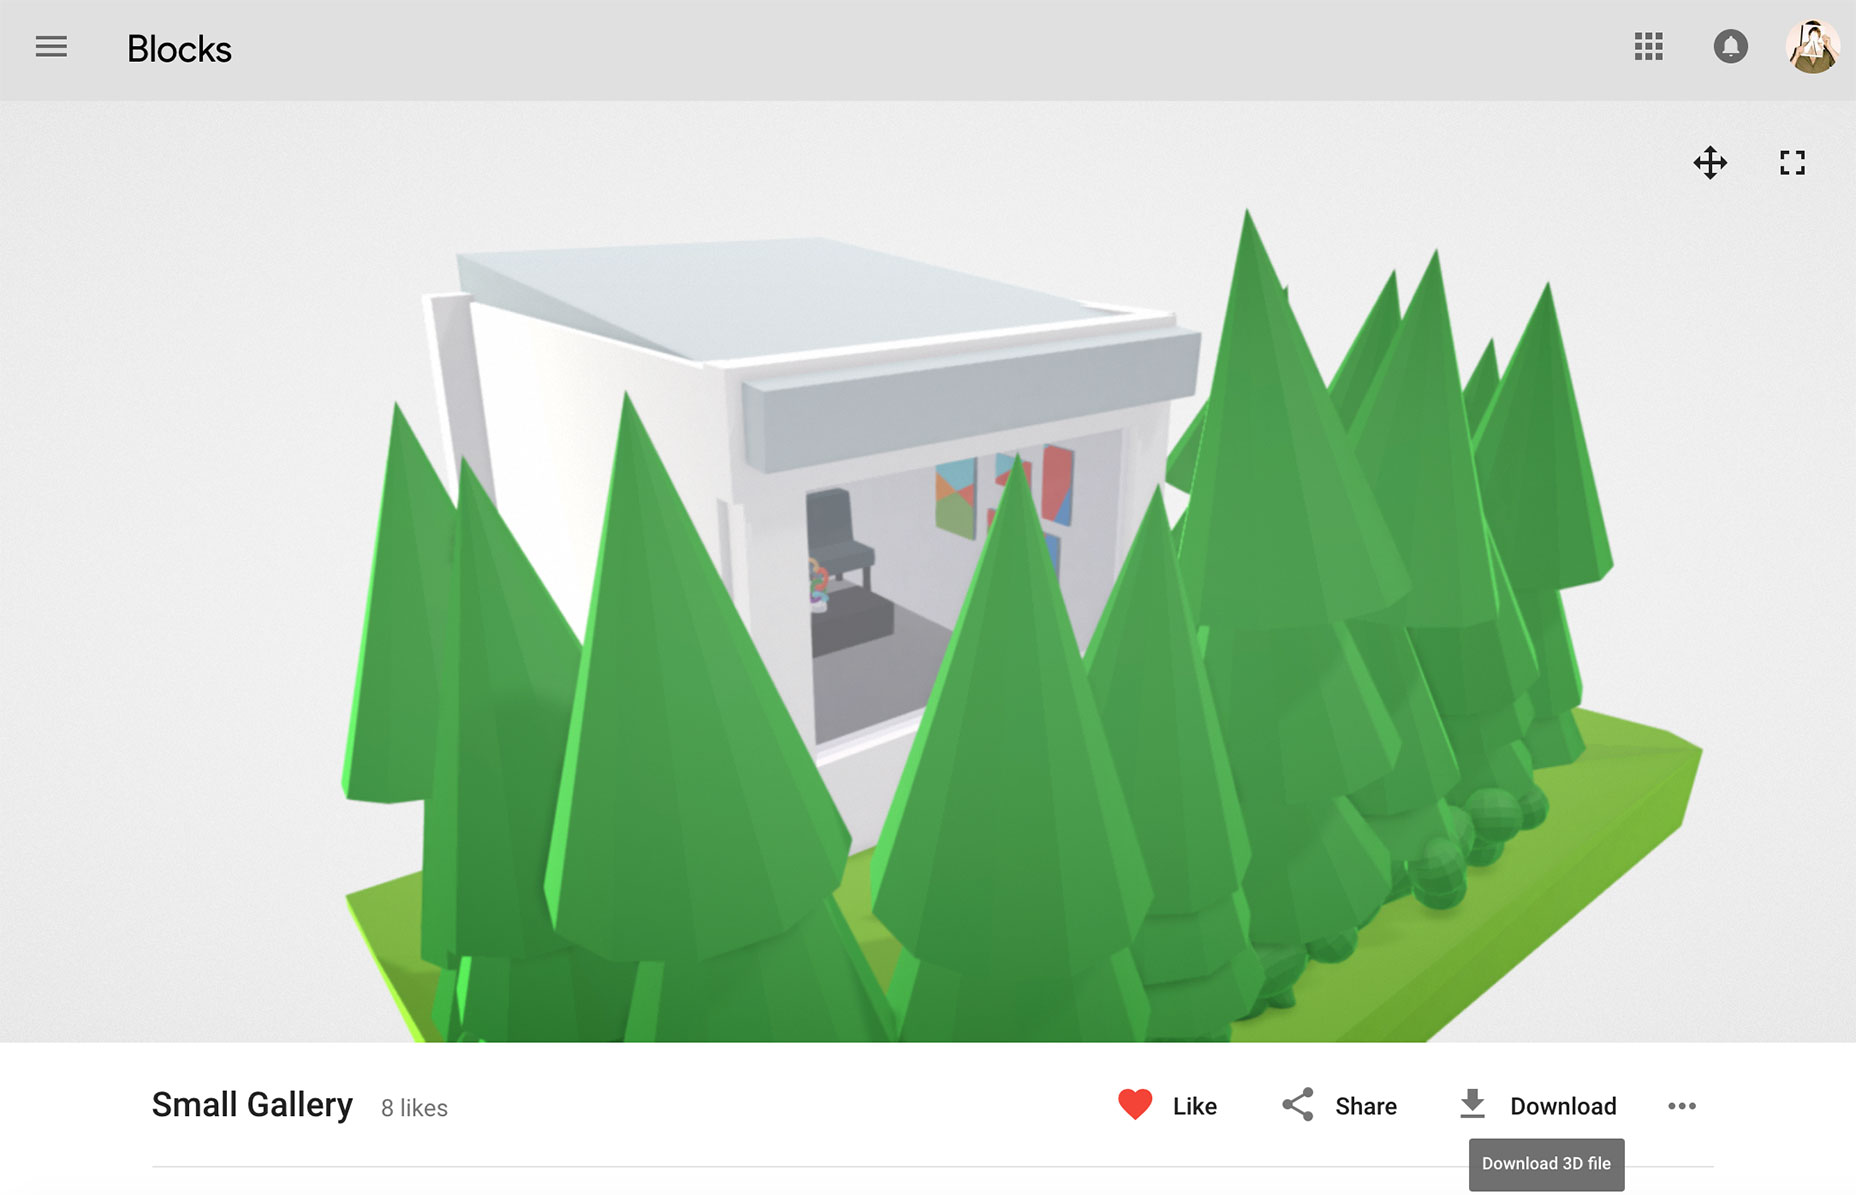
So we don’t forget, clear all the content from inside your scene, so now your file should look like this:<html> <head> <script src="https://aframe.io/releases/0.7.0/aframe.min.js"></script> </head> <body> <a-scene> </a-scene> </body> </html>Now we’ve got a clean slate let’s go find a 3D model to use. There’s several places online where we can download models, and you can find pretty much anything if you’re willing to pay for them. We’re going to get a model from the Google Blocks gallery. Google Blocks is an application for creating 3D models in VR which is awesome in it’s own right. The gallery is where people share their creations and where we will be downloading the “Small Gallery” model from. Head to the Google Blocks page for this model and click on download. This will download a folder with two files inside it; a model.obj and a materials.mtl. Place these two files inside a folder called “gallery” and put this folder next to your index.html file. We will need both of these files to render the model correctly and we’ll be adding them into A-Frame next.
 Your project should currently look like this:
index.html
gallery/model.obj
gallery/materials.mtl
Creating a VR Gallery Space
Now we’ll load the model we downloaded into our project. A-Frame comes with a built in asset management system, which preloads and caches our assets. This is a great feature that abstracts away a really important step and makes our lives a lot easier. Let’s load our object and our material into the asset loader:<a-assets> <a-asset-item id="gallery-obj" src="/gallery/model.obj"></a-asset-item> <a-asset-item id="gallery-mtl" src="/gallery/materials.mtl"></a-asset-item> </a-assets>The <a-asset-item> needs an id attribute which is how we’ll be targeting each asset, and a src attribute which is where we load the files. Now we can add this object to the scene by using the entity element. The entity element is one of the core elements in A-Frame and you’ll probably use this quite a bit. As we’re using it as a placeholder for our object we need to actually load the object and material into it.
<a-entity obj-model="obj: #gallery-obj; mtl: #gallery-mtl"></a-entity>If you refresh your page you should hopefully see the model in the centre of the screen. The positioning will probably be off but you should be able to look around. Let’s fix the positioning now by adding a camera element manually and positioning it.
<a-entity id="camera" camera look-controls></a-entity>As you can see the camera element is actually a camera component attached to an entity element and we can add the ability to look around with the look-controls component. Now we have the camera element added lets position it. Positioning takes three values, an X, Y and Z and we’ll start by setting a default of 0 on each of these.
<a-entity id="camera" camera position="0 0 0" look-controls></a-entity>As you can probably tell straight away, trying to position an X, Y and Z value just in code will be a bit tricky and is a recipe for headaches. Fortunately, we’ve got access to an awesome A-Frame Inspector to help you work on your VR experiences. You can open the A-Frame Inspector with <ctrl> + <alt> + i.
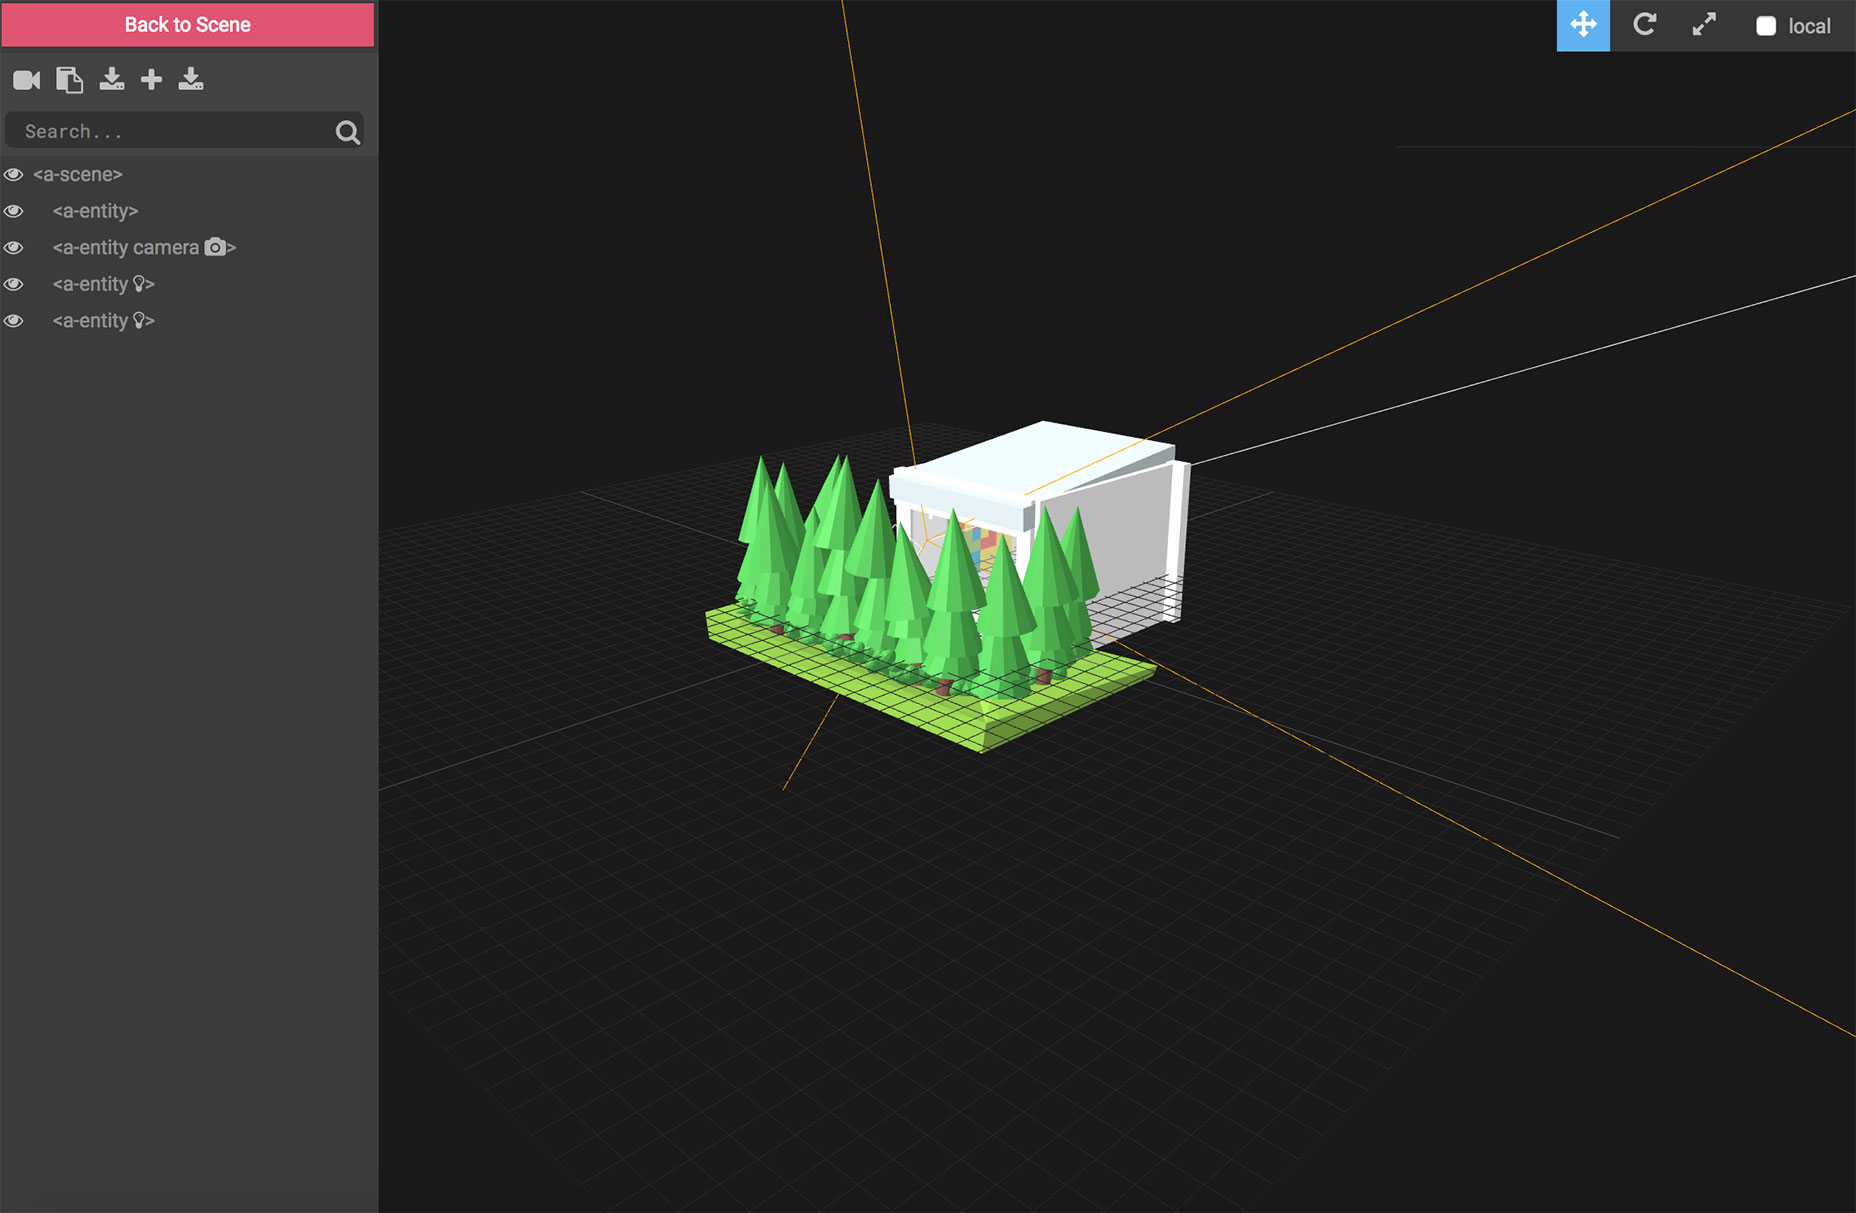 We can click on the camera in the list on the left and find position the camera either with the arrows or the properties in the right hand menu. Have a play around with the inspector and see what you can do with it. You can learn a lot from changing the properties and experimenting, and it’s one of the best ways to learn about positioning in the 3D space.
 We want to end up with a position, that centres the camera in the room and lifting it up slightly so it’s at head height. We’ll also rotate the camera so it’s facing out of the window at the start.
<a-entity id="camera" camera position="0 0.5 -3.0” rotation="0 180 0" look-controls></a-entity>
Adding a Welcome Message
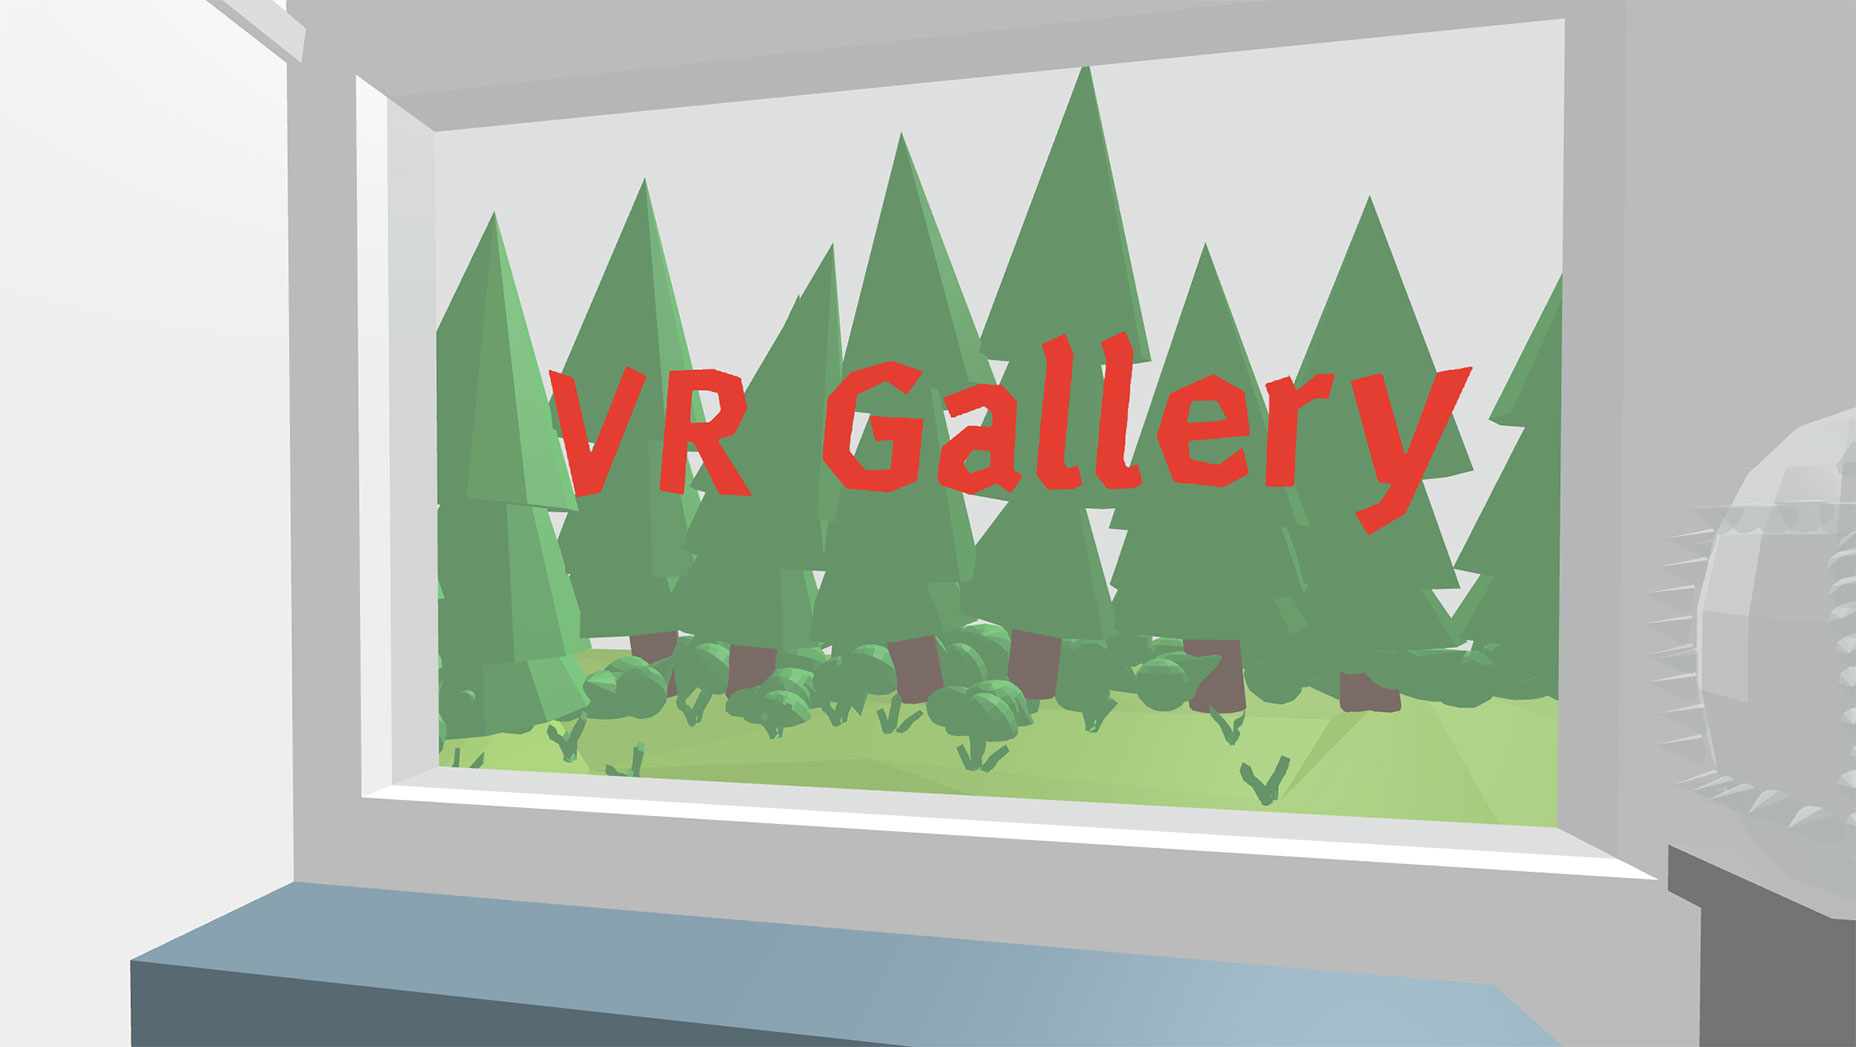
To give the VR Gallery a bit more of a welcoming feel, we’ll add a welcome message using A-Frame’s text component. Adding text is as simple as entering a value into the text component, however there are a lot of additional values that can be changed as well. We have the position and rotation attributes as usual, along with some text customisation options, such as font, alignment and color. We also have one called Side. Side actually tells A-Frame which side of the text to render. This is helpful if you can move around your scene and don’t want to see reversed text. We’re happy having it visible on both sides.<a-text value="VR Gallery" position="0.05 0.80 -2" rotation="0 180 0" font="mozillavr" color="#e43e31" side="double" align="center" width="6"> </a-text>So we’ve got the text showing up just in front of the window, but I’m still not feeling welcomed. Let’s add a bit of animation to it, so that it’s draws the eye and makes the scene more interesting.
Animating our Welcome Message
A-Frame has a powerful animation component that can be attached to other components. We attach it by nesting it within the element we want to animate. This is a really powerful feature and goes way beyond just animations. We can group together multiple objects in this way. As an example of how this could be used think of a heads up display in a game, or the earth on an orbit around the sun with the moon following and rotating around the earth. We’re going to keep it simple in this tutorial and just animate the text. We must choose a property we want to animate and set that as the attribute value. We’re going to make our text bounce up and down so we want to edit the position. Next we need to tell the animation where it is animating this component to - we only want it to move up slightly so we should copy the position value of the parent component and adjust the Y value. We can also set easing, durations, whether it loops and how it loops. We're going to make our animation bounce up and down by looping indefinitely whilst alternating the direction each time.<a-animation attribute="position" to="0.05 0.85 -2" dur="1000" direction="alternate" easing="ease-in-out" repeat="indefinite"> </a-animation>There we have it. A nice welcome message that bounces up and down. Here’s the full code:
<html>
 <head>
 <script src="https://aframe.io/releases/0.7.0/aframe.min.js"></script>
 </head>
 <body>
 <a-scene>
 <a-assets>
 <a-asset-item id="gallery-obj" src="/gallery/model.obj"></a-asset-item>
 <a-asset-item id="gallery-mtl" src="/gallery/materials.mtl"></a-asset-item>
 </a-assets>
 <a-entity obj-model="obj: #gallery-obj; mtl: #gallery-mtl"></a-entity>
 <a-entity id="camera" camera position="0 0.5 -3.0" rotation="0 180 0" look-controls></a-entity>
 <a-text
 value="VR Gallery"
 position="0.05 0.80 -2"
 rotation="0 180 0"
 font="mozillavr"
 color="#e43e31"
 side="double"
 align="center"
 width="6">
 <a-animation
 attribute="position"
 dur="1000"
 direction="alternate"
 to="0.05 0.85 -2"
 easing="ease-in-out"
 repeat="indefinite">
 </a-animation>
 </a-text>
 </a-scene>
 </body>
</html>
Wrapping Up
There we have it, a Virtual Reality Art Gallery in under 40 lines. You’ve had an introduction to the loading assets, using the entity component with objects, the camera, text and animations. With these tools the potentials are limitless and fun. WebVR is still in it’s infancy but already people are seeing the potential for great things with it. It’s a completely different way to experience content and it’s an exciting time to get involved. A-Frame gives us a way to get into it quickly, easily and get people using our creations across as many devices as possible.Adam Hughes
Adam is a Frontend Developer based in Liverpool, UK. With a focus on user experience he has worked with clients such as Arsenal FC, Liverpool FC and Volkswagen. Follow his hair brained schemes and projects on twitter @lostmybrain


Read Next

20 Best New Websites, April 2024
Welcome to our sites of the month for April. With some websites, the details make all the difference, while in others,…

Exciting New Tools for Designers, April 2024
Welcome to our April tools collection. There are no practical jokes here, just practical gadgets, services, and apps to…

14 Top UX Tools for Designers in 2024
User Experience (UX) is one of the most important fields of design, so it should come as no surprise that there are a…
By Simon Sterne

What Negative Effects Does a Bad Website Design Have On My Business?
Consumer expectations for a responsive, immersive, and visually appealing website experience have never been higher. In…

10+ Best Resources & Tools for Web Designers (2024 update)
Is searching for the best web design tools to suit your needs akin to having a recurring bad dream? Does each…
By WDD Staff

3 Essential Design Trends, April 2024
Ready to jump into some amazing new design ideas for Spring? Our roundup has everything from UX to color trends…

How to Plan Your First Successful Website
Planning a new website can be exciting and — if you’re anything like me — a little daunting. Whether you’re an…
By Simon Sterne

15 Best New Fonts, March 2024
Welcome to March’s edition of our roundup of the best new fonts for designers. This month’s compilation includes…
By Ben Moss

LimeWire Developer APIs Herald a New Era of AI Integration
Generative AI is a fascinating technology. Far from the design killer some people feared, it is an empowering and…
By WDD Staff

20 Best New Websites, March 2024
Welcome to our pick of sites for March. This month’s collection tends towards the simple and clean, which goes to show…

Exciting New Tools for Designers, March 2024
The fast-paced world of design never stops turning, and staying ahead of the curve is essential for creatives. As…

Web Tech Trends to Watch in 2024 and Beyond
It hardly seems possible given the radical transformations we’ve seen over the last few decades, but the web design…
By Louise North