
- Custom WordPress Dashboard Goals
- MongoDB & MongoDB Atlas
- ✅ Getting Started with MongoDB Atlas
- WordPress REST API — FTW!
- Microsoft Azure & Azure Functions
- Getting Started with Azure Functions
- 🤔 So, What Just Happened?!
- Machine Learning & Artificial Intelligence
- It’s Your Turn Now!
- Frequently Asked Questions (FAQs) on Building Custom Dashboards with MongoDB & Azure Serverless Functions
This article was originally published on Ahmad Awais. Thank you for supporting the partners who make SitePoint possible.
TL;DR: I’m building a custom WordPress dashboard for an enterprise client which is powered by React.js on top of Node.js, with MongoDB Atlas as the database.
This dashboard uses several Microsoft Azure services, e.g., Cognitive Services, Azure App Services, and especially serverless Azure Functions. In this post, you’ll learn how to build a small module from it and the reason behind my choice of stack, apps, and products.
One of my enterprise clients who owns a huge networking and media company has a large-scale WordPress site set up. He recently consulted me about the possibility of building a custom WordPress dashboard (based on the WordPress REST API) — to help him make intelligent business decisions via Machine Learning and Artificial Intelligence.
With JavaScript eating up the world and WordPress adapting to the move by creating the Gutenberg project, I thought of an architecture/stack where WordPress would be our content layer, a familiar battle-tested environment that does its job well with a custom dashboard that’s built with JavaScript.
When you’re tasked to build a modern JavaScript application, you find yourself in a mix of different frameworks, tools, and dev workflows. The JavaScript ecosystem has grown a lot over the last couple of years. We have many, many good options available today.
So, after researching my options for a bit, I opted to use React.js on top of Node.js to start building the custom WordPress dashboard. While the project is in its ideation phase at the moment, I think it’s important that I share some of our goals here to define context behind my choice of the stack.
Custom WordPress Dashboard Goals
Imagine you own a large networking company where over 500 hotels (in three different countries) use your services to power their conference halls, IT meetings, and online property management like the sites and blogs. That’s what my client does.
Most of this is powered by a huge multi-site WordPress instance that manages everything for the hotels, websites, online booking, registrations, events, tickets, reviews, and comments. There’re also other systems running different software which are able to produce content via REST API.
We’ve set out to create a custom WordPress dashboard with many goals in mind, but I’m listing a few of them which are related to this particular article. Take a look at what I have built so far, it’s all based on serverless Azure functions — which are pretty awesome.
👀 High-level Data Reporting
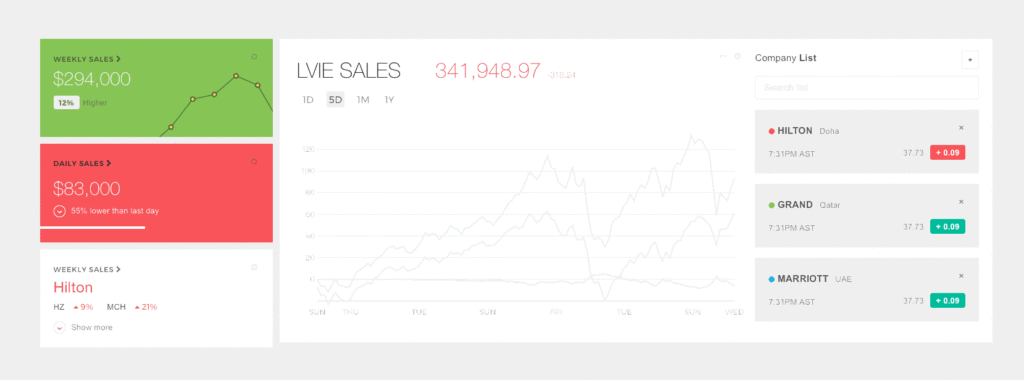
The custom dashboard will report all the high-level data, e.g. things like live sales happening throughout my client’s portfolio (500+ hotels), entity/time-based and date-based breakdowns.
And how each of his franchise performing on a daily, weekly, monthly basis. All of this data is being fed to MongoDB Atlas. More on that later.
⚡ Serverless Automation
Most of the modules are built upon serverless architecture — which in this case provides huge benefits. All the automation is always running and the cost is paid as you go i.e. pay for what you use.
An initial rough estimate puts this solution 34% more economical than having a server VM running all the time. We are using Azure Functions for this serverless automation.
🔥 IoT (Internet of Things) Hub
There are about ~200 IT managers working for my client who have IoT enabled devices that feed data into several online projects. This custom dashboard also includes that data for making better decisions and connecting the whole registration, management, maintenance team’s hub into a single place.
As you might have already guessed, this project makes use of IoT Hub from Microsoft Azure to connect, monitor, and manage all of the IoT assets.
🤖 Machine Learning and Artificial Intelligence
We’re using a lot of different services from Microsoft Azure for the sake of making this dashboard artificially intelligent by Machine Learning.
There’s a huge dataset that is fed to the ML Studio which later helps us predict different decisions like space management, low registrations trends for IT events, and questions like why and when these things happen.
While the Machine Learning part is beyond the scope of this article, I still plan to touch base with some of the awesome Artificial Intelligence I’ve been able to cook in via Azure’s Cognitive Services.
🕰 Live & Real-time
One of the most important aspects of this custom dashboard is that it’s live and real-time. Which means I need a managed database that can cope with this amount of data and still stay highly available.
But at the same time, it’s for the management purposes and doesn’t need to have any impact on the WordPress sites. That is a crucial system design decision for this dashboard.
By that what I mean is we can do all sorts of experiments with this custom dashboard but it shouldn’t have any impact on the database/servers which are running the multi-site WordPress instance.
MongoDB & MongoDB Atlas
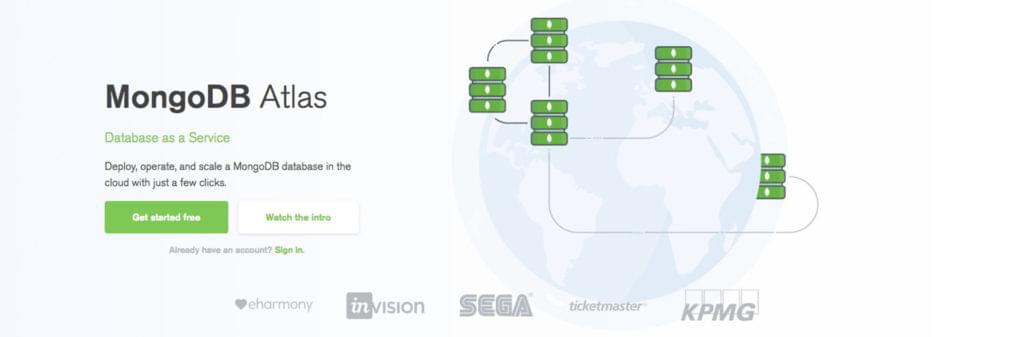
For this custom WordPress dashboard, I am using MongoDB Atlas as a DBaaS (Database as a Service). And I couldn’t be happier. When I first shared that I’d be using MongoDB, many developers had concerns.
![]()
Most of the questions asked why I’d add another layer of complexity by adding yet another database to the mix. Why not use the WordPress database as it is? To answer these questions and more I have prepared a list of reasons as to why I am using MongoDB Atlas.
♨ Dislike for RDBMS
I personally dislike relational databases. Most of the time, for me they get in the way of building applications. I have to completely get out of the app I am building, think about my database in the future and design a good schema which always ends up a bad exercise for my dev workflow. It’s counter-intuitive at best — at least for me, it is.
💸 HDD Is Cheap — CPU/RAM Is Not
Old databases were mostly designed to save disk space, among other things. This led to a plethora of problems like normalization, indexing, and made sharding, auto-scaling, and replication harder.
Nowadays, disk space is dirt cheap. On the other hand, CPU/RAM is not, and your sysadmin costs can skyrocket very quickly if you end up with a bad choice here.
Like you wanted to create a custom dashboard but your system design architect cost you two sysadmins with how they chose to design your system. Similarly, my client wanted a managed solution without having to hire a team of IT/DevOps folks — at least for an experimental custom dashboard.
🍀 MongoDB’s Pros
- Schema-less. Flexible schema for the win. I don’t have to change anything, my regular app development workflow, creating a Node.js-based app that I am manipulating with JSON type data, I can just feed that into MongoDB and it just works.
- Workflow-consistency. Creates documents the way my custom dashboard is represented. Sales, Videos, Talks, Comments, Reviews, Registrations, etc. all of that have similar data representation on the frontend and the backend — and even in the database. I manage 3rd party data via middleware. This consistency translates to clean code.
- Ease of scale-out. It scales reads by using replica sets. Scales writes by using sharding (auto-balancing). Just fire up another machine and away you go. Most importantly, instead of vertical scaling via RDBMS, MongoDB lets you scale horizontally with different levels of consistency. That’s a big plus. ➕
- Cost. Depends on which RDBMS of course, but MongoDB is free and can run on Linux, ideal for running on cheaper commodity kits.
🍃 Why MongoDB Atlas?
Well, now that I know MongoDB is the right database choice, there are so many different options to host your database. I can self-host on my Linux machine via DigitalOcean, use a cloud provider like AWS/Azure or a choose a DBaaS service specific to MongoDB.
But I want a fast, secure, and managed MongoDB solution that I can easily scale with the growth of the number of modules we attach in this custom WordPress dashboard. That’s MongoDB Atlas.
MongoDB Atlas is a cloud-hosted MongoDB service engineered and run by the same team that builds the database. And guess what, I trust that they follow the best operational practices since they are the ones who’re building MongoDB in the first place.
I want this custom dashboard to be self-managed, serverless, and using MongoDB Atlas saves me from worrying about software patching, backups, and reliable configuration setup for new DB updates. Again a big plus. ➕
Also, the fact that MongoDB Atlas is supported cross-platform as well as cross-region and across different cloud providers makes it a much better choice. I think each Cluster comes with two replica sets, ready to scale.
🔋 MongoDB Compass
Now that we are going to work with MongoDB, it’d be great to have a tool through which we can explore our database, view the changes, debug and so on. For this purpose, MongoDB again takes the lead with a product called MongoDB Compass. Take a look.
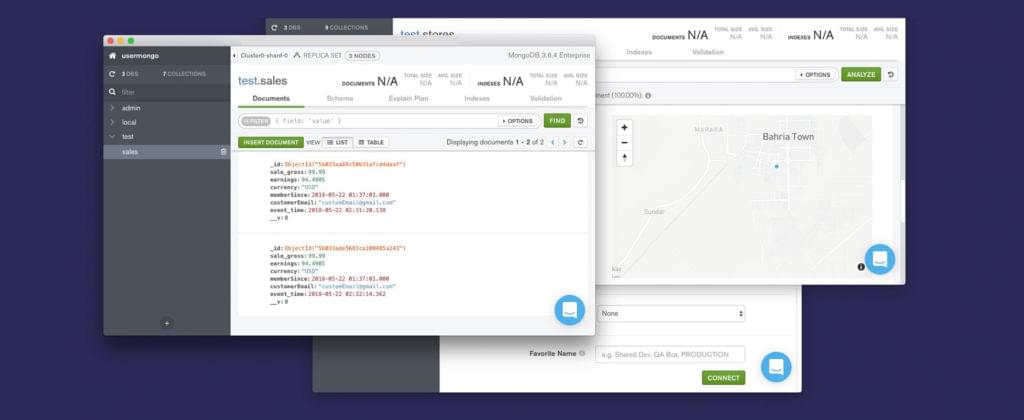
I suggest that you go ahead and download MongoDB Compass. It’s literally the best tool to visualize your MongoDB database. Here’s a set of features:
- Visualize and explore: Take a look at your database, find out how things are looking, and even visualize stuff like maps/coordinates.
- Insert, modify, and delete: You can also perform CRUD operations for your DB right from MongoDB compass. Makes testing easier.
- Debug and optimize: Finally, analyze your data, debug it and even find out about performance issues right inside a great GUI for your database. This tool is a must-have if you work with MongoDB.
- Extensible: And the best part is you can build your own plugins to extend MongoDB Compass. Here’s the documentation on building your own Compass plugins.
- Enterprise Flavor: MongoDB Compass comes in a few flavors: Community (Free), and Enterprise (Licensed) — the Enterprise version is the one that lets you visualize DB schema.
✅ Getting Started with MongoDB Atlas
Let’s get started and build a simple module that’s part of the custom WordPress dashboard I am building. For this module, we are collecting all the sales related data. For that, we need a MongoDB instance, and of course we’re using MongoDB Atlas here.
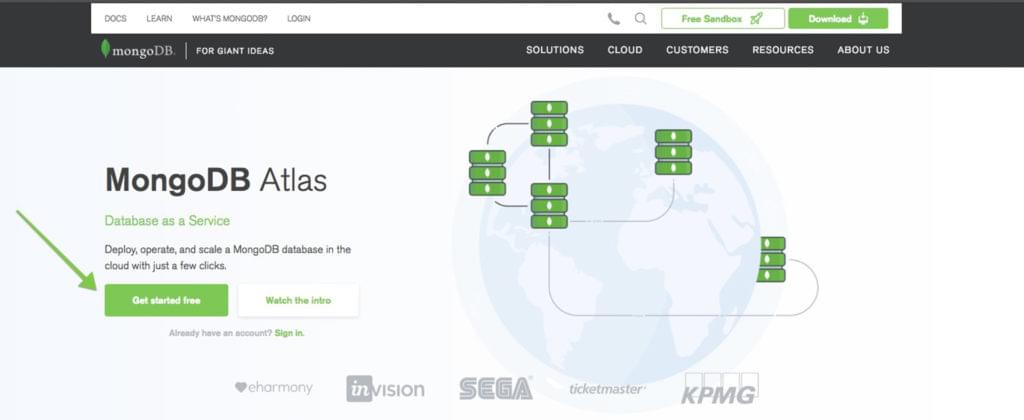
Step #1: Go to MongoDB Atlas →
Go to the MongoDB Atlas site and register a completely free MongoDB instance hosted on AWS, with shared RAM and 512 MB storage. Click the Get Started Free button.
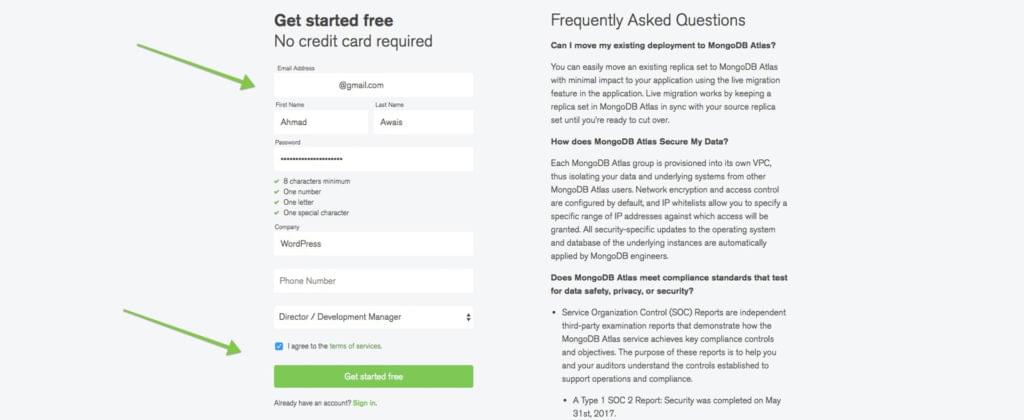
Step #2: Sign up at MongoDB Atlas →
Now go ahead and sign up with your email ID and fill up the details. It’s amazing that you can sign up and use a free MongoDB Atlas hosted DB instance, and they don’t even require you to add a credit card for that.
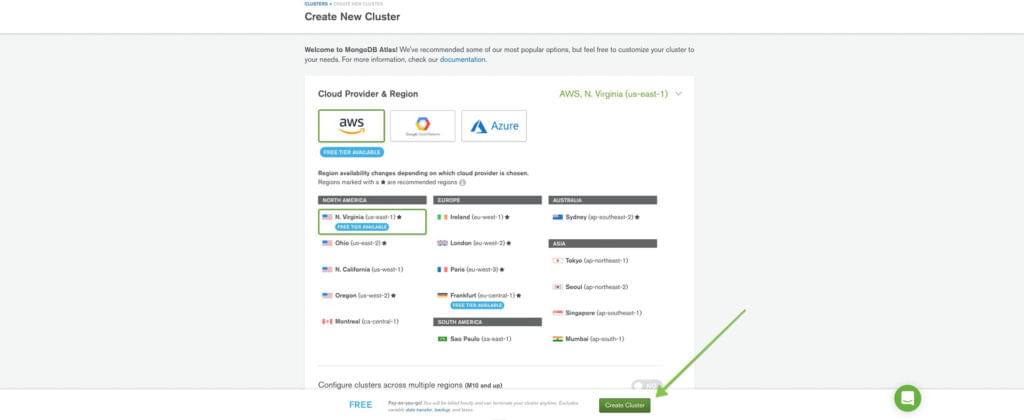
Step #3: Create the Cluster
Now you’ll be redirected to a page with a bunch of information about the new MongoDB Cluster you’re about to create. I suggest that you review this information, and move ahead by clicking the Create Cluster button at the bottom just like in the screenshot below.
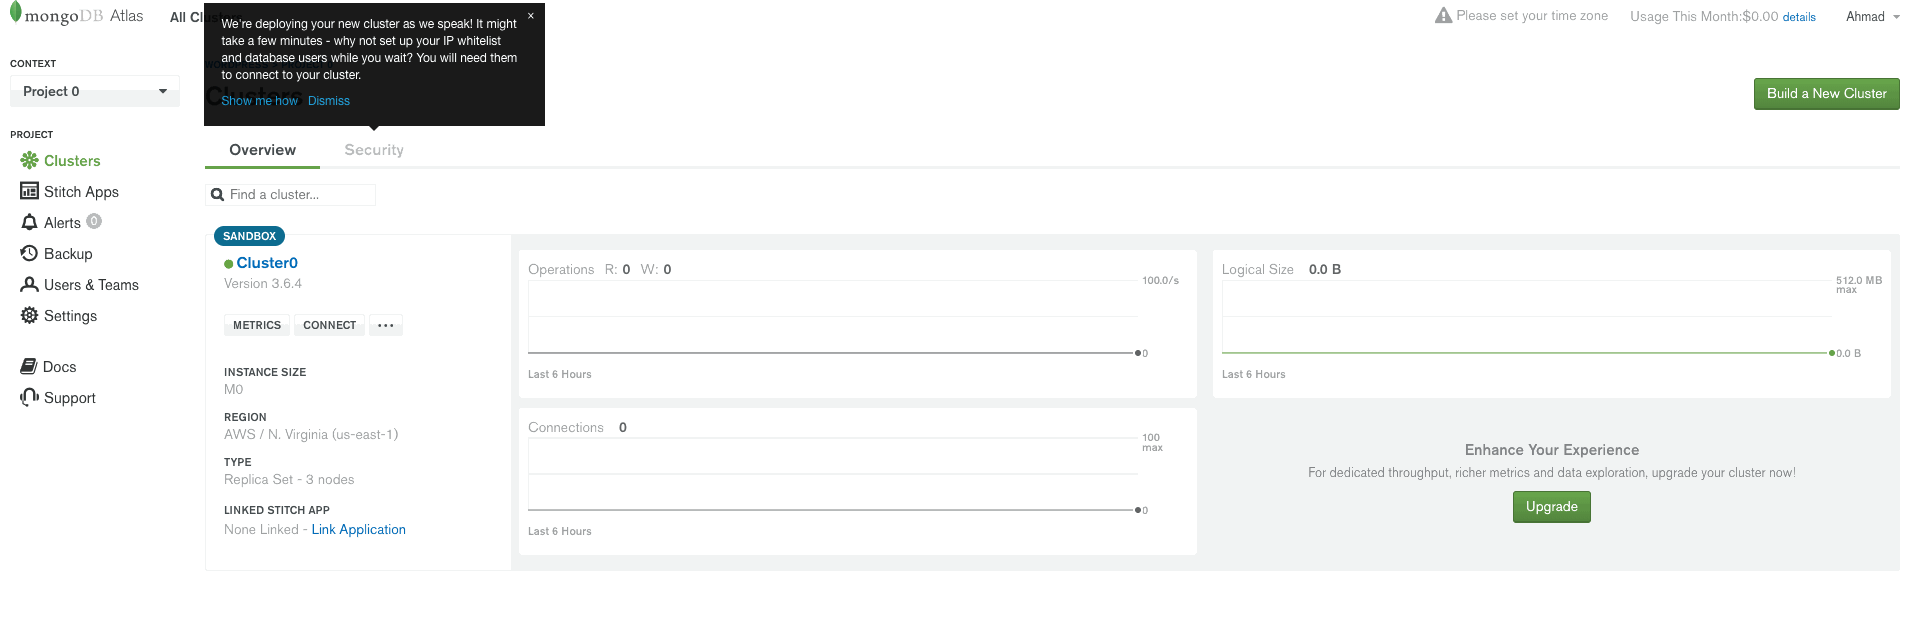
Step #4: Create DB Username & Password
It’ll take a minute and your DB will be created. Once that happens, head over to the Security > MongoDB Users and click on the + ADD NEW USER button on the right, to create a new user for your database. Let’s keep all the other settings set to default for the sake of this intro-article.
I’m setting the user/pass as usermongo but you know better.
Step #5: Add IP to Whitelist for Access
To be able to access your MongoDB Atlas database, you need to setup the IP Whitelist with the IP of your server where your app is hosted. Authentication is beyond what I am discussing here so for the purpose of this demo let’s just allow everyone (obviously a bad practice in production).
So, again, head over to the Security > IP Whitelist and click on the + ADD IP ADDRESS button on the right, and finally ALLOW ACCESS FROM ANYWHERE button to allow the anonymous access.

Step #6: Connect via MongoDB Compass
Now that our DB’s IP access and a user has been created, we can pick up the connection string and use it to connect to our database with our MongoDB Compass application.
Go to Connect then choose Connect with MongoDB Compass and download Compass if you haven’t. Copy the URI Connection String. Finally, open Compass and it should be able to detect the connection string in your clipboard, allow it to connect to your database.
And you are set to visualize your database, analyze its performance, and even run complete CRUD operations. Awesome! 💯
Now that we have created a MongoDB Atlas and connected it with MongoDB Compass, we can move forward and start building our Node.js application.
WordPress REST API — FTW!
This WordPress based Node.js custom dashboard interacts with the WordPress instance via the WordPress REST API. Since this is a Node.js app, I am using an awesome library called wpapi written by K Adam White. He has also built a demo Express based WordPress app. That’s what I got inspired by while building this custom dashboard, so you’ll see a lot of it here.
🚀 WordPress Custom Router Based on Express
The router is set up with Express. Here’s a basic error handler and router template for using WordPress with express.
'use strict';

var express = require('express');
var router = express.Router();
var siteInfoMiddleware = require('../middleware/site-info');

// Set global site info on all routes
router.use(siteInfoMiddleware);

// Public Routes
// =============

router.get('/', require('./index'));
router.get('/page/:page', require('./index'));
router.get('/:slug', require('./single'));
router.use('/tags/:tag', require('./tag'));
router.use('/categories/:category', require('./category'));

// Catch 404 and forward to error handler.
router.use(function (req, res, next) {
    var err = new Error('Not Found');
    err.status = 404;
    next(err);
});

// Error Handling
// ==============

// Development error handler will print stacktrace.
function developmentErrorRoute(err, req, res, next) {
    res.status(err.status || 500);
    res.render('error', {
        message: err.message,
        error: err
    });
}

// Production error handler. No stacktraces leaked to user.
function friendlyErrorRoute(err, req, res, next) {
    res.status(err.status || 500);
    res.render('error', {
        message: err.message,
        error: {}
    });
}

// Configure error-handling behavior
if (router.get('env') === 'development') {
    router.use(developmentErrorRoute);
} else {
    router.use(friendlyErrorRoute);
}

module.exports = router;
View the code on Gist.
🎚 Basic Express Based Implementation
I am not hosting this entire thing on WordPress, but the initial plan was to do just that. If you want to go do that, you’d wanna build the index by querying all the info using the RSVP.hash utility for convenience and parallelism. For that here’s what you should do.
'use strict';

var wp = require( '../services/wp' );
var contentService = require( '../services/content-service' );
var pageNumbers = require( '../services/page-numbers' );
var pageTitle = require( '../services/page-title' );
var RSVP = require( 'rsvp' );

function getHomepage( req, res, next ) {
  var pages = pageNumbers( req.params.page );

  RSVP.hash({
    archiveBase: '',
    pages: pages,
    title: pageTitle(),
    // Primary page content
    posts: wp.posts().page( pages.current ),
    sidebar: contentService.getSidebarContent()
  }).then(function( context ) {
    if ( req.params.page && ! context.posts.length ) {
      // Invalid pagination: 404
      return next();
    }

    res.render( 'index', context );
  }).catch( next );
}

module.exports = getHomepage;
View the code on Gist.
🦏 Authentication Cooked In
For this setup, you’ll also need to authenticate your Node.js app by giving it the authentication data, which along with wpapi can be processed like this. Beware this is not always a best practice if you don’t use correct permissions and environment variables settings.
var WP = require( 'wordpress-rest-api' );
var _ = require( 'lodash' );

var config = _.pick( require( './config' ).wordpress, [
  // Whitelist valid config keys
  'username',
  'password',
  'endpoint'
]);

var wp = new WP( config );

module.exports = wp;
View the code on Gist.
🦁 Site Content Accumulation
And finally, you are able to consume all the content by creating a content service which handles recursively fetching:
- All the pages of a paged collection.
- Your WordPress site’s info.
- An alphabetized list of categories.
- A specific category (specified by slug) from the content cache.
- An alphabetized list of tags.
- A specific tag (specified by slug) from the content cache
- Other content required to have some feature parity with WP.
The code for this looks somewhat like this.
'use strict';

var wp = require( './wp' );
var cache = require( './content-cache' );
var _ = require( 'lodash' );
var RSVP = require( 'rsvp' );

/**
 * Recursively fetch all pages of a paged collection
 *
 * @param {Promise} request A promise to a WP API request's response
 * @returns {Array} A promise to an array of all matching records
 */
function all( request ) {
  return request.then(function( response ) {
    if ( ! response._paging || ! response._paging.next ) {
      return response;
    }
    // Request the next page and return both responses as one collection
    return RSVP.all([
      response,
      all( response._paging.next )
    ]).then(function( responses ) {
      return _.flatten( responses );
    });
  });
}

function siteInfo( prop ) {
  var siteInfoPromise = cache.get( 'site-info' );

  if ( ! siteInfoPromise ) {
    // Instantiate, request and cache the promise
    siteInfoPromise = wp.root( '/' ).then(function( info ) {
      return info;
    });
    cache.set( 'site-info', siteInfoPromise );
  }

  // Return the requested property
  return siteInfoPromise.then(function( info ) {
    return prop ? info[ prop ] : info;
  });
}

/**
 * Get an alphabetized list of categories
 *
 * All archive routes display a sorted list of categories in their sidebar.
 * We generate that list here to ensure the sorting logic isn't duplicated
 * across routes.
 *
 * @method sortedCategories
 * @return {Array} An array of category objects
 */
function sortedCategories() {
  return all( wp.categories() ).then(function( categories ) {
    return _.chain( categories )
      .sortBy( 'slug' )
      .value();
  });
}

function sortedCategoriesCached() {
  var categoriesPromise = cache.get( 'sorted-categories' );

  if ( ! categoriesPromise ) {
    categoriesPromise = sortedCategories();
    cache.set( 'sorted-categories', categoriesPromise );
  }

  return categoriesPromise;
}

/**
 * Get a specific category (specified by slug) from the content cache
 *
 * The WP API doesn't currently support filtering taxonomy term collections,
 * so we have to request all categories and filter them down if we want to get
 * an individual term.
 *
 * To make this request more efficient, it uses sortedCategoriesCached.
 *
 * @method categoryCached
 * @param {String} slug The slug of a category
 * @return {Promise} A promise to the category with the provided slug
 */
function categoryCached( slug ) {
  return sortedCategoriesCached().then(function( categories ) {
    return _.findWhere( categories, {
      slug: slug
    });
  });
}

/**
 * Get a specific tag (specified by slug) from the content cache
 *
 * The WP API doesn't currently support filtering taxonomy term collections,
 * so we have to request all tags and filter them down if we want to get an
 * individual term.
 *
 * To make this request more efficient, it uses the cached sortedTags promise.
 *
 * @method tagCached
 * @param {String} slug The slug of a tag
 * @return {Promise} A promise to the tag with the provided slug
 */
function tagCached( slug ) {
  return sortedTagsCached().then(function( tags ) {
    return _.findWhere( tags, {
      slug: slug
    });
  });
}

/**
 * Get an alphabetized list of tags
 *
 * @method sortedTags
 * @return {Array} An array of tag objects
 */
function sortedTags() {
  return all( wp.tags() ).then(function( tags ) {
    return _.chain( tags )
      .sortBy( 'slug' )
      .value();
  });
}

function sortedTagsCached() {
  var tagsPromise = cache.get( 'sorted-tags' );

  if ( ! tagsPromise ) {
    tagsPromise = sortedTags();
    cache.set( 'sorted-tags', tagsPromise );
  }

  return tagsPromise;
}

function getSidebarContent() {
  return RSVP.hash({
    categories: sortedCategoriesCached(),
    tags: sortedTagsCached()
  });
}

module.exports = {
  // Recursively page through a collection to retrieve all matching items
  all: all,
  // Get (and cache) the top-level information about a site, returning the
  // value corresponding to the provided key
  siteInfo: siteInfo,
  sortedCategories: sortedCategories,
  sortedCategoriesCached: sortedCategoriesCached,
  categoryCached: categoryCached,
  tagCached: tagCached,
  sortedTags: sortedTags,
  sortedTagsCached: sortedTagsCached,
  getSidebarContent: getSidebarContent
};
View the code on Gist.
🛠 Custom Routes & Sales Data
Finally, I have cooked in quite a few custom routes from where I can attain any kind of sales related data. For the particular architecture I have in place, I’m again using the RSVP.hash utility for convenience and parallelism. It works like a charm.
var WPAPI = require( 'wpapi' );
var RSVP = require('rsvp');

// Using the RSVP.hash utility for convenience and parallelism
RSVP.hash({
  categories: wp.categories().slug( 'it-services' ),
  tags1: wp.tags().slug('hotel-name'),
  tags2: wp.tags().slug('march-events')
}).then(function( results ) {
    // Combine & map .slug() results into arrays of IDs by taxonomy
    var tagIDs = results.tags1.concat( results.tags2 )
        .map(function( tag ) { return tag.id; });
    var categoryIDs = results.categories
        .map(function( cat ) { return cat.id; });
    return wp.posts()
        .tags( tags )
        .categories( categories );
}).then(function( posts ) {
    // These posts are all fiction, either magical realism or historical:
    console.log( posts );
});
View the code on Gist.
Once I have that data, I am sending it to Paddle.com for processing along with the purchased order request so that it can be added to our MongoDB instance via serverless ⚡ Azure Functions.
// Registering custom routes.
site.itSales = site.registerRoute( 'sales/v1', '/resource/(?P<some_part>\\d+)' );
site.itSales().somePart( 7 ); // => myplugin/v1/resource/7

// Query Parameters & Filtering Custom Routes.
site.handler = site.registerRoute( 'sales/v1', 'receipts/(?P<id>)', {
    // Listing any of these parameters will assign the built-in
    // chaining method that handles the parameter:
    params: [ 'before', 'after', 'author', 'parent', 'post' ]
});

// Yields from the custom data of buyers.
site.handler().post( 8 ).author( 92 ).before( dateObj )... // Sent to paddle.
View the code on Gist.
It might look odd to some but WordPress allows you to set up custom post types and custom taxonomies which is what I’m using here, the above code, however, is not the exact implementation but a similar approach to what I have used via categories and tags.
This data gets sent Paddle, and it’s heavily cached so that our WordPress instances do not get any sort of load while we experiment with the custom dashboard. I’ve also cooked in a small data-refresh module which fetches the data on demand from the WordPress instance of choice.
Microsoft Azure & Azure Functions
While building this custom WordPress dashboard, I wanted to make sure that each module of this dashboard lived in form of a serverless app with multiple serverless functions. This decision was based on keeping this dashboard’s cost as economical as possible.
👀 Three Options
There are three major cloud services providers present. These are Microsoft Azure, Google Cloud Platform, and Amazon Web Services. Each of these has serverless functions available, respectively called Azure functions, GCP Cloud Functions, and AWS Lambdas.
📘 Choosing Azure
Azure has one of the biggest cloud architectures and global presences. 50 Azure regions, more than any cloud provider and after testing each of these three, I found that Azure functions had the best response time in UAE (as my client’s business is based out of UAE).
Also, the fact that we’re using Azure ML Studio, AI Cognitive Services, and Virtual Machines to host parts of this project, means it made complete sense to use Azure functions for the serverless architecture.
Getting Started with Azure Functions
Let’s get started with Azure functions. I am going to take you through the process of creating a simple serverless Azure function, which will be triggered via HTTP requests, and inside it, we’ll process the sales information sent to us from Paddle.com.
⚙ What are we building?!
- I am building a serverless Azure function which is based on JavaScript and specifically Node.js code.
- This Azure function will get triggered by a simple
GETHTTP request from our 3rd party payment solution, i.e., Paddle.com. - As soon as there’s a sale on Paddle.com, it will trigger a webhook that contains info related to our sale, quantity, item, earnings, and some member-related data that WordPress sent to Paddle.
- Using the WordPress REST API, I have added some custom data related to the user who purchased the product, like user’s ID in WordPress DB, which WordPress site had this sale, and that user’s meta info.
- When the Azure function receives this
GETrequest, it processes the info, takes out what I need to keep in the MongoDB Atlas Cluster and forms a JavaScript object ready to be saved in the DB. - The Azure function then connects to the MongoDB Atlas instance via an npm package called mongoose, where after connecting the database, I create a DB Model/Schema, and then this data is saved to the MongoDB Atlas Cluster.
- After which Azure function kind of sits there waiting for next sale to happen, where my client only pays for the execution time and amount of executions for Azure functions. (1 million of which are free every month 😮).
Now, this is only a high-level summary of what’s happening, there’s a lot of steps that I skipped here like authentication which is beyond the scope of this article. You should always setup authentication and verification to keep things civil and avoid any overage.
So, let’s go ahead and build this thing.
Step #1: Set up Microsoft Azure & VSCode
I expect you to have the Azure account set up on your end. You’ll need to subscribe with a credit card since we need storage for hosting the Node.js files, which will be used with Azure Functions and you have to pay for storage (you’ll probably get a free $200 credit for the first month, and even after that the cost is quite low).
So, go ahead and set up the following:
- ✅ Setup a Microsoft Azure account with a credit card in billing.
- ✅ Install Visual Studio Code (Psst. I’m making a course on VSCode).
- ✅ Install the Azure Functions extension on your VSCode.
- 💡 To enable local debugging, install the Azure Functions Core Tools.
- 🗂 Create a new directory and open it up in VSCode.
In case you’re wondering which theme and font I am using, it’s Shades of Purple 💜 — for more info see which software and hardware I use.
Step #2: Create a New Function App Project
Now let’s create a new function app project. This is really easy with VSCode. All you have to do is go to the Azure Extension explorer present in the activity bar. From there access FUNCTIONS tab and click on the first Create New Project icon.
This will create a demo project, with basic files required to get started and will initialize a Git repo for you. I’ll keep up with small GIF-based demos to make things easier for you.
Step #3: Create an HTTP-triggered Azure Function
Now that we have created a function app project, let’s create an HTTP-triggered serverless Azure function. For that, go to the Azure Extension explorer present in the activity bar. From there access the FUNCTIONS tab and click on the second icon Create Function.
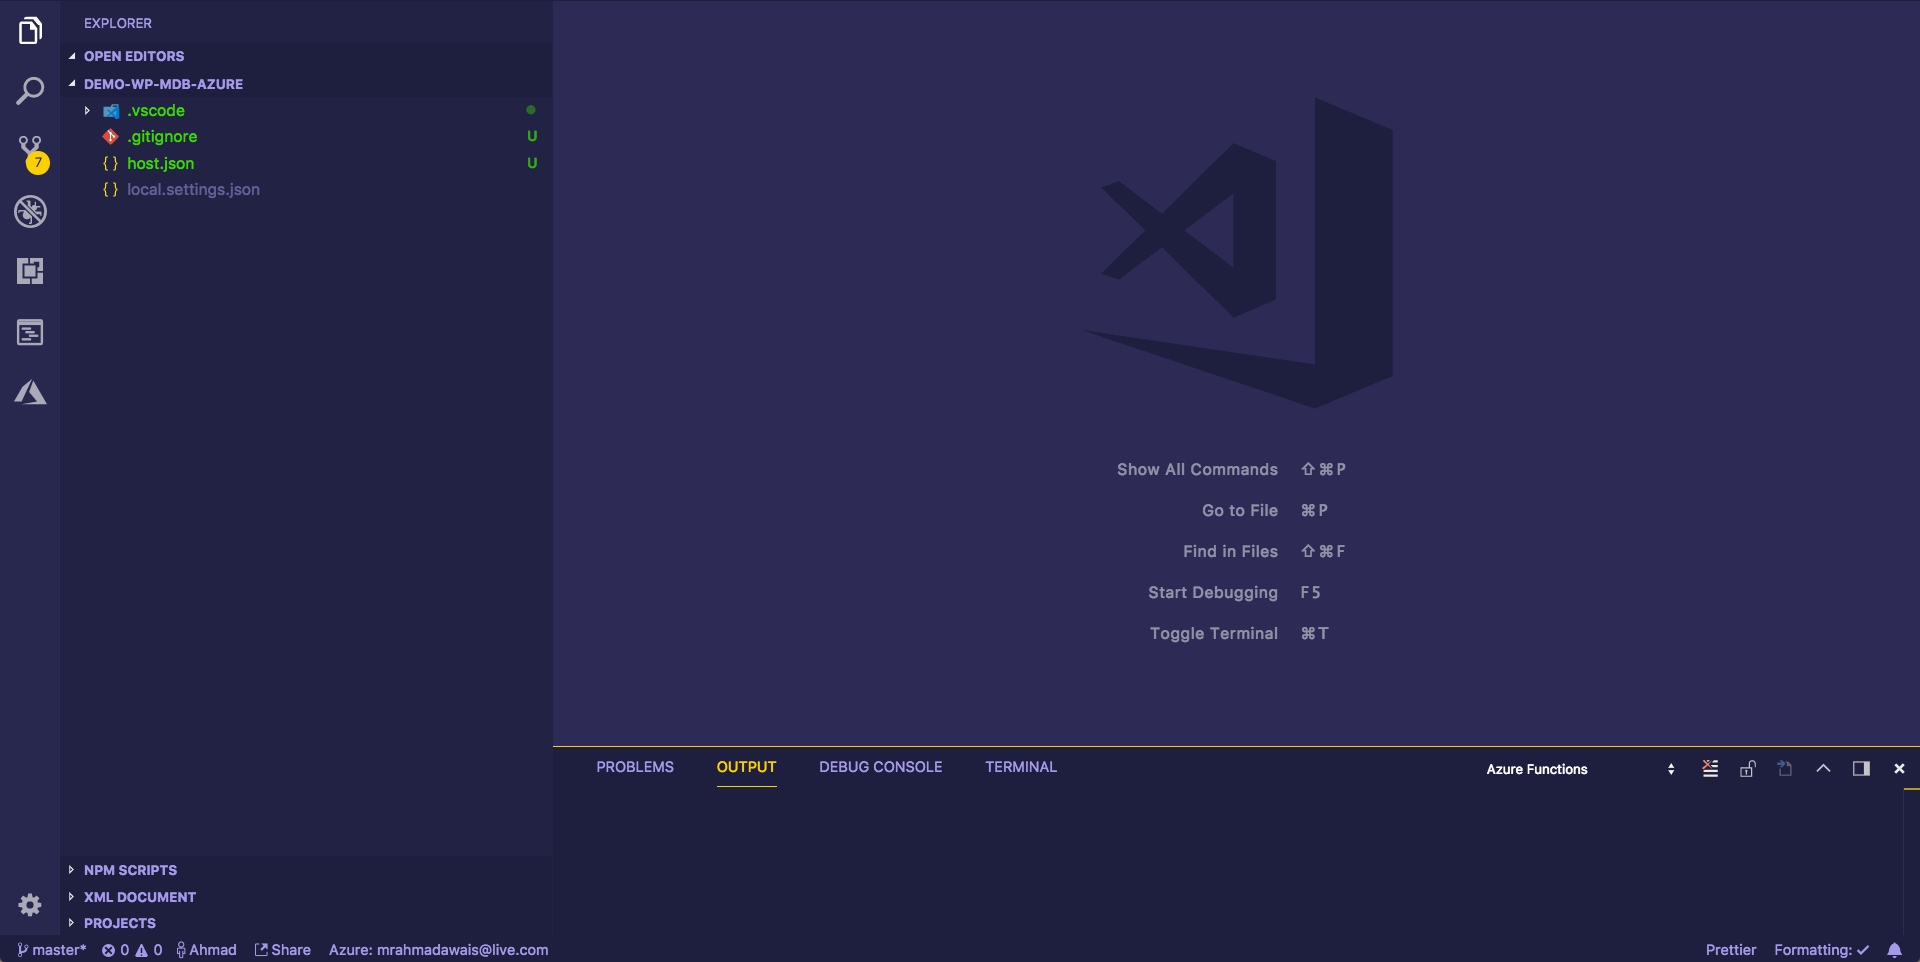
For the sake of this demo, I am choosing to keep the authentication part simple, so I’m going to select anonymous access. The name of our Azure function is HttpTriggerJS so you can find a new directory created with that name inside your project. This should contain two files i.e. functions.json and index.js
⚡ A function is a primary concept in Azure Functions. You write code for a function in a language of your choice and save the code and configuration files in the same folder.
🛠 The configuration is named function.json, which contains JSON configuration data. It defines the function bindings and other configuration settings. The runtime uses this file to determine the events to monitor and how to pass data into and return data from function execution. Read more on this file in the official documentation here.
The following is an example function.json file that gets created.
{
  "disabled": false,
  "bindings": [
    {
      "authLevel": "anonymous",
      "type": "httpTrigger",
      "direction": "in",
      "name": "req"
    },
    {
      "type": "http",
      "direction": "out",
      "name": "res"
    }
  ]
}
View the code on Gist.
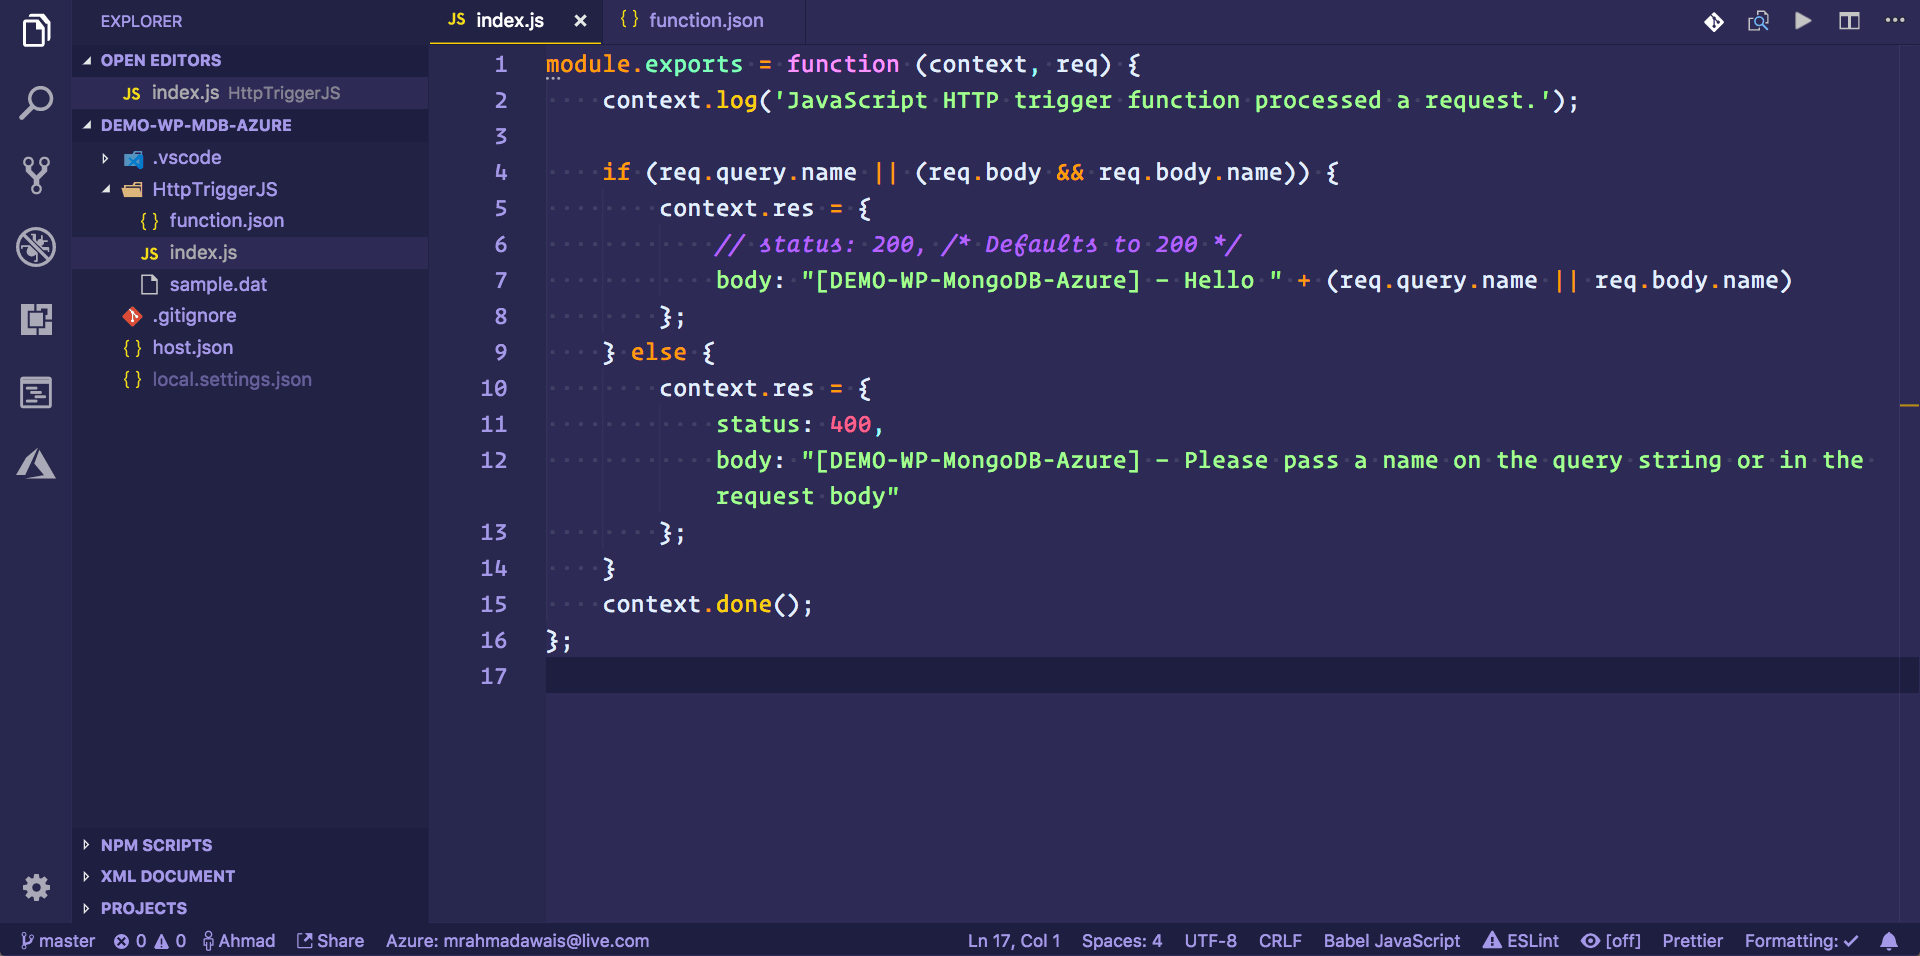
And then, there’s an index.js file which contains a basic code that you can use to test your Azure function. It receives a parameter name and prints it back to you or shows you an error asking for this parameter.
module.exports = function (context, req) {
    context.log('JavaScript HTTP trigger function processed a request.');

    if (req.query.name || (req.body && req.body.name)) {
        context.res = {
            // status: 200, /* Defaults to 200 */
            body: "Hello " + (req.query.name || req.body.name)
        };
    }
    else {
        context.res = {
            status: 400,
            body: "Please pass a name on the query string or in the request body"
        };
    }
    context.done();
};
View the code on Gist.
Step #4: Deploy & Test Your Azure Function
Now that we have created an Azure function which can be triggered by a GET HTTP request, let’s go ahead and deploy it with VSCode and test it with the Postman API Explorer.
To deploy the function go to the Azure Extension explorer present in the activity bar. From there access the FUNCTIONS tab and click on the third icon Deploy to Function App.
This will ask you a bunch of questions about the name of your app, use anything unique. I used demo-wp-mdb-azure — VSCode then uses this to create a resource group, to group together your function-app related resources, its storage (used to save the files), and the created Azure function — finally responding back to us with a public URL.
I then went ahead to access this URL and it asked for the name param as per the code. When I sent the name param with the Postman app, it responded with Hello Ahmad Awais. 👍
VSCode also asked me to update the function extension app versions to beta, and I chose yes — because that will help me use Node.js v8 for async/await.
Step #5: Create package.json and Install mongoose
Now that our Azure function is up and running, let’s create a package.json file in the root of our project and install mongoose. We’ll need this to connect and save data to our MongoDB Atlas Cluster.
Mongoose provides a straight-forward, schema-based solution to modeling your application data. It includes built-in typecasting, validation, query building, business logic hooks and more, out of the box. It’s pretty awesome. 💯
Step #6: Add App Setting for MongoDB Connection
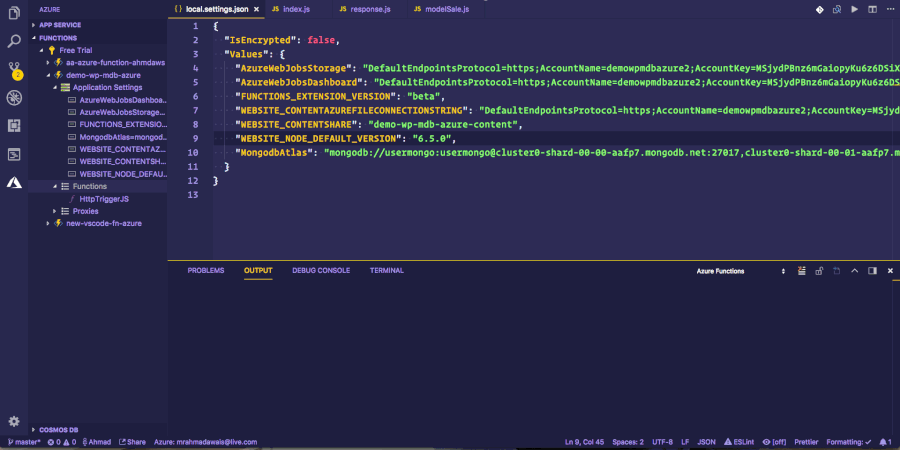
Now we are almost ready to start writing code for our application. But before doing that, we’ll need a connection string to be able to connect to our MongoDB Atlas Cluster (just like we did with MongoDB Compass). This connection string is private and you shouldn’t commit it to the git repo.
💯 This connection string belongs to the local.settings.json file in the project root. Let’s first download the settings, then add the MongodbAtlas setting with our connection string (get this string from the MongoDB Atlas dashboard) and upload the app settings.
To do this, go to the Azure Extension explorer present in the activity bar. From there access the FUNCTIONS tab and select your subscription, then your Azure function app, i.e., demo-wp-mdb-azure. Right click Application Settings and select Download remote settings… to download and Upload local settings… to upload the settings after adding the MongodbAtlas connection string to the settings.
Step #7: Update Node Version of Azure Function
In the code, I intend to use async/await, which are not available on Node.js v6.5.0, which comes with the default version 1 of Azure functions. In step #4, VSCode asked me to update the runtime version of Azure function to beta and I did that. This enabled support for the latest Node.js versions on Azure functions.
So, let’s update the WEBSITE_NODE_DEFAULT_VERSION app setting in our local settings and update that to the remote settings.
Step #8: Create MongoDB Model/Schema
Before we save any data to our MongoDB Atlas Cluster, let’s create a modelSale.js file that will contain the model’s schema for what we intend to save in the database. It’s an extremely simple schema implementation, and I suggest you read up on what you can do here with mongoose and MongoDB.
This file is pretty much self-explanatory.
/**
 * Model: Sale
 */
const mongoose = require('mongoose');
mongoose.Promise = global.Promise;

// Sale Schema.
const saleSchema = new mongoose.Schema({
    sale_gross: Number,
    earnings: Number,
    currency: String,
    memberSince: Date,
    customerEmail: String,
    event_time: {
        type: Date,
        default: Date.now
    },
});


// Export the model.
module.exports = mongoose.model('Sale', saleSchema);
View the code on Gist.
Step #9: Code the ⚡ Azure Function with Node.js
Now let’s code our Azure function. I’m adding all the main code inside the index.js file for the purpose of this demo. I’m also going to use the context object as the first parameter, so make sure you read about that. Everything else is explained in the code snippet below.
So, this is just a demo code for this article. It does the following:
- ✅ Gets the data from Paddle.com
- ⚡ Connects to the MongoDB Atlas via connection string that we added in our Application Settings.
- 📘 Uses the defined DB schema inside the
testdatabase where it creates asalescollection, including documents for our sales. - ⚙ Validates the data and creates a
finalDataobject that gets saved in the MongoDB Atlas Cluster. Yay! - 🥅 Finally, responds to the Paddle webhook with a
200status code if all goes well, and does thecontext.done()dance.
Everything is pretty much explained with inline documentation.
/**
 * Azure Function: Sale.
 *
 * Gets data from Paddle.com (which in turn gets data
 * from WordPress) and processes the data, creates a
 * finalData object and saves it in MongoDB Atlas.
 *
 * @param context To pass data between function to / from runtime.
 * @param req HTTP Request sent to the Azure function by Paddle.
 */
module.exports = async function (context, req) {
    // Let's call it log.
    const log = context.log;

    // Log the entire request just for the demo.
    log('[RAN] RequestUri=%s', req.originalUrl);

    /**
     * Azure function Response.
     *
     * Processes the `req` request from Paddle.com
     * and saves the data to MongoDB Atlas while
     * responding the `res` response.
     */

    // Database interaction.
    const mongoose = require('mongoose');
    const DATABASE = process.env.MongodbAtlas;

    // Connect to our Database and handle any bad connections
    mongoose.connect(DATABASE);
    mongoose.Promise = global.Promise; // Tell Mongoose to use ES6 promises
    mongoose.connection.on('error', (err) => {
        context.log(`ERROR→ ${err.message}`);
    });

    // Sale Schema.
    require('./modelSale');
    const Sale = mongoose.model('Sale');

    // Create a Response.
    if (req.query.customFieldName) { // Simple authentication for the purpose of demo.

        // Build the data we need.
        const sale_gross = req.query.p_sale_gross || '0';
        const earnings = JSON.parse(req.query.p_earnings)['16413'] || '0'
        const currency = req.query.p_currency || 'USD';
        const memberSince = req.query.memberSince || new Date();
        const customerEmail = req.query.customerEmail || '';
        const event_time = new Date();

        log('[OUTPUT]—— sale_gross: ' + sale_gross);
        log('[OUTPUT]—— earnings: ' + earnings);
        log('[OUTPUT]—— currency: ' + currency);

        const finalData = {
            sale_gross: sale_gross,
            earnings: earnings,
            currency: currency,
            memberSince: memberSince,
            customerEmail: customerEmail,
            event_time: event_time,
        }

        // Save to db.
        const sale = await (new Sale(finalData)).save();
        log("[OUTPUT]—— SALE SAVED: ", sale);

        // Respond with 200.
        context.res = {
            status: 200,
            body: "Thank You for the payment! " + (req.query.customFieldName || req.body.customFieldName)
        };
    } else {
        context.res = {
            status: 400,
            body: "Please pass a name on the query string or in the request body"
        };
    }


    // Informs the runtime that your code has finished. You must call context.done, or else the runtime never knows that your function is complete, and the execution will time out.
    // @link: https://docs.microsoft.com/en-us/azure/azure-functions/functions-reference-node#contextdone-method
    context.done();
};
View the code on Gist.
Step #10: Re-deploy the Azure Function
Now let’s re-deploy the Azure function. For that, go to the Azure Extension explorer present in the activity bar. From there access the FUNCTIONS tab and click on the third Deploy to Function App icon.
Step #11: Test Azure Function via Paddle’s Webhook
Looks like we’re pretty much done. All that’s left is to test our Azure function by triggering a dummy webhook via Paddle.com. Let’s do that. Also, when things do work, let’s explore how our data looks in the MongoDB Compass.
Wow, humph! That was a lot. Glad it worked. 🎉
🤔 So, What Just Happened?!
Prepare yourself for a mouthful. I created a small part of the Sales module in the custom WordPress Dashboard app that I am building. I used MongoDB Atlas and Compass, then created a Microsoft Azure Function via Function App with VSCode, deployed the app with an env secret as the application string with the MongoDB connection string, updated the Node.js version and triggered the function via a dummy webhook from Paddle.com (like it will trigger when a sale happens) to send data (from Paddle + WordPress) to our Azure function and from there to MongoDB Atlas. And it worked, haha!
Machine Learning & Artificial Intelligence
Machine learning and artificial intelligence are always a mesmerizing topic in the world of software technology but we don’t talk a lot about that in the context of WordPress or in the WP community.
I set to change that by adding a few small improvements to a select few WordPress sites for my client and have every intention of exploring the same with this custom WordPress dashboard.
I have discussed this topic before and shared what I am working on, take a look at this small artificial intelligence plugin I am building for WordPress, and integrating it with different Azure Cognitive Services.
I explained this in a video in another post that you can find here: Building a WordPress Artificial Intelligence Plugin →.
I’ve accomplished similar results in this dashboard with the wpapi package. First I upload the image to cognitive services and then on a confident response, I send it to WordPress to be uploaded via WordPress REST API, with an image description that gets generated by Computer Vision AI.
/**
 * Get Image Alt Recognition with Computer Vision
 * using Azure Cognitive Services.
 */
var WPAPI = require('wpapi');
var wp = new WPAPI({
    endpoint: 'http://src.wordpress-develop.dev/wp-json'
});

/**
 * Handle Image Alt Generation.
 */
function processImage() {
    // **********************************************
    // *** Update or verify the following values. ***
    // **********************************************

    // Replace <Subscription Key> with your valid subscription key.
    var subscriptionKey = "<Subscription Key>";

    // You must use the same region in your REST call as you used to get your
    // subscription keys. For example, if you got your subscription keys from
    // westus, replace "westcentralus" in the URI below with "westus".
    //
    // Free trial subscription keys are generated in the westcentralus region.
    // If you use a free trial subscription key, you shouldn't need to change
    // this region.
    var uriBase =
        "https://westcentralus.api.cognitive.microsoft.com/vision/v2.0/analyze";

    // Request parameters.
    var params = {
        "visualFeatures": "Categories,Description,Color",
        "details": "",
        "language": "en",
    };

    // Display the image.
    var sourceImageUrl = document.getElementById("inputImage").value;
    document.querySelector("#sourceImage").src = sourceImageUrl;

    // Make the REST API call.
    $.ajax({
            url: uriBase + "?" + $.param(params),

            // Request headers.
            beforeSend: function (xhrObj) {
                xhrObj.setRequestHeader("Content-Type", "application/json");
                xhrObj.setRequestHeader(
                    "Ocp-Apim-Subscription-Key", subscriptionKey);
            },

            type: "POST",

            // Request body.
            data: '{"url": ' + '"' + sourceImageUrl + '"}',
        })

        .done(function (data) {
            // Show formatted JSON on webpage.
            $("#responseTextArea").val(JSON.stringify(data, null, 2));

            // Extract and display the caption and confidence from the first caption in the description object.
            if (data.description && data.description.captions) {
                var caption = data.description.captions[0];

                if (caption.text && caption.confidence >= 0.5) {
                    const imgDescription = caption.text;

                    // ⬆ Upload to WordPress.
                    wp.media()
                        // Specify a path to the file you want to upload, or a Buffer
                        .file(sourceImageUrl)
                        .create({
                            title: imgDescription,
                            alt_text: imgDescription,
                            caption: imgDescription,
                            description: imgDescription
                        })
                        .then(function (response) {
                            // Your media is now uploaded: let's associate it with a post
                            var newImageId = response.id;
                            return wp.media().id(newImageId).update({
                                post: associatedPostId
                            });
                        })
                        .then(function (response) {
                            console.log('Media ID #' + response.id);
                            console.log('is now associated with Post ID #' + response.post);
                        });
                }
            }
        })

        .fail(function (jqXHR, textStatus, errorThrown) {
            // Display error message.
            var errorString = (errorThrown === "") ? "Error. " :
                errorThrown + " (" + jqXHR.status + "): ";
            errorString += (jqXHR.responseText === "") ? "" :
                jQuery.parseJSON(jqXHR.responseText).message;
            alert(errorString);
        });
};
View the code on Gist.
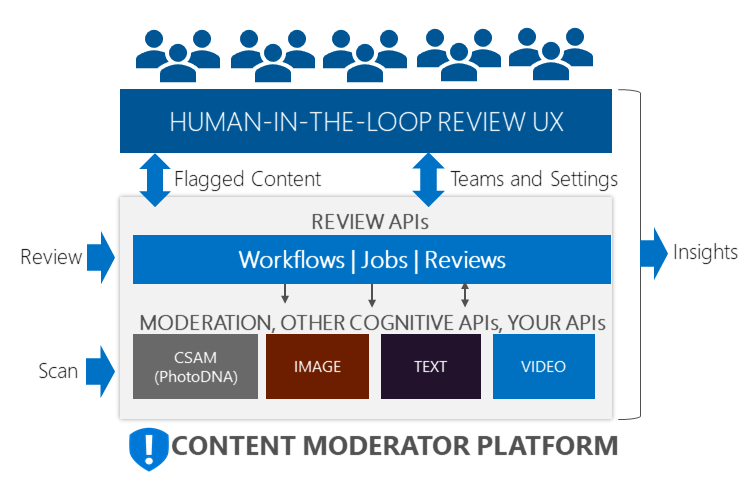
👀 Content Moderation Automation
One of the ideas we have is to take AI/ML from Azure to use as a content moderation platform, which offers a built-in human-in-the-loop + machine learning to help moderate images, text, and videos. It’s a work in progress but it’s something really interesting that you should definitely take a look at.
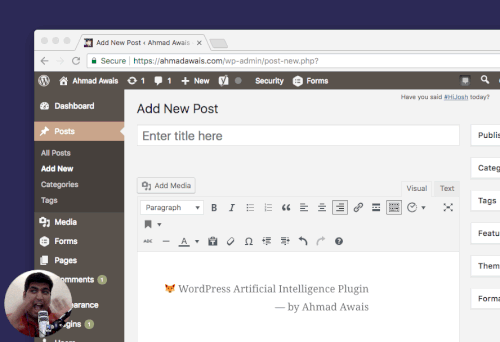
🕵 WordPress Grammar (Nazi) Intelligence
Y’all have a habit of typing the same typos over and over again. I do that all the time. The coolest thing ever is when search engines like Bing and Google can spell check and proofread the search query for you.
Imagine if WordPress had that?! So, I got to work and ended up cooking the same functionality in the WordPress admin area for when you type a typo in your post title (or more than one typos for all I care!).
I was so excited that I couldn’t contain myself, so there’s me in the left bottom corner. All happy and surprised! 🙌👐👏👊💪🎶☝😌🎧
It’s Your Turn Now!
I really hope that you enjoyed this potential integration between all these modern JavaScript frameworks, AI/ML products, and serverless functions.
This project is a lot of fun. I think if you give this tech-stack a shot you can have this crazy amount of fun as well. So, I’m leaving it up to you to try MongoDB Atlas, in the context of WordPress — and maybe attach all that to a bunch of serverless functions.
Frequently Asked Questions (FAQs) on Building Custom Dashboards with MongoDB & Azure Serverless Functions
How can I integrate Azure Functions with MongoDB?
Integrating Azure Functions with MongoDB involves creating a MongoDB database, setting up an Azure Function App, and writing a function that connects to the MongoDB database. You’ll need to install the MongoDB driver in your Azure Function App and use it to establish a connection to your MongoDB database. Once the connection is established, you can use the MongoDB driver to perform CRUD operations on your database from your Azure Function.
What are the benefits of using Azure Serverless Functions with MongoDB?
Azure Serverless Functions provide a scalable and cost-effective way to run your code in the cloud. When combined with MongoDB, a document database that provides high performance, high availability, and easy scalability, you can build powerful applications that can handle large amounts of data and complex operations. This combination allows you to focus on writing your code without worrying about infrastructure management.
How can I create a custom dashboard with MongoDB?
Creating a custom dashboard with MongoDB involves using MongoDB Charts, a tool that allows you to create visual representations of your MongoDB data. You can create various types of charts, including bar charts, line charts, and pie charts, and arrange them on a dashboard to provide a comprehensive view of your data. You can also customize the appearance of your charts and dashboards to suit your needs.
What is the role of Azure Portal in building custom dashboards?
Azure Portal is a web-based, unified console that provides an interface to manage all your Azure resources. It allows you to build, manage, and monitor everything from simple web apps to complex cloud applications in a single, unified console. In the context of building custom dashboards, you can use Azure Portal to manage your Azure Functions and monitor their performance.
How can I use the MongoDB API with Azure Functions?
To use the MongoDB API with Azure Functions, you’ll need to install the MongoDB driver in your Azure Function App. This driver provides a high-level API that you can use to interact with your MongoDB database. You can use this API to perform CRUD operations on your database, such as creating, reading, updating, and deleting documents.
Can I use JavaScript to write Azure Functions for MongoDB?
Yes, you can use JavaScript to write Azure Functions for MongoDB. Azure Functions support several programming languages, including JavaScript. You can use the MongoDB driver for Node.js to interact with your MongoDB database from your JavaScript Azure Functions.
How can I monitor the performance of my Azure Functions?
Azure provides several tools for monitoring the performance of your Azure Functions, including Azure Monitor and Application Insights. These tools provide insights into the performance and usage of your functions, allowing you to identify and troubleshoot issues.
How can I secure my MongoDB database when using it with Azure Functions?
Securing your MongoDB database involves several steps, including enabling authentication, enforcing access controls, encrypting data at rest and in transit, and regularly auditing your system. When using MongoDB with Azure Functions, you should also secure your function app by restricting access to it and encrypting its connections.
Can I scale my Azure Functions based on the load on my MongoDB database?
Yes, Azure Functions provide automatic scaling based on the load on your system. This means that if the load on your MongoDB database increases, Azure Functions can automatically allocate more resources to handle the increased load.
How can I handle errors in my Azure Functions for MongoDB?
Handling errors in your Azure Functions involves writing error handling code in your functions. This code should catch any errors that occur when your function is running and handle them appropriately. You can also use Azure’s monitoring tools to track errors and troubleshoot issues.
 Ahmad Awais
Ahmad Awais is a Full Stack WordPress Developer, WP Core Contributor, Front-end Fanatic and a Designer by night. He loves to read and write about WordPress. Apart from that, he creates optimized but advanced workflows to produce cool pieces of Open Source software.