
- Prerequisites
- About the Project
- Setting up a ChatKit Instance
- Scaffolding the Vue.js Project
- Building the UI Interface
- Password-less Authentication
- Subscribing to a Room
- Changing Rooms
- Reconnecting the User After a Page Refresh
- Sending Messages, Detecting User Typing and Logging Out
- Summary
- Frequently Asked Questions (FAQs) about Building a Real-Time Chat App with Vue.js and Pusher
Apps that communicate in real time are becoming more and more popular nowadays, as they make for a smoother, more natural user experience.
In this tutorial, we’re going to build a real-time chat application using Vue.js powered by ChatKit, a service provided by Pusher. The ChatKit service will provide us with a complete back end necessary for building a chat application on any device, leaving us to focus on building a front-end user interface that connects to the ChatKit service via the ChatKit client package.
Want to learn Vue.js from the ground up? Get an entire collection of Vue books covering fundamentals, projects, tips and tools & more with SitePoint Premium. Join now for just $9/month.
Prerequisites
This is an intermediate- to advanced-level tutorial. You’ll need to be familiar with the following concepts to follow along:
- Vue.js basics
- Vuex fundamentals
- employing a CSS framework
You’ll also need Node installed on your machine. You can do this by downloading the binaries from the official website, or by using a version manager. This is probably the easiest way, as it allows you to manage multiple versions of Node on the same machine.
Finally, you’ll need to install Vue CLI globally with the following command:
npm install -g @vue/cli
At the time of writing, Node 10.14.1 and Vue CLI 3.2.1 are the latest versions.
About the Project
We’re going to build a rudimentary chat application similar to Slack or Discord. The app will do the following:
- have multiple channels and rooms
- list room members and detect presence status
- detect when other users start typing
As mentioned earlier, we’re just building the front end. The ChatKit service has a back-end interface that will allows us to manage users, permissions and rooms.
You can find the complete code for this project on GitHub.
Setting up a ChatKit Instance
Let’s create our ChatKit instance, which is similar to a server instance if you’re familiar with Discord.
Go to the ChatKit page on Pusher’s website and click the Sign Up button. You’ll be prompted for an email address and password, as well as the option to sign in with GitHub or Google.
Select which option suits you best, then on the next screen fill out some details such as Name, Account type, User role etc.
Click Complete Onboarding and you’ll be taken to the main Pusher dashboard. Here, you should click the ChatKit Product.
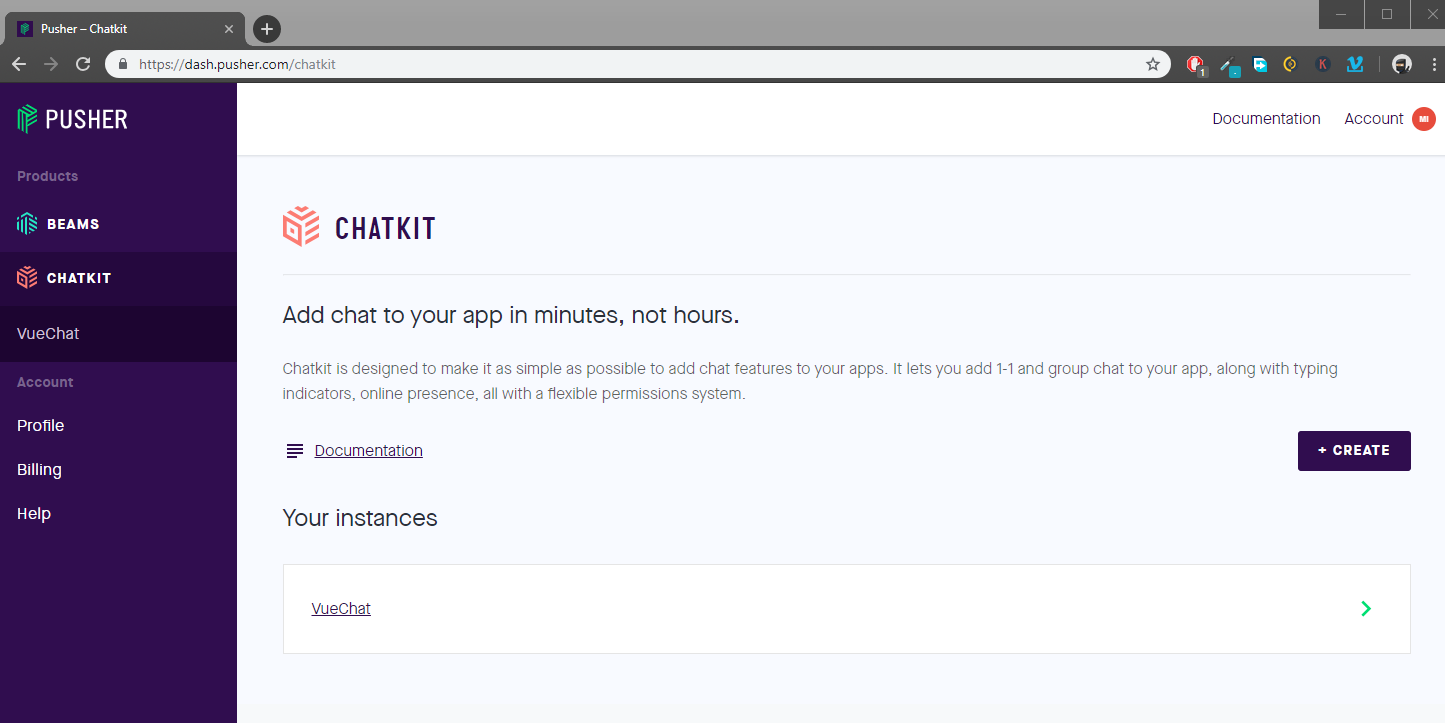
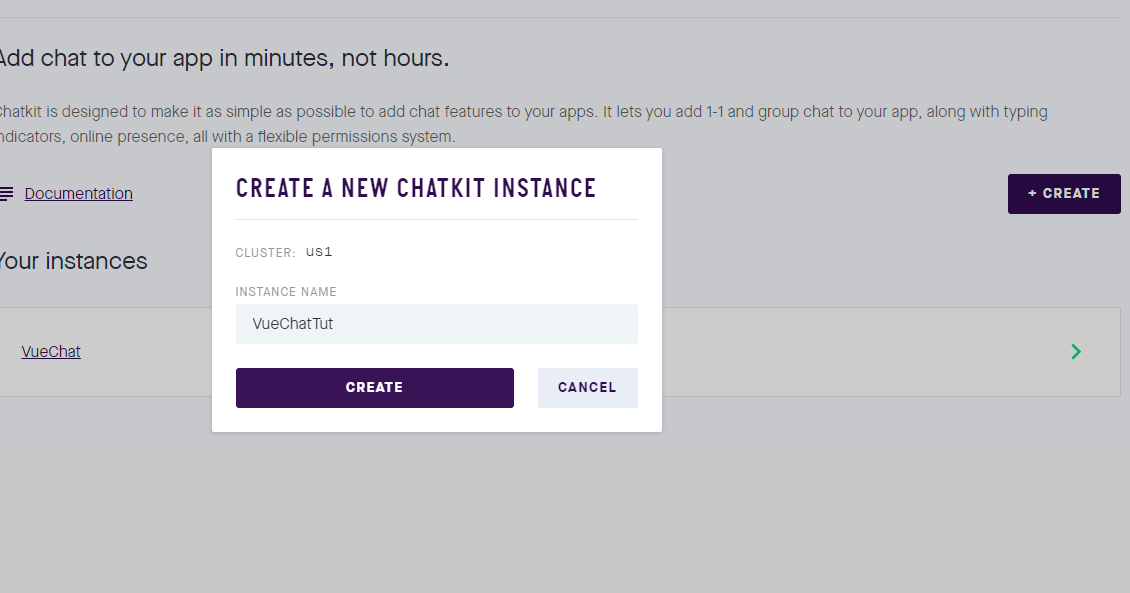
Click the Create button to create a new ChatKit Instance. I’m going to call mine VueChatTut.
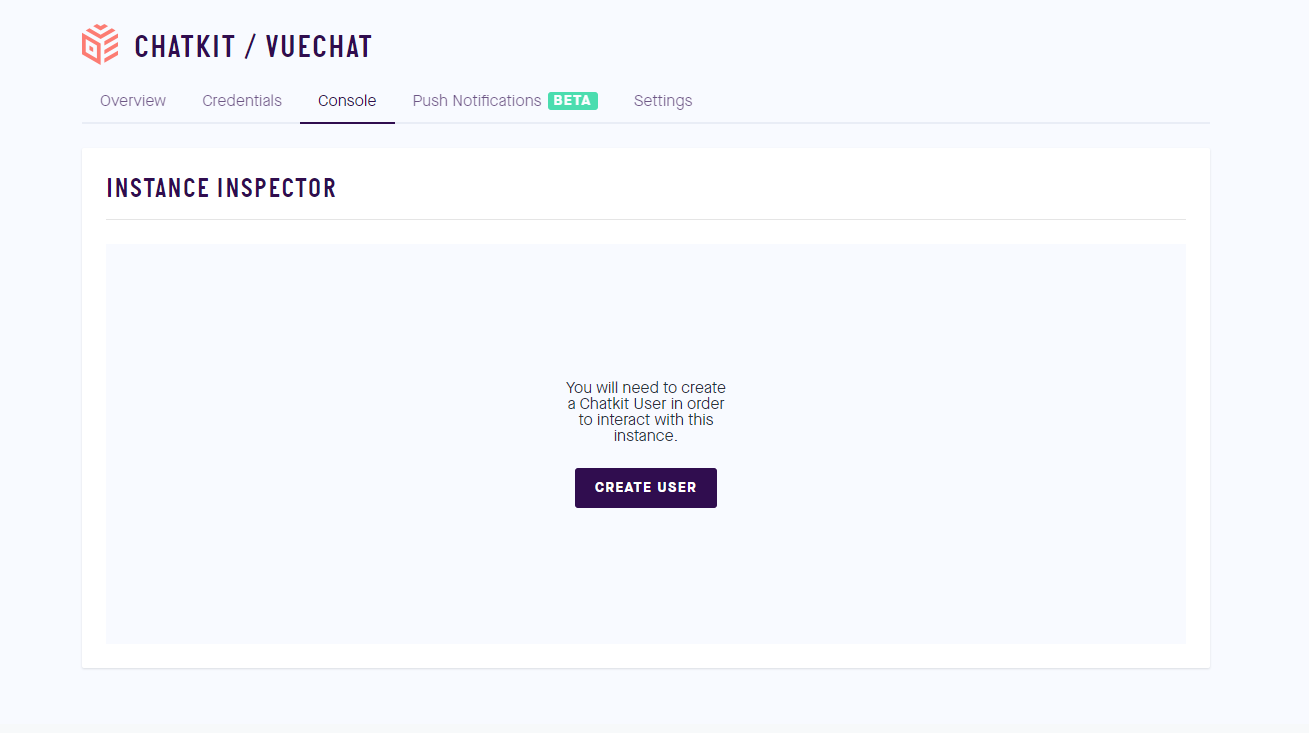
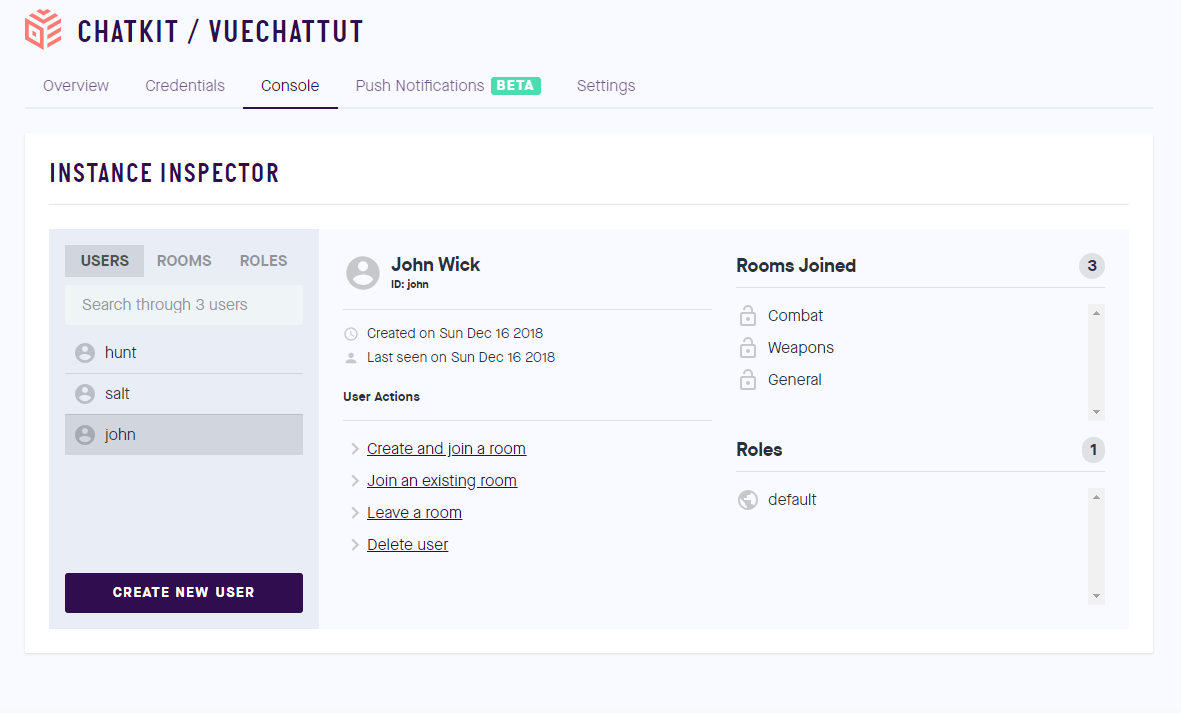
We’ll be using the free plan for this tutorial. It supports up to 1,000 unique users, which is more than sufficient for our needs. Head over to the Console tab. You’ll need to create a new user to get started. Go ahead and click the Create User button.
I’m going to call mine “john” (User Identifier) and “John Wick” (Display Name), but you can name yours however you want. The next part is easy: create the two or more users. For example:
- salt, Evelyn Salt
- hunt, Ethan Hunt
Create three or more rooms and assign users. For example:
- General (john, salt, hunt)
- Weapons (john, salt)
- Combat (john, hunt)
Here’s a snapshot of what your Console interface should like.
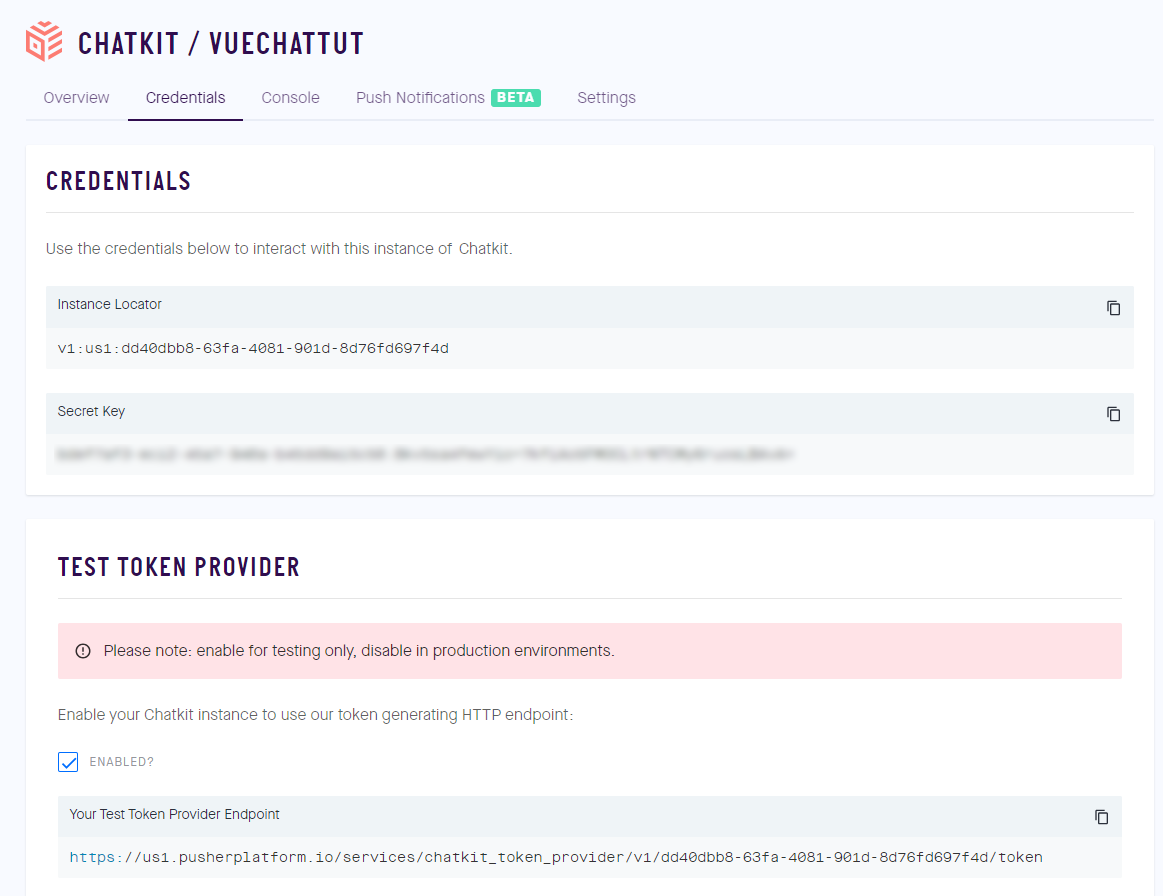
Next, you can go to the Rooms tab and create a message using a selected user for each room. This is for testing purposes. Then go to the Credentials tab and take note of the Instance Locator. We’ll need to activate the Test Token Provider, which is used for generating our HTTP endpoint, and take a note of that, too.
Our ChatKit back end is now ready. Let’s start building our Vue.js front end.
Scaffolding the Vue.js Project
Open your terminal and create the project as follows:
vue create vue-chatkit
Select Manually select features and answer the questions as shown below.
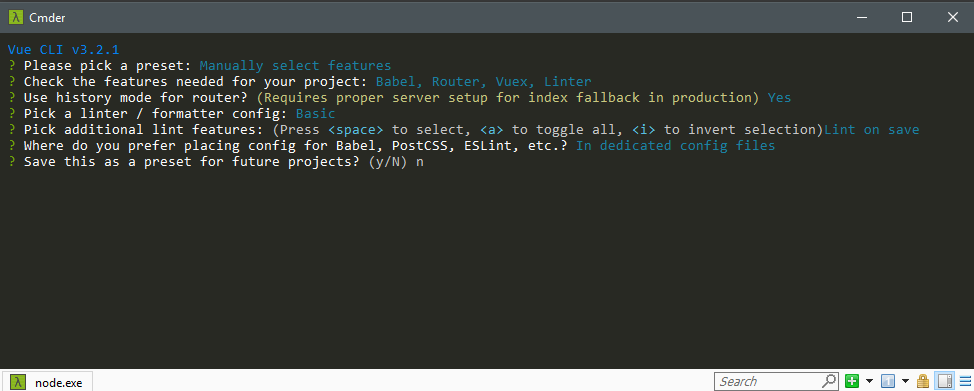
Make doubly sure you’ve selected Babel, Vuex and Vue Router as additional features. Next, create the following folders and files as follows:
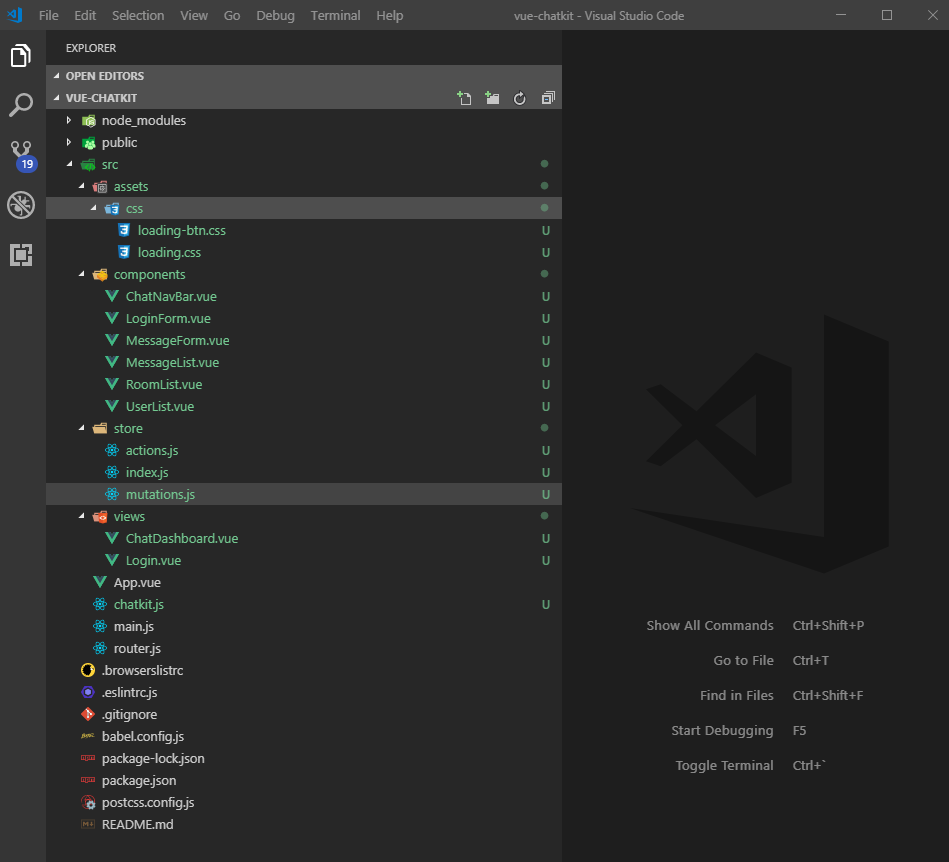
Make sure to create all the folders and files as demonstrated. Delete any unnecessary files that don’t appear in the above illustration.
For those of you that are at home in the console, here are the commands to do all that:
mkdir src/assets/css
mkdir src/store

touch src/assets/css/{loading.css,loading-btn.css}
touch src/components/{ChatNavBar.vue,LoginForm.vue,MessageForm.vue,MessageList.vue,RoomList.vue,UserList.vue}
touch src/store/{actions.js,index.js,mutations.js}
touch src/views/{ChatDashboard.vue,Login.vue}
touch src/chatkit.js

rm src/components/HelloWorld.vue
rm src/views/{About.vue,Home.vue}
rm src/store.js
When you’re finished, the contents of the src folder should look like so:
.
├── App.vue
├── assets
│   ├── css
│   │   ├── loading-btn.css
│   │   └── loading.css
│   └── logo.png
├── chatkit.js
├── components
│   ├── ChatNavBar.vue
│   ├── LoginForm.vue
│   ├── MessageForm.vue
│   ├── MessageList.vue
│   ├── RoomList.vue
│   └── UserList.vue
├── main.js
├── router.js
├── store
│   ├── actions.js
│   ├── index.js
│   └── mutations.js
└── views
    ├── ChatDashboard.vue
    └── Login.vue
For the loading-btn.css and the loading.css files, you can find them on the loading.io website. These files are not available in the npm repository, so you need to manually download them and place them in your project. Do make sure to read the documentation to get an idea on what they are and how to use the customizable loaders.
Next, we’re going to install the following dependencies:
- @pusher/chatkit-client, a real-time client interface for the ChatKit service
- bootstrap-vue, a CSS framework
- moment, a date and time formatting utility
- vue-chat-scroll, which scrolls to the bottom automatically when new content is added
- vuex-persist, which saves Vuex state in browser’s local storage
npm i @pusher/chatkit-client bootstrap-vue moment vue-chat-scroll vuex-persist
Do check out the links to learn more about what each package does, and how it can be configured.
Now, let’s configure our Vue.js project. Open src/main.js and update the code as follows:
import Vue from 'vue'
import BootstrapVue from 'bootstrap-vue'
import VueChatScroll from 'vue-chat-scroll'

import App from './App.vue'
import router from './router'
import store from './store/index'

import 'bootstrap/dist/css/bootstrap.css'
import 'bootstrap-vue/dist/bootstrap-vue.css'
import './assets/css/loading.css'
import './assets/css/loading-btn.css'

Vue.config.productionTip = false
Vue.use(BootstrapVue)
Vue.use(VueChatScroll)

new Vue({
  router,
  store,
  render: h => h(App)
}).$mount('#app')
Update src/router.js as follows:
import Vue from 'vue'
import Router from 'vue-router'
import Login from './views/Login.vue'
import ChatDashboard from './views/ChatDashboard.vue'

Vue.use(Router)

export default new Router({
  mode: 'history',
  base: process.env.BASE_URL,
  routes: [
    {
      path: '/',
      name: 'login',
      component: Login
    },
    {
      path: '/chat',
      name: 'chat',
      component: ChatDashboard,
    }
  ]
})
Update src/store/index.js:
import Vue from 'vue'
import Vuex from 'vuex'
import VuexPersistence from 'vuex-persist'
import mutations from './mutations'
import actions from './actions'

Vue.use(Vuex)

const debug = process.env.NODE_ENV !== 'production'

const vuexLocal = new VuexPersistence({
  storage: window.localStorage
})

export default new Vuex.Store({
  state: {
  },
  mutations,
  actions,
  getters: {
  },
  plugins: [vuexLocal.plugin],
  strict: debug
})
The vuex-persist package ensures that our Vuex state is saved between page reloads or refreshes.
Our project should be able to compile now without errors. However, don’t run it just yet, as we need to build the user interface.
Building the UI Interface
Let’s start by updating src/App.vue as follows:
<template>
  <div id="app">
    <router-view/>
  </div>
</template>
Next, we need to define our Vuex store states as they’re required by our UI components to work. We’ll do this by going to our Vuex store in src/store/index.js. Just update the state and getters sections as follows:
state: {
  loading: false,
  sending: false,
  error: null,
  user: [],
  reconnect: false,
  activeRoom: null,
  rooms: [],
  users: [],
  messages: [],
  userTyping: null
},
getters: {
  hasError: state => state.error ? true : false
},
These are all the state variables that we’ll need for our chat application. The loading state is used by the UI to determine whether it should run the CSS loader. The error state is used to store information of an error that has just occurred. We’ll discuss the rest of the state variables when we cross their bridges.
Next open src/view/Login.vue and update as follows:
<template>
  <div class="login">
    <b-jumbotron  header="Vue.js Chat"
                  lead="Powered by Chatkit SDK and Bootstrap-Vue"
                  bg-variant="info"
                  text-variant="white">
      <p>For more information visit website</p>
      <b-btn target="_blank" href="https://pusher.com/chatkit">More Info</b-btn>
    </b-jumbotron>
    <b-container>
      <b-row>
        <b-col lg="4" md="3"></b-col>
        <b-col lg="4" md="6">
          <LoginForm />
        </b-col>
        <b-col lg="4" md="3"></b-col>
      </b-row>
    </b-container>
  </div>
</template>

<script>
import LoginForm from '@/components/LoginForm.vue'

export default {
  name: 'login',
  components: {
    LoginForm
  }
}
</script>
Next, insert code for src/components/LoginForm.vue as follows:
<template>
  <div class="login-form">
    <h5 class="text-center">Chat Login</h5>
    <hr>
    <b-form @submit.prevent="onSubmit">
       <b-alert variant="danger" :show="hasError">{{ error }} </b-alert>

      <b-form-group id="userInputGroup"
                    label="User Name"
                    label-for="userInput">
        <b-form-input id="userInput"
                      type="text"
                      placeholder="Enter user name"
                      v-model="userId"
                      autocomplete="off"
                      :disabled="loading"
                      required>
        </b-form-input>
      </b-form-group>

      <b-button type="submit"
                variant="primary"
                class="ld-ext-right"
                v-bind:class="{ running: loading }"
                :disabled="isValid">
                Login <div class="ld ld-ring ld-spin"></div>
      </b-button>
    </b-form>
  </div>
</template>

<script>
import { mapState, mapGetters } from 'vuex'

export default {
  name: 'login-form',
  data() {
    return {
      userId: '',
    }
  },
  computed: {
    isValid: function() {
      const result = this.userId.length < 3;
      return result ? result : this.loading
    },
    ...mapState([
      'loading',
      'error'
    ]),
    ...mapGetters([
      'hasError'
    ])
  }
}
</script>
As mentioned earlier, this is an advanced tutorial. If you have trouble understanding any of the code here, please go to the prerequisites or the project dependencies for information.
We can now start the Vue dev server via npm run serve to ensure our application is running without any compilation issues.

You can confirm the validation is working by entering a username. You should see the Login button activate after entering three characters. The Login button doesn’t work for now, as we haven’t coded that part. We’ll look into it later. For now, let’s continue building our chat user interface.
Go to src/view/ChatDashboard.vue and insert the code as follows:
<template>
  <div class="chat-dashboard">
    <ChatNavBar />
    <b-container fluid class="ld-over" v-bind:class="{ running: loading }">
      <div class="ld ld-ring ld-spin"></div>
      <b-row>
        <b-col cols="2">
          <RoomList />
        </b-col>

        <b-col cols="8">
          <b-row>
            <b-col id="chat-content">
              <MessageList />
            </b-col>
          </b-row>
          <b-row>
            <b-col>
              <MessageForm />
            </b-col>
          </b-row>
        </b-col>

        <b-col cols="2">
          <UserList />
        </b-col>
      </b-row>
    </b-container>
  </div>
</template>

<script>
import ChatNavBar from '@/components/ChatNavBar.vue'
import RoomList from '@/components/RoomList.vue'
import MessageList from '@/components/MessageList.vue'
import MessageForm from '@/components/MessageForm.vue'
import UserList from '@/components/UserList.vue'
import { mapState } from 'vuex';

export default {
  name: 'Chat',
  components: {
    ChatNavBar,
    RoomList,
    UserList,
    MessageList,
    MessageForm
  },
  computed: {
    ...mapState([
      'loading'
    ])
  }
}
</script>
The ChatDashboard will act as a layout parent for the following child components:
ChatNavBar, a basic navigation barRoomList, which lists rooms that the logged in user has access to, and which is also a room selectorUserList, which lists members of a selected roomMessageList, which displays messages posted in a selected roomMessageForm, a form for sending messages to the selected room
Let’s put some boilerplate code in each component to ensure everything gets displayed.
Insert boilerplate code for src/components/ChatNavBar.vue as follows:
<template>
  <b-navbar id="chat-navbar" toggleable="md" type="dark" variant="info">
    <b-navbar-brand href="#">
      Vue Chat
    </b-navbar-brand>
    <b-navbar-nav class="ml-auto">
      <b-nav-text>{{ user.name }} | </b-nav-text>
      <b-nav-item href="#" active>Logout</b-nav-item>
    </b-navbar-nav>
  </b-navbar>
</template>

<script>
import { mapState } from 'vuex'

export default {
  name: 'ChatNavBar',
  computed: {
    ...mapState([
      'user',
    ])
  },
}
</script>

<style>
  #chat-navbar {
    margin-bottom: 15px;
  }
</style>
Insert boilerplate code for src/components/RoomList.vue as follows:
<template>
  <div class="room-list">
    <h4>Channels</h4>
    <hr>
    <b-list-group v-if="activeRoom">
      <b-list-group-item v-for="room in rooms"
                        :key="room.name"
                        :active="activeRoom.id === room.id"
                        href="#"
                        @click="onChange(room)">
        # {{ room.name }}
      </b-list-group-item>
    </b-list-group>
  </div>
</template>

<script>
import { mapState } from 'vuex'

export default {
  name: 'RoomList',
  computed: {
    ...mapState([
      'rooms',
      'activeRoom'
    ]),
  }
}
</script>
Insert boilerplate code for src/components/UserList.vue as follows:
<template>
  <div class="user-list">
    <h4>Members</h4>
    <hr>
    <b-list-group>
      <b-list-group-item v-for="user in users" :key="user.username">
        {{ user.name }}
        <b-badge v-if="user.presence"
        :variant="statusColor(user.presence)"
        pill>
        {{ user.presence }}</b-badge>
      </b-list-group-item>
    </b-list-group>
  </div>
</template>

<script>
import { mapState } from 'vuex'

export default {
  name: 'user-list',
  computed: {
    ...mapState([
      'loading',
      'users'
    ])
  },
  methods: {
    statusColor(status) {
      return status === 'online' ? 'success' : 'warning'
    }
  }
}
</script>
Insert boilerplate code for src/components/MessageList.vue as follows:
<template>
  <div class="message-list">
    <h4>Messages</h4>
    <hr>
    <div id="chat-messages" class="message-group" v-chat-scroll="{smooth: true}">
      <div class="message" v-for="(message, index) in messages" :key="index">
        <div class="clearfix">
          <h4 class="message-title">{{ message.name }}</h4>
          <small class="text-muted float-right">@{{ message.username }}</small>
        </div>
        <p class="message-text">
          {{ message.text }}
        </p>
        <div class="clearfix">
          <small class="text-muted float-right">{{ message.date }}</small>
        </div>
      </div>
    </div>
  </div>
</template>

<script>
import { mapState } from 'vuex'

export default {
  name: 'message-list',
  computed: {
    ...mapState([
      'messages',
    ])
  }
}
</script>

<style>
.message-list {
  margin-bottom: 15px;
  padding-right: 15px;
}
.message-group {
  height: 65vh !important;
  overflow-y: scroll;
}
.message {
  border: 1px solid lightblue;
  border-radius: 4px;
  padding: 10px;
  margin-bottom: 15px;
}
.message-title {
  font-size: 1rem;
  display:inline;
}
.message-text {
  color: gray;
  margin-bottom: 0;
}
.user-typing {
  height: 1rem;
}
</style>
Insert boilerplate code for src/components/MessageForm.vue as follows:
<template>
  <div class="message-form ld-over">
    <small class="text-muted">@{{ user.username }}</small>
    <b-form @submit.prevent="onSubmit" class="ld-over" v-bind:class="{ running: sending }">
      <div class="ld ld-ring ld-spin"></div>
      <b-alert variant="danger" :show="hasError">{{ error }} </b-alert>
      <b-form-group>
        <b-form-input id="message-input"
                      type="text"
                      v-model="message"
                      placeholder="Enter Message"
                      autocomplete="off"
                      required>
        </b-form-input>
      </b-form-group>
      <div class="clearfix">
        <b-button type="submit" variant="primary" class="float-right">
          Send
        </b-button>
      </div>
    </b-form>
  </div>
</template>

<script>
import { mapState, mapGetters } from 'vuex'

export default {
  name: 'message-form',
  data() {
    return {
      message: ''
    }
  },
  computed: {
    ...mapState([
      'user',
      'sending',
      'error',
      'activeRoom'
    ]),
    ...mapGetters([
      'hasError'
    ])
  }
}
</script>
Go over the code to ensure nothing is a mystery to you. Navigate to http://localhost:8080/chat to check if everything is running. Check the terminal and browser consoles to ensure there are no errors at this point. You should now have the following view.

Pretty empty, right? Let’s go to src/store/index.js and insert some mock data in state:
state: {
  loading: false,
  sending: false,
  error: 'Relax! This is just a drill error message',
  user: {
    username: 'Jack',
    name: 'Jack Sparrow'
  },
  reconnect: false,
  activeRoom: {
    id: '124'
  },
  rooms: [
    {
      id: '123',
      name: 'Ships'
    },
    {
      id: '124',
      name: 'Treasure'
    }
  ],
  users: [
    {
      username: 'Jack',
      name: 'Jack Sparrow',
      presence: 'online'
    },
    {
      username: 'Barbossa',
      name: 'Hector Barbossa',
      presence: 'offline'
    }
  ],
  messages: [
    {
      username: 'Jack',
      date: '11/12/1644',
      text: 'Not all treasure is silver and gold mate'
    },
    {
      username: 'Jack',
      date: '12/12/1644',
      text: 'If you were waiting for the opportune moment, that was it'
    },
    {
      username: 'Hector',
      date: '12/12/1644',
      text: 'You know Jack, I thought I had you figured out'
    }
  ],
  userTyping: null
},
After saving the file, your view should match the image below.
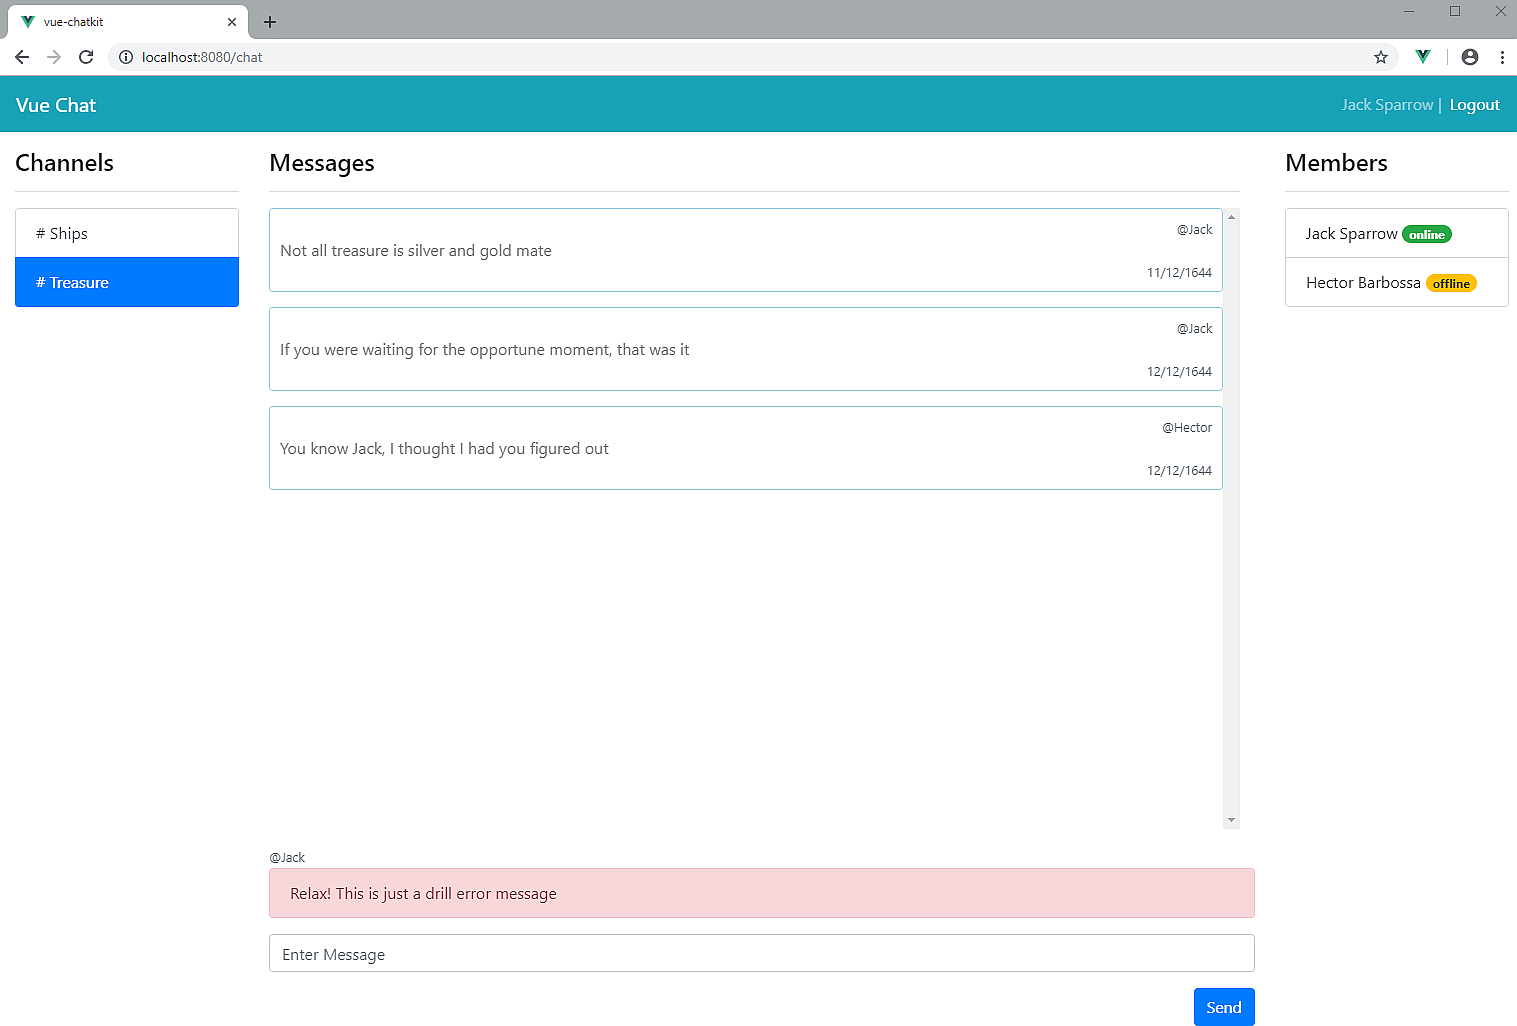
This simple test ensures that all components and states are all tied up together nicely. You can now revert the state code back to its original form:
state: {
  loading: false,
  sending: false,
  error: null,
  user: null,
  reconnect: false,
  activeRoom: null,
  rooms: [],
  users: [],
  messages: [],
  userTyping: null
}
Let’s start implementing concrete features, starting with the login form.
Password-less Authentication
For this tutorial, we’ll employ a password-less non-secure authentication system. A proper, secure authentication system is outside the scope of this tutorial. To start with, we need to start building our own interface that will interact with ChatKit service via the @pusher/chatkit-client package.
Go back to the ChatKit dashboard and copy the instance and test token parameters. Save them in the file .env.local at the root of your project like this:
VUE_APP_INSTANCE_LOCATOR=
VUE_APP_TOKEN_URL=
VUE_APP_MESSAGE_LIMIT=10
I’ve also added a MESSAGE_LIMIT parameter. This value simply restricts the number of messages our chat application can fetch. Make sure to fill in the other parameters from the credentials tab.
Next, go to src/chatkit.js to start building our chat application foundation:
import { ChatManager, TokenProvider } from '@pusher/chatkit-client'

const INSTANCE_LOCATOR = process.env.VUE_APP_INSTANCE_LOCATOR;
const TOKEN_URL = process.env.VUE_APP_TOKEN_URL;
const MESSAGE_LIMIT = Number(process.env.VUE_APP_MESSAGE_LIMIT) || 10;

let currentUser = null;
let activeRoom = null;

async function connectUser(userId) {
  const chatManager = new ChatManager({
    instanceLocator: INSTANCE_LOCATOR,
    tokenProvider: new TokenProvider({ url: TOKEN_URL }),
    userId
  });
  currentUser = await chatManager.connect();
  return currentUser;
}

export default {
  connectUser
}
Notice that we’re casting the MESSAGE_LIMIT constant to a number, as by default the process.env object forces all of its properties to be of type string.
Insert the following code for src/store/mutations:
export default {
  setError(state, error) {
    state.error = error;
  },
  setLoading(state, loading) {
    state.loading = loading;
  },
  setUser(state, user) {
    state.user = user;
  },
  setReconnect(state, reconnect) {
    state.reconnect = reconnect;
  },
  setActiveRoom(state, roomId) {
    state.activeRoom = roomId;
  },
  setRooms(state, rooms) {
    state.rooms = rooms
  },
  setUsers(state, users) {
    state.users = users
  },
 clearChatRoom(state) {
    state.users = [];
    state.messages = [];
  },
  setMessages(state, messages) {
    state.messages = messages
  },
  addMessage(state, message) {
    state.messages.push(message)
  },
  setSending(state, status) {
    state.sending = status
  },
  setUserTyping(state, userId) {
    state.userTyping = userId
  },
  reset(state) {
    state.error = null;
    state.users = [];
    state.messages = [];
    state.rooms = [];
    state.user = null
  }
}
The code for mutations is really simple — just a bunch of setters. You’ll soon understand what each mutation function is for in the later sections. Next, update src/store/actions.js with this code:
import chatkit from '../chatkit';

// Helper function for displaying error messages
function handleError(commit, error) {
  const message = error.message || error.info.error_description;
  commit('setError', message);
}

export default {
  async login({ commit, state }, userId) {
    try {
      commit('setError', '');
      commit('setLoading', true);
      // Connect user to ChatKit service
      const currentUser = await chatkit.connectUser(userId);
      commit('setUser', {
        username: currentUser.id,
        name: currentUser.name
      });
      commit('setReconnect', false);

      // Test state.user
      console.log(state.user);
    } catch (error) {
      handleError(commit, error)
    } finally {
      commit('setLoading', false);
    }
  }
}
Next, update src/components/LoginForm.vue as follows:
import { mapState, mapGetters, mapActions } from 'vuex'

//...
export default {
  //...
  methods: {
    ...mapActions([
      'login'
    ]),
    async onSubmit() {
      const result = await this.login(this.userId);
      if(result) {
        this.$router.push('chat');
      }
    }
  }
}
You’ll have to restart the Vue.js server in order to load env.local data. If you see any errors regarding unused variables, ignore them for now. Once you’ve done that, navigate to http://localhost:8080/ and test the login feature:
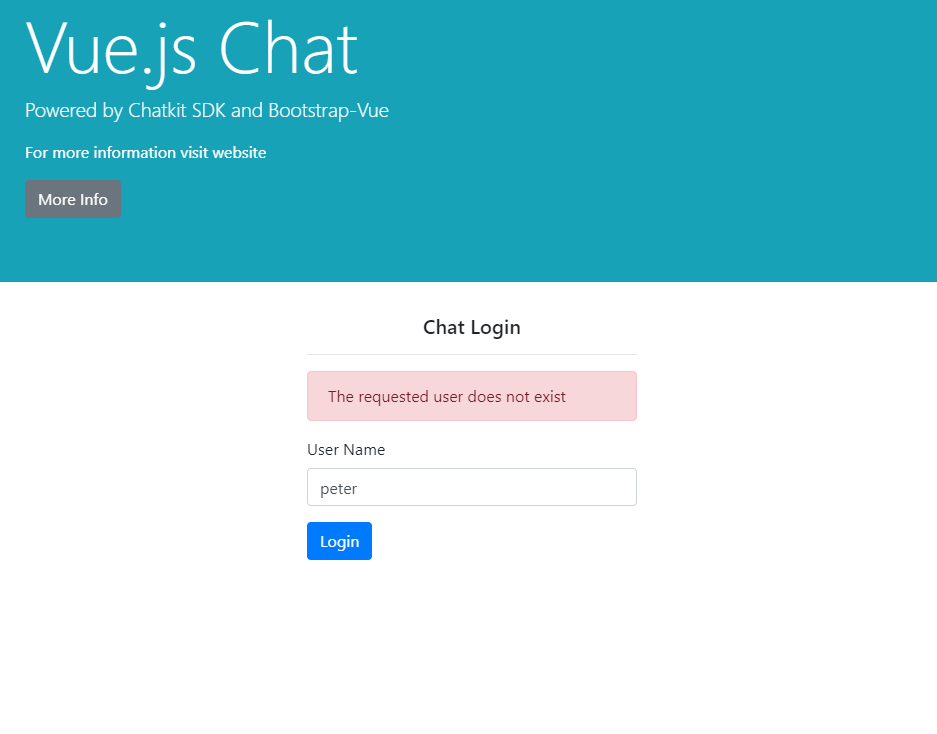
In the above example, I’ve used an incorrect username just to make sure the error handling feature is working correctly.
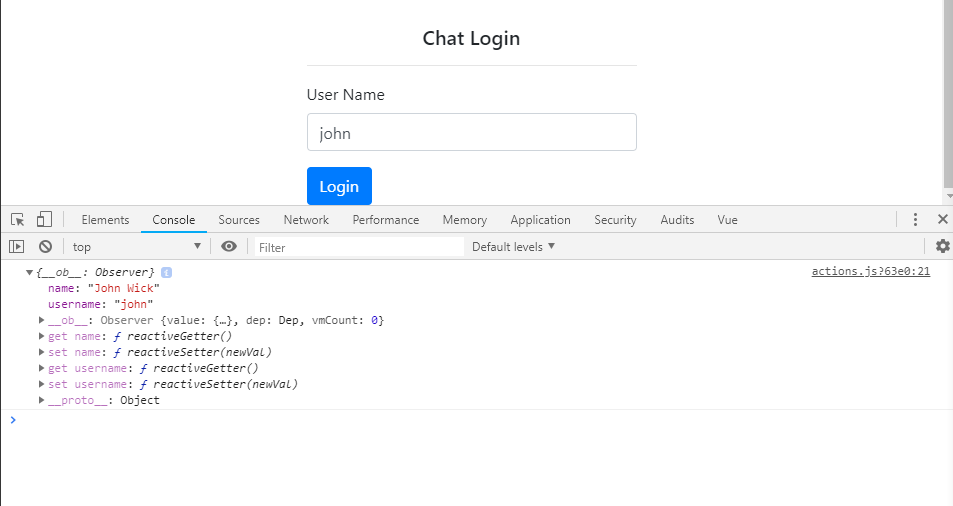
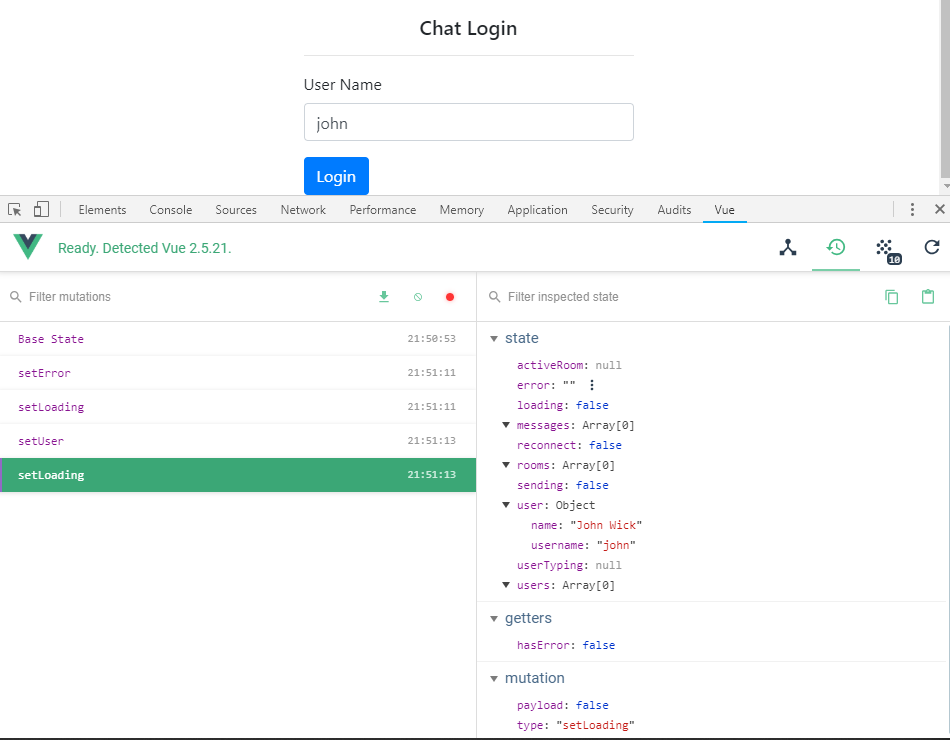
In this screenshot, I’ve used the correct username. I’ve also opened up the browser console tab to ensure that the user object has been populated. Better yet, if you’ve installed Vue.js Dev Tools in Chrome or Firefox, you should be able to see more detailed information.
If everything’s working correctly for you at this point, move on to the next step.
Subscribing to a Room
Now that we’ve successfully verified that the login feature works, we need to redirect users to the ChatDashboard view. The code this.$router.push('chat'); does this for us. However, our action login needs to return a Boolean to determine when it’s okay to navigate to the ChatDashboard view. We also need to populate the RoomList and UserList components with actual data from the ChatKit service.
Update src/chatkit.js as follows:
//...
import moment from 'moment'
import store from './store/index'

//...
function setMembers() {
  const members = activeRoom.users.map(user => ({
    username: user.id,
    name: user.name,
    presence: user.presence.state
  }));
  store.commit('setUsers', members);
}

async function subscribeToRoom(roomId) {
  store.commit('clearChatRoom');
  activeRoom = await currentUser.subscribeToRoom({
    roomId,
    messageLimit: MESSAGE_LIMIT,
    hooks: {
      onMessage: message => {
        store.commit('addMessage', {
          name: message.sender.name,
          username: message.senderId,
          text: message.text,
          date: moment(message.createdAt).format('h:mm:ss a D-MM-YYYY')
        });
      },
      onPresenceChanged: () => {
        setMembers();
      },
      onUserStartedTyping: user => {
        store.commit('setUserTyping', user.id)
      },
      onUserStoppedTyping: () => {
        store.commit('setUserTyping', null)
      }
    }
  });
  setMembers();
  return activeRoom;
}

export default {
  connectUser,
  subscribeToRoom
}
If you look at the hooks section, we have event handlers used by the ChatKit service to communicate with our client application. You can find the full documentation here. I’ll quickly summarize the purpose of each hook method:
onMessagereceives messagesonPresenceChangedreceives an event when a user logs in or outonUserStartedTypingreceives an event that a user is typingonUserStoppedTypingreceives an event that a user has stopped typing
For the onUserStartedTyping to work, we need to emit a typing event from our MessageForm while a user is typing. We’ll look into this in the next section.
Update the login function in src/store/actions.js with the following code:
//...
try {
  //... (place right after the `setUser` commit statement)
  // Save list of user's rooms in store
  const rooms = currentUser.rooms.map(room => ({
    id: room.id,
    name: room.name
  }))
  commit('setRooms', rooms);

  // Subscribe user to a room
  const activeRoom = state.activeRoom || rooms[0]; // pick last used room, or the first one
  commit('setActiveRoom', {
    id: activeRoom.id,
    name: activeRoom.name
  });
  await chatkit.subscribeToRoom(activeRoom.id);

  return true;
} catch (error) {
  //...
}
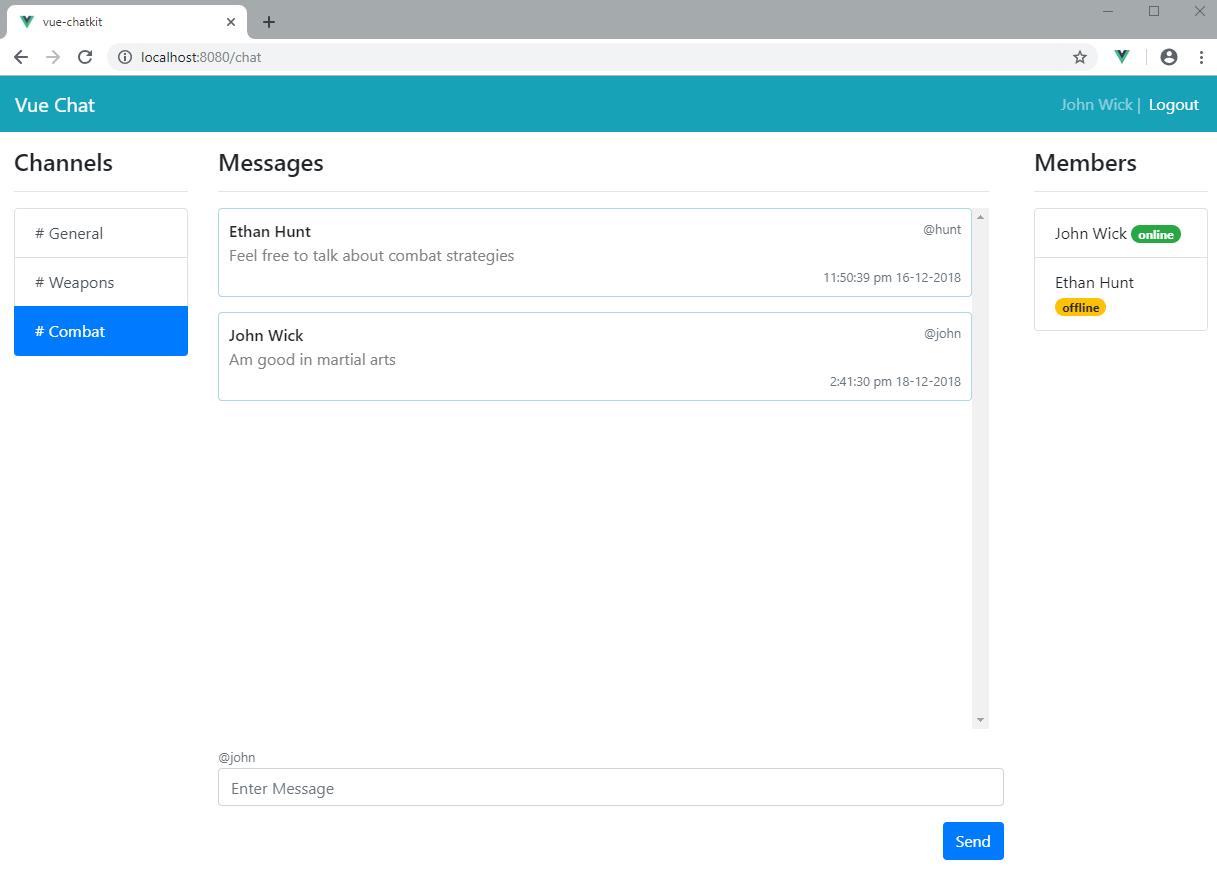
After you’ve saved the code, go back to the login screen and enter the correct username. You should be taken to the following screen.

Nice! Almost all the components are working without additional effort since we wired them up properly to the Vuex store. Try sending a message via ChatKit’s dashboard console interface. Create a message and post it to the General room. You should see the new messages pop up automatically in the MessageList component. Soon, we’ll implement the logic for sending messages from our Vue.js app.
If You Experience Issues
In case you’re experiencing issues, try the following:
- restart the Vue.js server
- clear your browser cache
- do a hard reset/refresh (available in Chrome if the Console tab is open and you hold the Reload button for five seconds)
- clear localStorage using your browser console
If everything is running okay up to this point, continue with the next section, where we implement logic for changing rooms.
Changing Rooms
This part is quite simple, since we’ve already laid out the foundation. First, we’ll create an action that will allow users to change rooms. Go to src/store/actions.js and add this function right after the login action handler:
async changeRoom({ commit }, roomId) {
  try {
    const { id, name } = await chatkit.subscribeToRoom(roomId);
    commit('setActiveRoom', { id, name });
  } catch (error) {
    handleError(commit, error)
  }
},
Next, go to src/componenents/RoomList.vue and update the script section as follows:
import { mapState, mapActions } from 'vuex'
//...
export default {
  //...
  methods: {
    ...mapActions([
      'changeRoom'
    ]),
    onChange(room) {
      this.changeRoom(room.id)
    }
  }
}
If you recall, we’ve already defined @click="onChange(room)" in the b-list-group-item element. Let’s test out this new feature by clicking the items in the RoomList component.
Your UI should update with each click of the room. The MessageList and UserList component should display the correct information for the selected room. For the next section, we’ll implement multiple features at once.
Reconnecting the User After a Page Refresh
You may have noticed that, when you do some changes to store/index.js, or you do a page refresh, you get the following error: Cannot read property 'subscribeToRoom' of null. This happens because the state of your application gets reset. Luckily, the vuex-persist package maintains our Vuex state between page reloads by saving it in the browser’s local storage.
Unfortunately, the references that connect our app to the ChatKit server are reset back to null. To fix this, we need to perform a reconnect operation. We also need a way to tell our app that a page reload has just happened and that our app needs to reconnect in order to continue functioning properly. We’ll implement this code in src/components/ChatNavbar.vue. Update the script section as follows:
<script>
import { mapState, mapActions, mapMutations } from 'vuex'

export default {
  name: 'ChatNavBar',
  computed: {
    ...mapState([
      'user',
       'reconnect'
    ])
  },
  methods: {
    ...mapActions([
      'logout',
      'login'
    ]),
    ...mapMutations([
      'setReconnect'
    ]),
    onLogout() {
      this.$router.push({ path: '/' });
      this.logout();
    },
    unload() {
      if(this.user.username) { // User hasn't logged out
        this.setReconnect(true);
      }
    }
  },
  mounted() {
    window.addEventListener('beforeunload', this.unload);
    if(this.reconnect) {
      this.login(this.user.username);
    }
  }
}
</script>
Let me break down the sequence of events so that you can understand the logic behind reconnecting to the ChatKit service:
unload. When a page refresh occurs, this method gets called. It checks first the stateuser.usernamehas been set. If it has, it means the user has not logged out. The statereconnectis set to true.mounted. This method gets called every timeChatNavbar.vuehas just finished rendering. It first assigns a handler to an event listener that gets called just before the page unloads. It also does a check ifstate.reconnecthas been set to true. If so, then the login procedure is executed, thus reconnecting our chat application back to our ChatKit service.
I’ve also added a Logout feature, which we’ll look into later.
After making these changes, try refreshing the page. You’ll see the page update itself automatically as it does the reconnection process behind the scenes. When you switch rooms, it should work flawlessly.
Sending Messages, Detecting User Typing and Logging Out
Let’s start with implementing these features in src/chatkit.js by adding the following code:
//...
async function sendMessage(text) {
  const messageId = await currentUser.sendMessage({
    text,
    roomId: activeRoom.id
  });
  return messageId;
}

export function isTyping(roomId) {
  currentUser.isTypingIn({ roomId });
}

function disconnectUser() {
  currentUser.disconnect();
}

export default {
  connectUser,
  subscribeToRoom,
  sendMessage,
  disconnectUser
}
While the functions sendMessage and disconnectUser will be bundled in ChatKit’s module export, isTyping function will be exported separately. This is to allow MessageForm to directly send typing events without involving the Vuex store.
For sendMessage and disconnectUser, we’ll need to update the store in order to cater for things like error handling and loading status notifications. Go to src/store/actions.js and insert the following code right after the changeRoom function:
async sendMessage({ commit }, message) {
  try {
    commit('setError', '');
    commit('setSending', true);
    const messageId = await chatkit.sendMessage(message);
    return messageId;
  } catch (error) {
    handleError(commit, error)
  } finally {
    commit('setSending', false);
  }
},
async logout({ commit }) {
  commit('reset');
  chatkit.disconnectUser();
  window.localStorage.clear();
}
For the logout function, we call commit('reset') to reset our store back to its original state. It’s a basic security feature to remove user information and messages from the browser cache.
Let’s start by updating the form input in src/components/MessageForm.vue to emit typing events by adding the @input directive:
<b-form-input id="message-input"
              type="text"
              v-model="message"
              @input="isTyping"
              placeholder="Enter Message"
              autocomplete="off"
              required>
</b-form-input>
Let’s now update the script section for src/components/MessageForm.vue to handle message sending and emitting of typing events. Update as follows:
<script>
import { mapActions, mapState, mapGetters } from 'vuex'
import { isTyping } from '../chatkit.js'

export default {
  name: 'message-form',
  data() {
    return {
      message: ''
    }
  },
  computed: {
    ...mapState([
      'user',
      'sending',
      'error',
      'activeRoom'
    ]),
    ...mapGetters([
      'hasError'
    ])
  },
  methods: {
    ...mapActions([
      'sendMessage',
    ]),
    async onSubmit() {
      const result = await this.sendMessage(this.message);
      if(result) {
        this.message = '';
      }
    },
     async isTyping() {
      await isTyping(this.activeRoom.id);
    }
  }
}
</script>
And in src/MessageList.vue:
import { mapState } from 'vuex'

export default {
  name: 'message-list',
  computed: {
    ...mapState([
      'messages',
      'userTyping'
    ])
  }
}
The send message feature should now work. In order to display a notification that another user is typing, we need to add an element for displaying this information. Add the following snippet in the template section of src/components/MessageList.vue, right after the message-group div:
<div class="user-typing">
  <small class="text-muted" v-if="userTyping">@{{ userTyping }} is typing....</small>
</div>
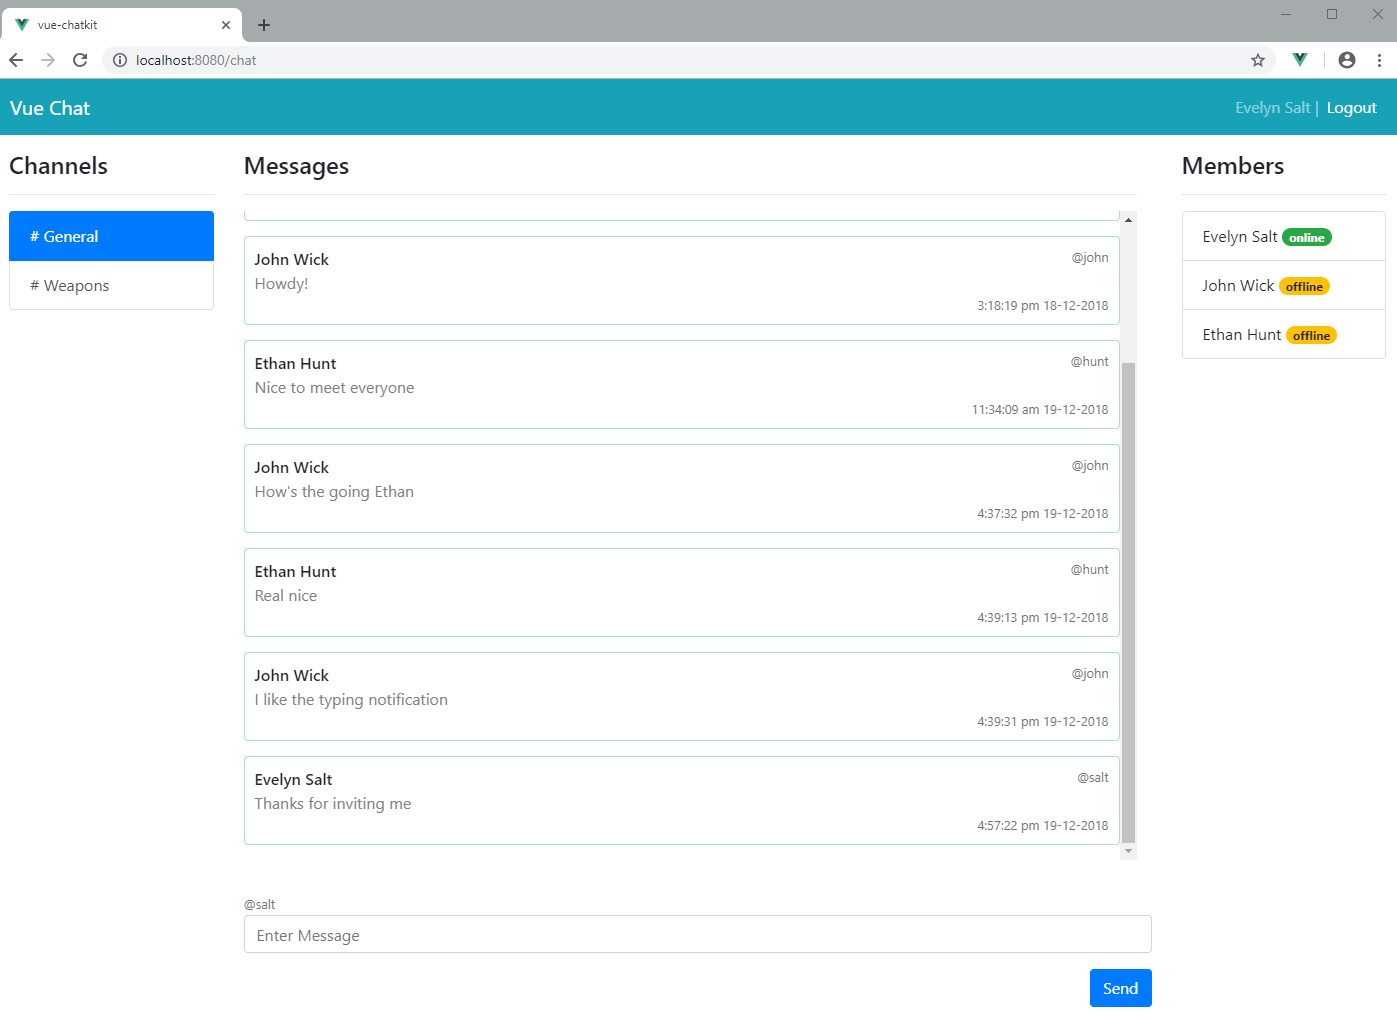
To test out this feature, simply log in as another user using a different browser and start typing. You should see a notification appear on the other user’s chat window.
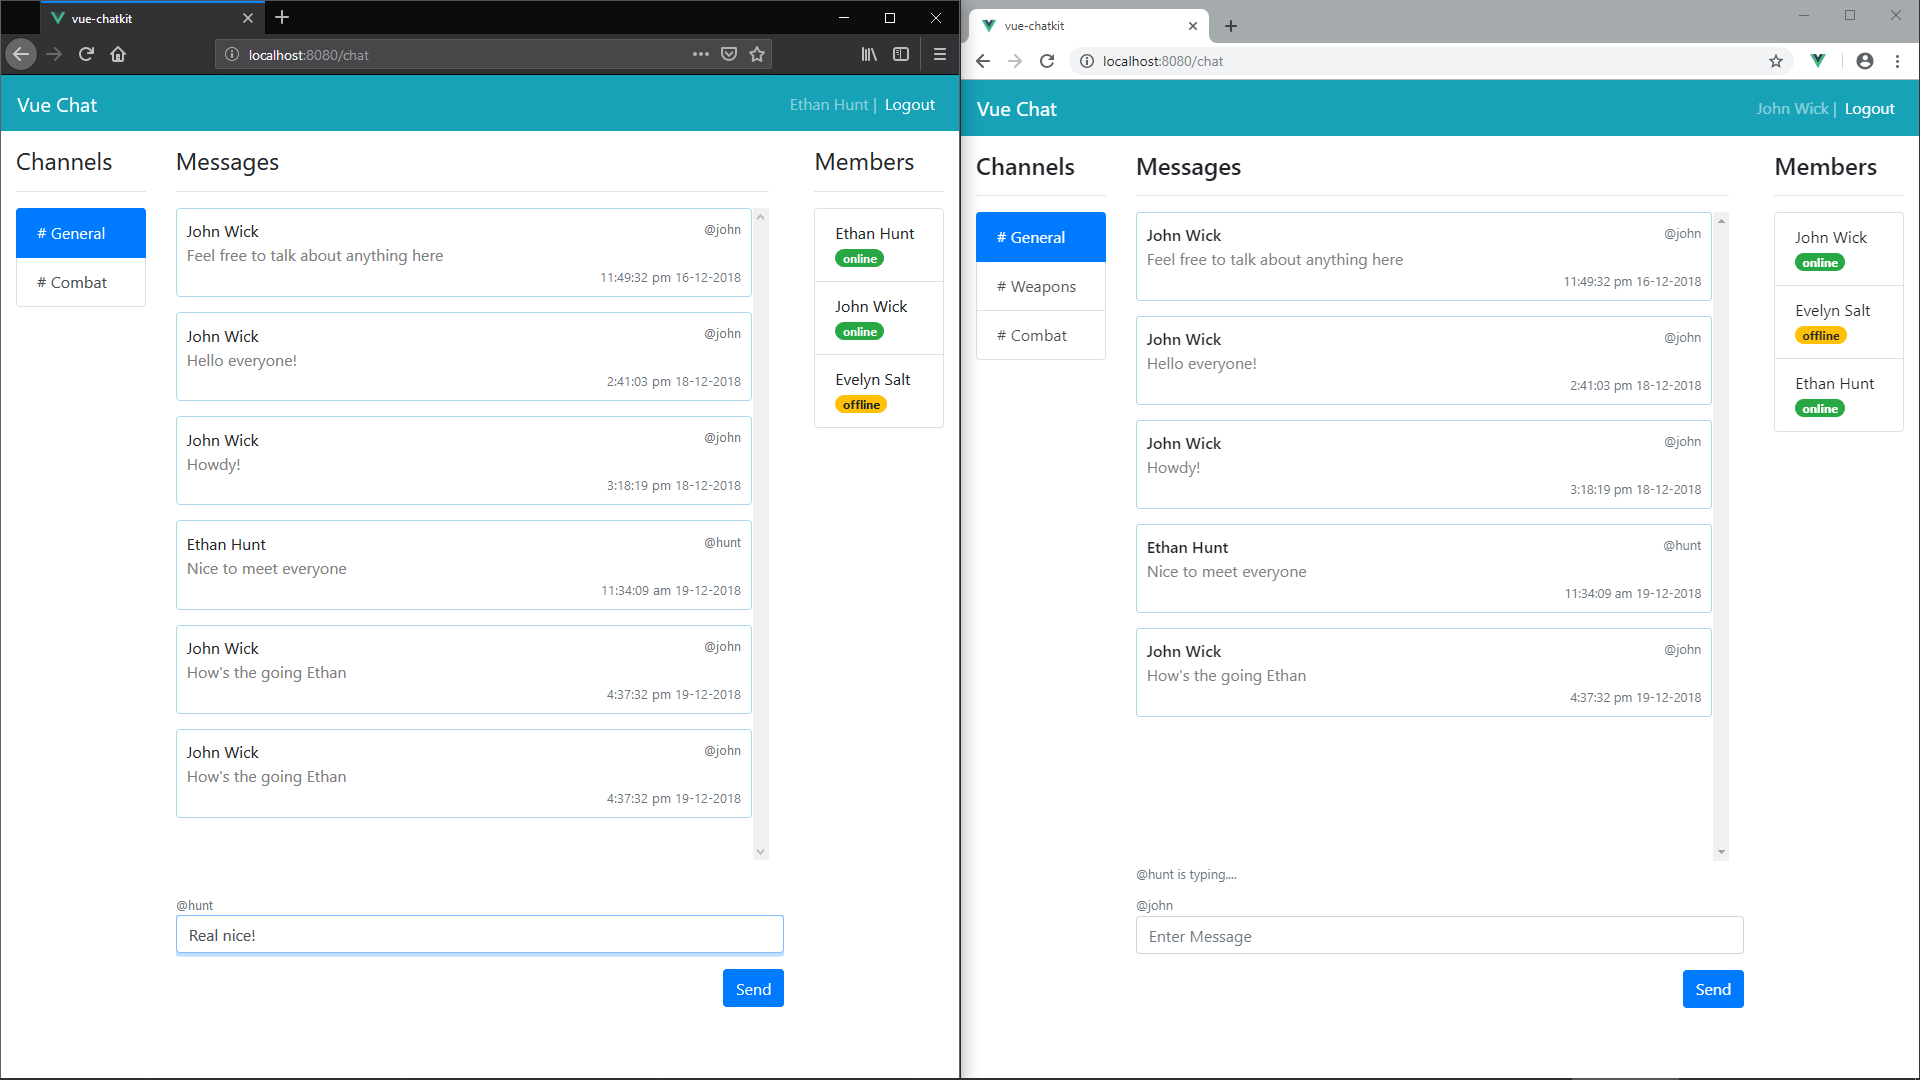
Let’s finish this tutorial by implementing the last feature, logout. Our Vuex store already has the necessary code to handle the logout process. We just need to update src/components/ChatNavBar.vue. Simply link the Logout button with function handler onLogout that we had specified earlier:
<b-nav-item href="#" @click="onLogout" active>Logout</b-nav-item>
That’s it. You can now log out and log in again as another user.
Summary
We’ve now come to the end of the tutorial. The ChatKit API has enabled us to rapidly build a chat application in a short time. If we were to build a similar application from scratch, it would take us several weeks, since we’d have to flesh out the back end as well. The great thing about this solution is that we don’t have to deal with hosting, managing databases and other infrastructure issues. We can simply build and deploy the front-end code to client devices on web, Android and IOS platforms.
Please do take a look at the documentation, as there’s a ton of back-end features I wasn’t able to show you in this tutorial. Given time, you can easily build a full-featured chat application that can rival popular chat products like Slack and Discord.
Frequently Asked Questions (FAQs) about Building a Real-Time Chat App with Vue.js and Pusher
How Can I Integrate Pusher with Vue.js in a Real-Time Chat App?
Integrating Pusher with Vue.js in a real-time chat app involves a few steps. First, you need to install Pusher and Vue.js in your project. You can do this using npm or yarn. Once installed, you need to import Pusher into your Vue.js component and initialize it with your Pusher app credentials. You can then use the Pusher instance to subscribe to channels and bind to events that you want to listen for. When an event is triggered, you can use Vue.js to update the state of your app and re-render the component.
What are the Key Differences between Vue.js and Laravel when Building a Chat App with Pusher?
Vue.js and Laravel are both powerful tools for building web applications, but they serve different purposes. Vue.js is a JavaScript framework for building user interfaces, while Laravel is a PHP framework for web application development. When building a chat app with Pusher, you would typically use Vue.js for the front-end to handle user interactions and display data, and Laravel for the back-end to handle server-side logic and database operations.
How Can I Use Vue-Pusher Package in My Project?
The Vue-Pusher package is a Vue.js plugin that makes it easy to use Pusher in your Vue.js applications. To use it, you first need to install it using npm or yarn. Once installed, you can import it into your main Vue.js file and use Vue.use() to install the plugin. You can then use this.$pusher in your Vue.js components to access the Pusher instance.
How Can I Integrate Pusher with Pinia in a Vue 3 Web Application?
Integrating Pusher with Pinia in a Vue 3 web application involves a few steps. First, you need to install Pusher and Pinia in your project. Once installed, you can import them into your Vue.js component and initialize them. You can then use the Pusher instance to subscribe to channels and bind to events, and use Pinia to manage the state of your app.
What are the Benefits of Using Pusher in a Vue.js Real-Time Chat App?
Pusher offers several benefits when used in a Vue.js real-time chat app. It provides real-time functionality, allowing you to instantly send and receive messages without needing to refresh the page. It also offers reliable and scalable infrastructure, ensuring that your app can handle high volumes of traffic. Additionally, Pusher provides a simple API that integrates well with Vue.js, making it easy to implement real-time features in your app.
How Can I Handle Errors When Using Pusher in a Vue.js Chat App?
When using Pusher in a Vue.js chat app, you can handle errors by listening for error events on the Pusher instance. When an error event is triggered, you can use Vue.js to display an error message or take other appropriate action.
How Can I Test a Vue.js Chat App Built with Pusher?
You can test a Vue.js chat app built with Pusher by sending and receiving messages and checking that they are correctly displayed in the app. You can also test the real-time functionality by opening the app in multiple browsers or devices and checking that messages are instantly updated across all instances.
How Can I Secure a Vue.js Chat App Built with Pusher?
You can secure a Vue.js chat app built with Pusher by using private or presence channels, which require authentication to access. You can also use SSL encryption to secure the data transmitted between the client and server.
How Can I Optimize the Performance of a Vue.js Chat App Built with Pusher?
You can optimize the performance of a Vue.js chat app built with Pusher by minimizing the number of events you subscribe to, using efficient data structures to store messages, and using Vue.js best practices to optimize your code.
Can I Use Pusher with Other JavaScript Frameworks in a Real-Time Chat App?
Yes, Pusher can be used with other JavaScript frameworks such as React and Angular in a real-time chat app. The process of integrating Pusher with these frameworks is similar to integrating it with Vue.js. You need to install Pusher, import it into your components, and use it to subscribe to channels and bind to events.
 Michael Wanyoike
I write clean, readable and modular code. I love learning new technologies that bring efficiencies and increased productivity to my workflow.